Thanks very much for watching! And please remember to hit like and subscribe! :)
Following is a product I use picked at random from my collection which may appear in my videos. Clicking through on this to find and click on the green affiliate links before purchasing from eBay or AliExpress is a great way to support the channel at no cost to you. Thanks!
Thanks very much for watching! And please remember to hit like and subscribe! :)
p.s. today I added DVM and VOM to my spell check.
Following is a product I use picked at random from my collection which may appear in my videos. Clicking through on this to find and click on the green affiliate links before purchasing from eBay or AliExpress is a great way to support the channel at no cost to you. Thanks!
Thanks very much for watching! And please remember to hit like and subscribe! :)
Following is a product I use picked at random from my collection which may appear in my videos. Clicking through on this to find and click on the green affiliate links before purchasing from eBay or AliExpress is a great way to support the channel at no cost to you. Thanks!
Silly Job Title: Electronics Guru. I am the Electronics Guru!
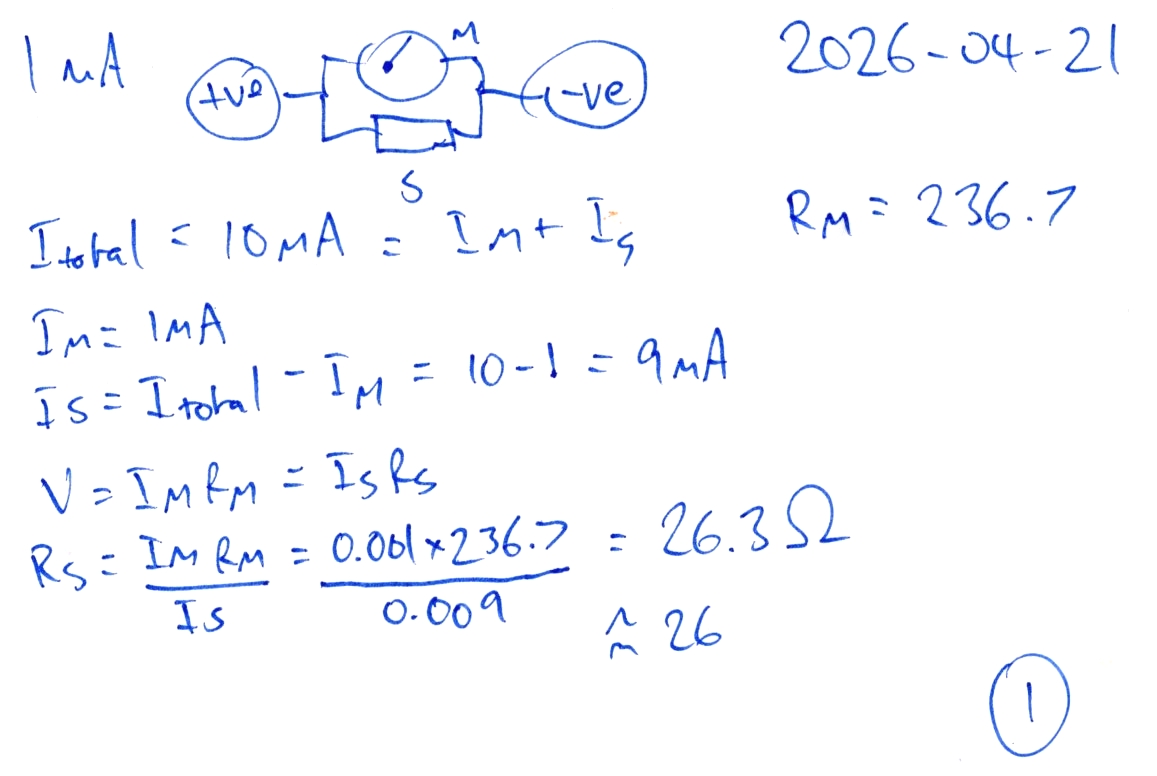
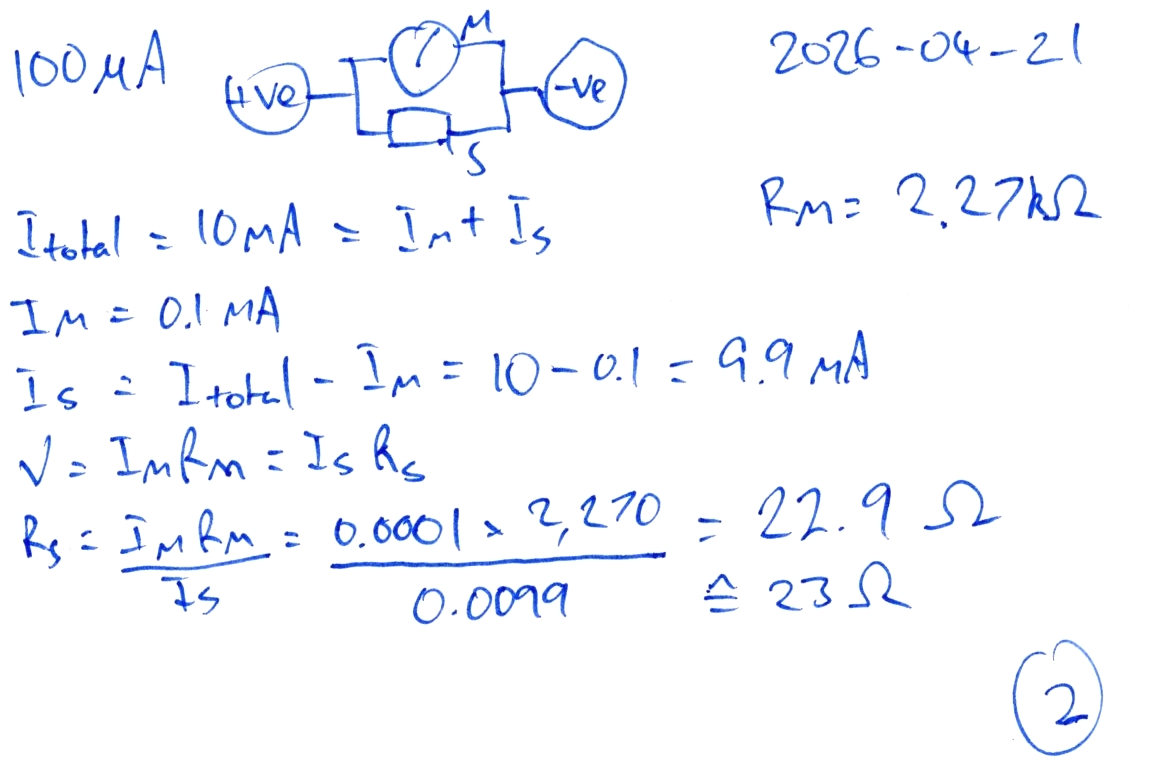
In this video we continue to work our way through Learning the Art of Electronics. In this video we return to 1L Lab: DC Circuits and revisit lab 1L.4.3 in which we made a 10 mA ammeter. This time around we do a better job of it, build two ammeters from different movements, and compare our results with an actual known-good ammeter.
Thanks very much for watching! And please remember to hit like and subscribe! :)
p.s. today I added mA to my spell check.
Following is a product I use picked at random from my collection which may appear in my videos. Clicking through on this to find and click on the green affiliate links before purchasing from eBay or AliExpress is a great way to support the channel at no cost to you. Thanks!
Thanks very much for watching! And please remember to hit like and subscribe! :)
p.s. today I added Luminar, Pro’sKit, Desoldering, Tenma, Yum Cha, Multimeters, Bysameyee, nmsafety, ElectroCookie, Solderable, WilliamKlein, and Hakko to my spell check.
Following is a product I use picked at random from my collection which may appear in my videos. Clicking through on this to find and click on the green affiliate links before purchasing from eBay or AliExpress is a great way to support the channel at no cost to you. Thanks!
Thanks very much for watching! And please remember to hit like and subscribe! :)
p.s. today I added slinger to my spell check.
Following is a product I use picked at random from my collection which may appear in my videos. Clicking through on this to find and click on the green affiliate links before purchasing from eBay or AliExpress is a great way to support the channel at no cost to you. Thanks!
Thanks very much for watching! And please remember to hit like and subscribe! :)
p.s. today I added to my spell check.
Following is a product I use picked at random from my collection which may appear in my videos. Clicking through on this to find and click on the green affiliate links before purchasing from eBay or AliExpress is a great way to support the channel at no cost to you. Thanks!
Thanks very much for watching! And please remember to hit like and subscribe! :)
p.s. today I added Riden, EEVblog, Kaisi, and Multimeter, to my spell check.
Following is a product I use picked at random from my collection which may appear in my videos. Clicking through on this to find and click on the green affiliate links before purchasing from eBay or AliExpress is a great way to support the channel at no cost to you. Thanks!

 notes
notes