New motherboard: ASUS ProArt B550-CREATOR

Ordered myself a new motherboard today, the ASUS ProArt B550-CREATOR. This new board will replace my ASUS PRIME B550M-A in my new/upgraded computer ‘lore‘ (which is replacing ‘longing‘).

This new board has 2x M.2 PCIe 4.0 (as with the old motherboard), 2x 2.5Gbps Ethernet (compared to 1x 1Gbps Ethernet in my old motherboard), and 3x PCIe 16x slots (compared to 1x PCIe 16x slot in my old motherboard).

I will put in 2x M.2 PCIe 4x adapters and 2x M.2 PCIe 1x adapters which will mean I am able to install 6x M.2 drives: 2x Kioxia 256GB, 2x Samsung 990 Pro 2TB, and 2x PNY 1TB.

I will also put in a quad 2.5Gbps PCIe Ethernet adapter which will give me six 2.5Gbps Ethernet ports in total (two onboard and four on PCIe 16x).

When I’m done all four RAM slots will be full (4x Corsair Vengeance 32GB 3200MHz DDR4), both the M.2 slots will be full, all three of the PCIe 16x slots will be full, all four SATA ports will be full (3x Western Digital WD Ultrastar DC HC550 16TB and 1x ASUS BW-16D1HT PRO 16X Blu-ray burner), and both PCIe 1x slots will be full too. Also there will be a bunch of high speed USB ports available on both the front and the back of the case. I feel like I have really squeezed a lot of juice out of this system, it’s operating very close to capacity.

I’m kinda dreading plugging in the USB attachments to the front panel, but I guess if I RTFM and apply some thought I will be able to figure that out.

Unboxing #9: Unboxing of Sudake SDK07 and SKD08 IC Clip SMD Gripper Test Probe | In The Lab

This post is part of my video blog and you can find more information about this video on this show’s homepage which is here.

You can support this channel on Patreon: patreon.com/JohnElliotV

Silly Job Title: Hack In Residence

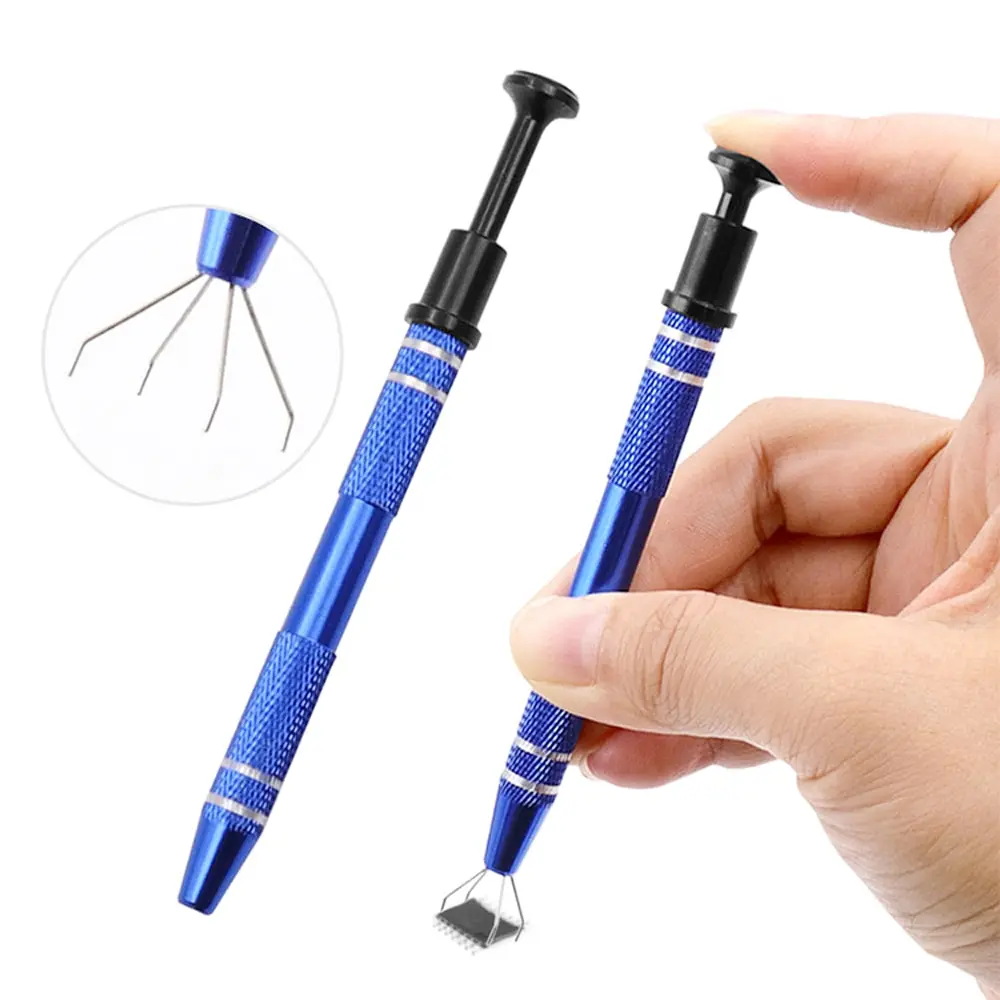
Today: another unboxing video! This time we’re taking a look at the Sudake SDK07 and SKD08 IC clips / SMD grippers / test probes.

Originally I was going to demo these things in this video too, but the test circuit took like two hours to make, and then when I turned it on it didn’t even work, so I cancelled that and now this is just an unboxing video and not a demo. Stay tuned for the demo which I will do, just when I can find some more time.

These test clips are really great, they let you attach a probe to the foot of an integrated circuit or a surface mount device.

Be warned: there’s a bit of swearing and bad language in this video. What can I say? I’m just a passionate individual, ya know? :P

Thanks very much for watching! And please remember to hit like and subscribe!


Following is a product I use picked at random from my collection which may appear in my videos. Clicking through on this to find and click on the green affiliate links before purchasing from eBay or AliExpress is a great way to support the channel at no cost to you. Thanks!

Yum Cha 100pcs Releasable Cable OrganizerThis is an image of the product.

Let’s go shopping!

Loot from WeAct Studio

You might remember that last month AliExpress had a sale and I ordered a bunch of stuff. That stuff has started to arrive and I wanted to show you the things I picked up from WeAct Studio.

I don’t know anything about WeAct Studio, I have never heard of them before. But I like what I see so far!

Here’s my WeAct Studio kit which arrived today:

Unboxing #8: Unboxing of Mini Classic Game Console | Learning Electronics In The Lab With Jay Jay

This post is part of my video blog and you can find more information about this video over here.

You can support this channel on Patreon: patreon.com/JohnElliotV

Silly Job Title: Power Provider

It’s the In The Lab With Jay Jay Halloween Special! This evening: another unboxing video! This time we’re taking a look at my retro gaming console: The Mini Classic Game Console. Complete with 620 odd games!

I picked this thing up at Vinnies (the thrift store) for fifteen Aussie buckaroos.

The main circuit board looks like this:

I found the S71PL256NC0HFW5U2 which is a 64Mb flash memory. The details of the other circuitry was obscured.

Here is the list of games on this thing:

And this is the manual:

I managed to get this thing wired through an AV to HDMI adapter, then a HDMI to USB adapter, so in the last half of the video you can see me demoing a few of the games and scrolling through the full list of games.

Oh, and in this video I read “NTSL” on the manual and say “they got that wrong, it’s NTSA”, but *I* got that wrong, and it’s “NTSC”. The American video standard. In Australia almost everything is PAL.

Thanks very much for watching! And please remember to hit like and subscribe! :)


Following is a product I use picked at random from my collection which may appear in my videos. Clicking through on this to find and click on the green affiliate links before purchasing from eBay or AliExpress is a great way to support the channel at no cost to you. Thanks!

aToolTour Black Hexagon Deburring Drill BitThis is an image of the product.notes

Let’s go shopping!

Unboxing #7: Unboxing of FILCO Majestouch 2SS Edition 104-key and tenkeyless keyboards | In The Lab

This post is part of my video blog and you can find more information about this video on this show’s homepage which is here.

You can support this channel on Patreon: patreon.com/JohnElliotV

Silly Job Title: Sparky

Happy Halloween! Today: another unboxing video! This time we’re taking a look at my two new mechanical keyboards from FILCO (affiliate links):

As I mention in the video I usually like to purchase my mechanical keyboards from WASD Keyboards in California. They make excellent keyboards but just a bit too pricey for me at the moment. Instead of purchasing from WASD Keyboards I picked these keyboards up from Amazon Australia and I paid AU$202.55 (US$130) for the 104-key keyboard and AU$188.89 (US$120) for the 87-key keyboard which was roughly half of what I would have had to pay if I purchased from WASD Keyboards.

Both of these FILCO Majestouch 2SS Edition keyboards come with Cherry MX Speed Silver switches. If you’re into mechanical keyboards definitely give these switches a try; now that I’m used to them I will accept nothing less.

It was a bit disappointing that while doing the unboxing I discovered some of the keys had fallen loose during shipping. I have since plugged in and tested the keyboard (I’m using it now in fact) and everything seems to be working okay, so no harm no foul.

Thanks very much for watching! And please remember to hit like and subscribe!


Following is a product I use picked at random from my collection which may appear in my videos. Clicking through on this to find and click on the green affiliate links before purchasing from eBay or AliExpress is a great way to support the channel at no cost to you. Thanks!

Miniware DT71 Digital TweezersThis is an image of the product.notes

Let’s go shopping!

FILCO Majestouch 2SS Edition Keyboards

I ordered two new keyboards this morning. I got a 104-key one and an 87-key one. The gory details are documented on the keyboard page on my wiki.

Usually I like to buy V3 keyboards from WASD Keyboards in America. But the price for the two keyboards delivered would have been AU$841, which was just a bit too expensive for me.

So I had a bit of a hunt around and I found these Japanese FILCO Majestouch 2SS Edition keyboards on Amazon:

They both come with MX Speed Silver switches which are the ones I like.

While I was researching I found the following content mill articles which I enjoyed reading to learn more about mechanical keyboards:

Watch Loupe

This morning my new eyeglasses arrived, they are these ones from AliExpress: Watch Loupe Glasses Magnifying Repair Tool Loop Magnifiers Watchmaker Jewelry Jewelers Magnifier Foreye Convenient Professional.

Rather than do an unboxing video I thought I’d just write it up in this blog post.

There’s a headband type thing that comes with them that looks rather cheap and flimsy (it is), but it’s actually quite functional and practical.

The 20X magnification is my fav, and I might even see if I can get something with higher magnification one day.

John's new eyeglasses

The headband that goes with the eyeglasses

Unboxing #5: Unboxing of AliExpress TE-801 Third Hand With Magnifier | In The Lab With Jay Jay

This post is part of my video blog and you can find more information about this video on this show’s homepage which is here.

You can support this channel on Patreon: patreon.com/JohnElliotV

In this video I unbox two “different” helping hands (AKA “third hand”) only to discover they are the same TE-801 model.

I purchased these separately on AliExpress:

They are exactly the same product so if you’re planning to purchase might as well get the cheapest option. Note that the first link above also has a separate more expensive option which is actually a different product, I didn’t get one of those.

In addition to unboxing these third hands I also add some 4mm heat shrink to the alligator clips to take the bite out of the teeth.

Note: in this video I have the annoying habit of calling “heat shrink”, “shrink wrap”. The correct term is heat shrink, shrink wrap is a different type of thing.

In the video I use 4mm yellow heat shrink:

The hot air gun I use is a part of my Horusdy Soldering Station.

The batteries I use are Duracell AAA batteries.

My gloves are:

Thanks very much for watching! And please remember to hit like and subscribe!


Following is a product I use picked at random from my collection which may appear in my videos. Clicking through on this to find and click on the green affiliate links before purchasing from eBay or AliExpress is a great way to support the channel at no cost to you. Thanks!

ENGINEER PA-09 Crimping ToolThis is an image of the product.notes

Let’s go shopping!