I mention that I found a YouTube video which has a look at it: Octopus Hand supports Soldering for only 5$ – Turtle Review but like me they couldn’t figure out what the rubber and bolts on the base are for! If you know please let me know in the comments!
Thanks very much for watching! And please remember to hit like and subscribe! :)
Following is a product I use picked at random from my collection which may appear in my videos. Clicking through on this to find and click on the green affiliate links before purchasing from eBay or AliExpress is a great way to support the channel at no cost to you. Thanks!
We use the Rigol MSO5074 Mixed Signal Oscilloscope to see the output of the astable multivibrator. In the video I make a mistake and attach the probe to the wrong pins.
We use the METCAL PS-900 Soldering Station to solder the wires I use for the banana plugs I attach to the touch sensor an voice sensor (microphone).
We use the UNI-T UTi260B Thermal Imager to look at the heat profile of the circuit. We see that the low resistances (470Ω and 1KΩ) get the warmest, but the higher resistances (e.g. 10KΩ) are also slightly visible.
We use the Peak Electronic Design Atlas LCR45 LCR Meter to measure the resistance of the resistor we use in the LED attachment circuit. This extra circuit allows us to switch out the buzzer for an LED, which makes a lot less racket. The resistor it uses turned out to be 470Ω.
We use the Riden RD6006 Bench Power Supply to provide 9V for our test circuit. Usually I take a current reading to see how much power the circuit draws in its various states, but I forgot!
We use the Horusdy Soldering Station with Hot Air Gun for its hot air gun in order to shrink the heat shrink which we added to the banana plug cables we attached to our sensors.
Thanks very much for watching! And please remember to hit like and subscribe! :)
Following is a product I use picked at random from my collection which may appear in my videos. Clicking through on this to find and click on the green affiliate links before purchasing from eBay or AliExpress is a great way to support the channel at no cost to you. Thanks!
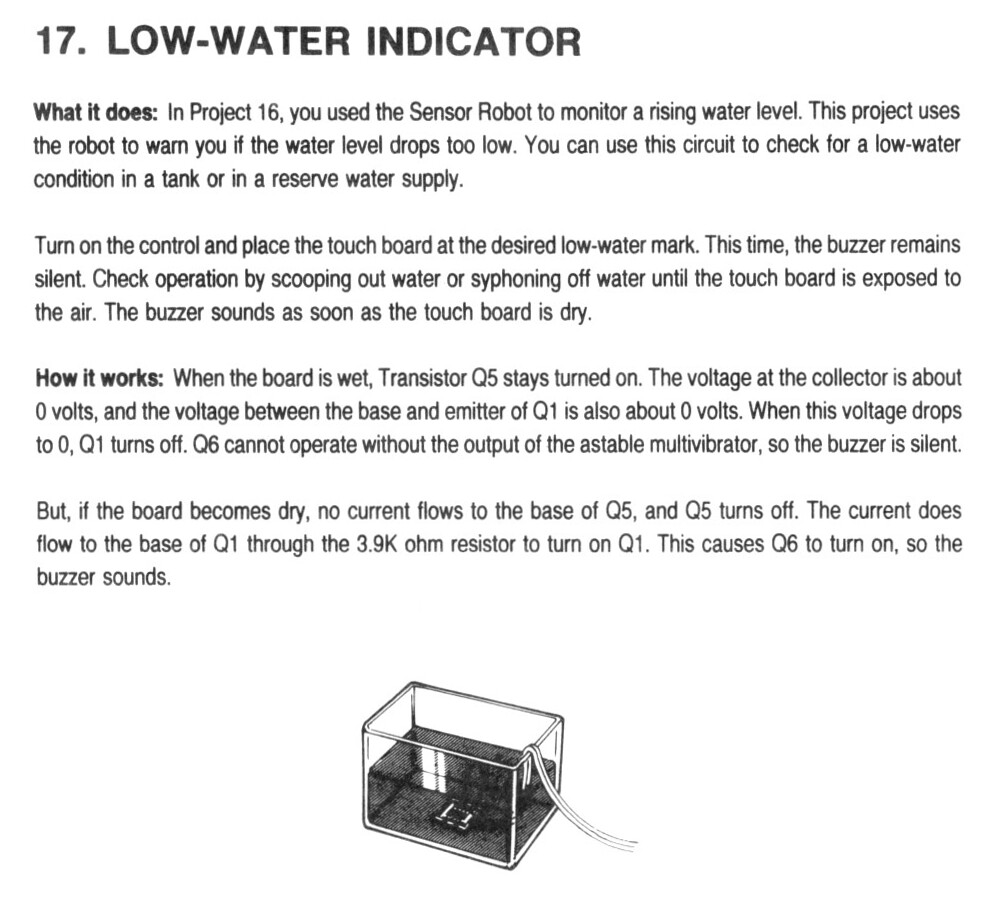
After we build the circuit we dump the sensor in a glass of water which causes the alarm to trigger. To avoid the obnoxious noise we put an LED in place of the buzzer.
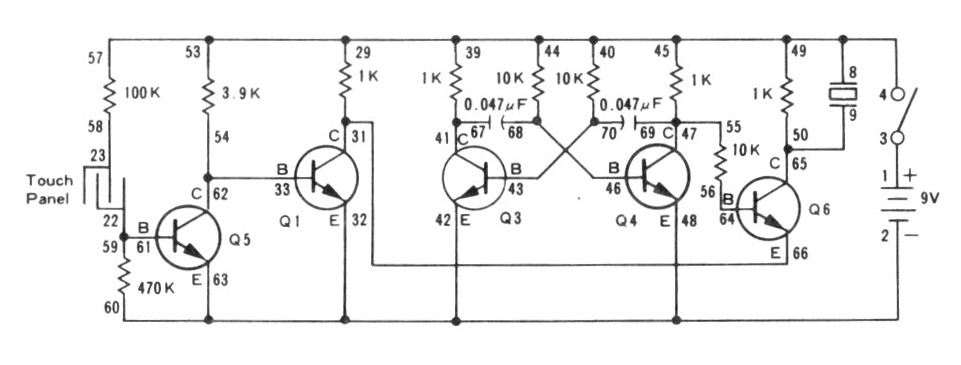
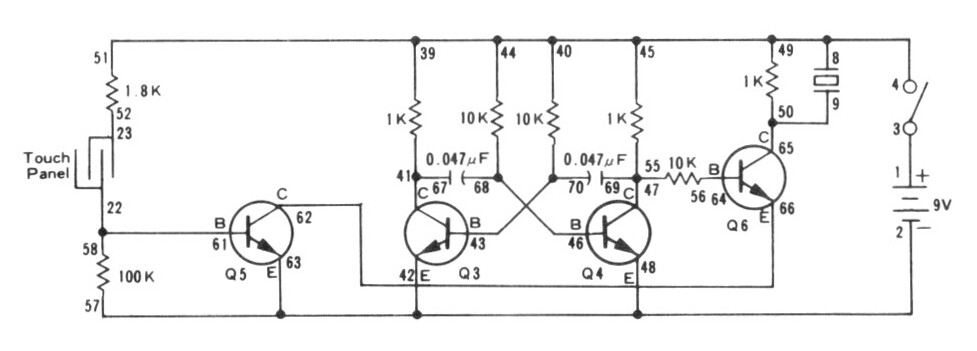
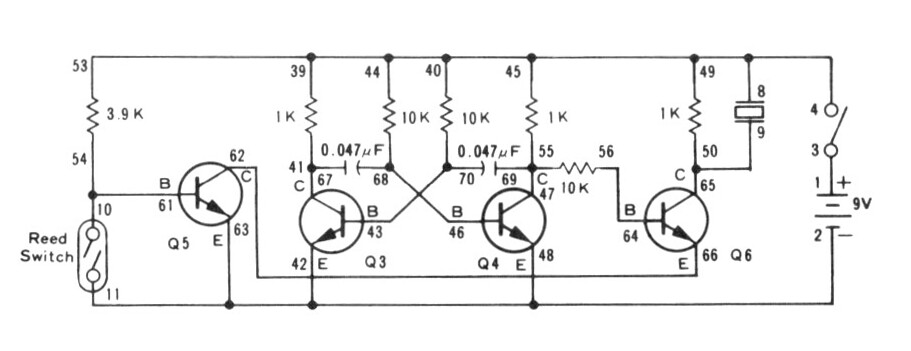
Please be aware: while talking about this circuit I said that the astable multivibrator “flip flops” between states. And that’s kind of true in one sense, but I should be clear than an astable multivibrator is not a “flip flop” circuit. A flip flop circuit is a different type of circuit known as a bistable multivibrator, which is a different kind of thing. In this experiment we use an astable multivibrator to generate a 1.62 kHz square wave which provides our tone, we do not use a flip flop or bistable multivibrator circuit.
We use the UNI-T UTi260B Thermal Imager to investigate the circuit thermals. We see that the 1K resistors in the astable multivibrator generate the most heat.
We use the Fluke 17B+ Digital Multimeter to measure the voltage across Q5. Between about 500 mV and 750 mV is enough voltage to enable the output.
We use the Riden RD6006 Bench Power Supply to deliver the 9V DC required for the project. We use the current measurement from the power supply to see that when the LED is active the circuit draws about 23 mA compared to about 11 mA when the LED is not active.
Thanks very much for watching! And please remember to hit like and subscribe! :)
Following is a product I use picked at random from my collection which may appear in my videos. Clicking through on this to find and click on the green affiliate links before purchasing from eBay or AliExpress is a great way to support the channel at no cost to you. Thanks!
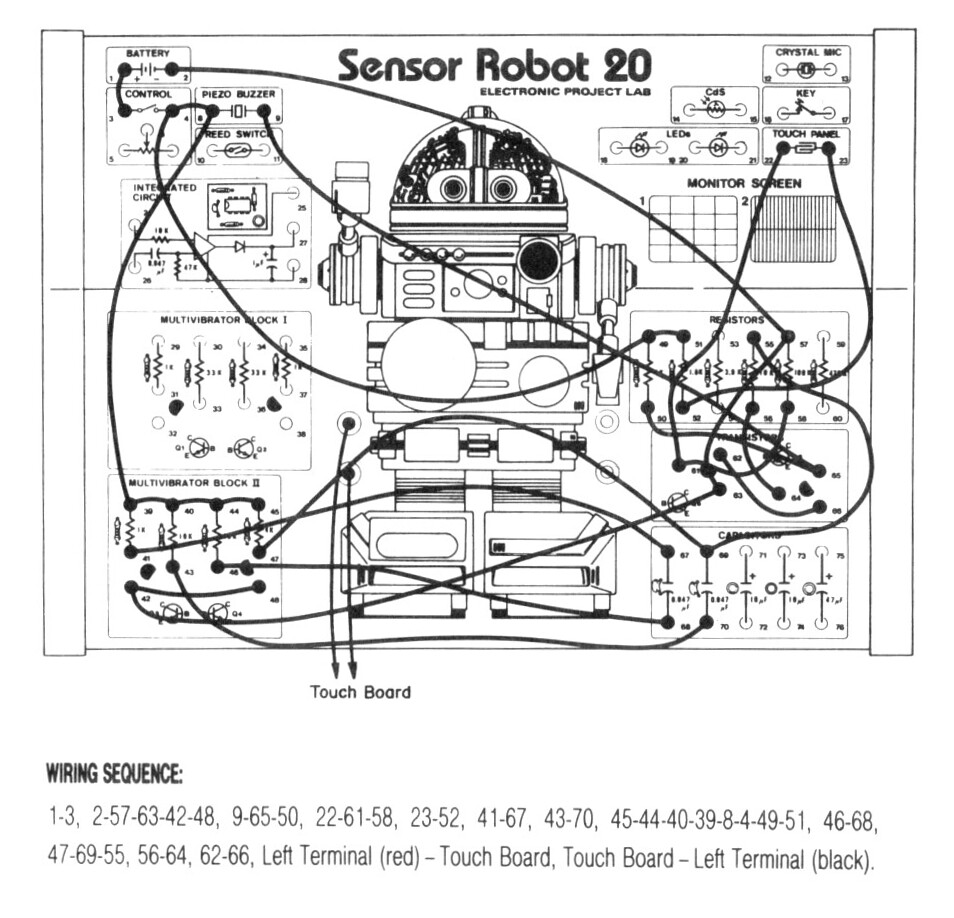
We had some trouble getting this circuit to work. It turned out that the instructions omitted one necessary wire. After we added that the circuit worked.
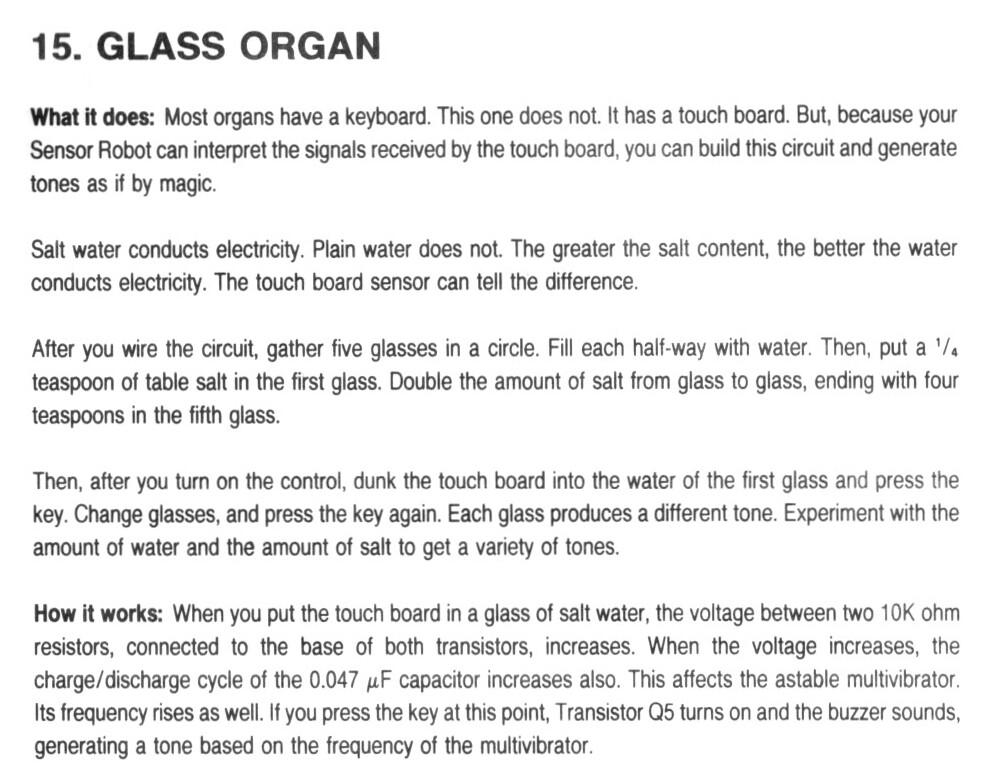
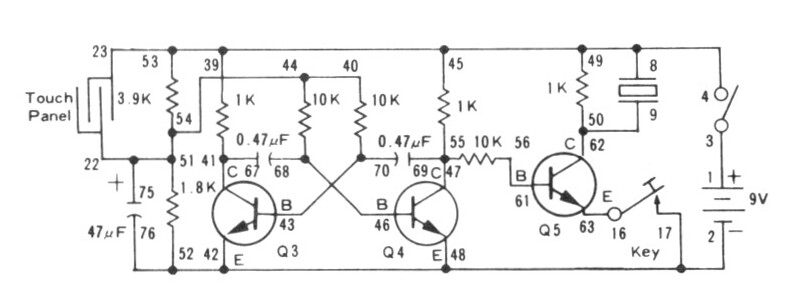
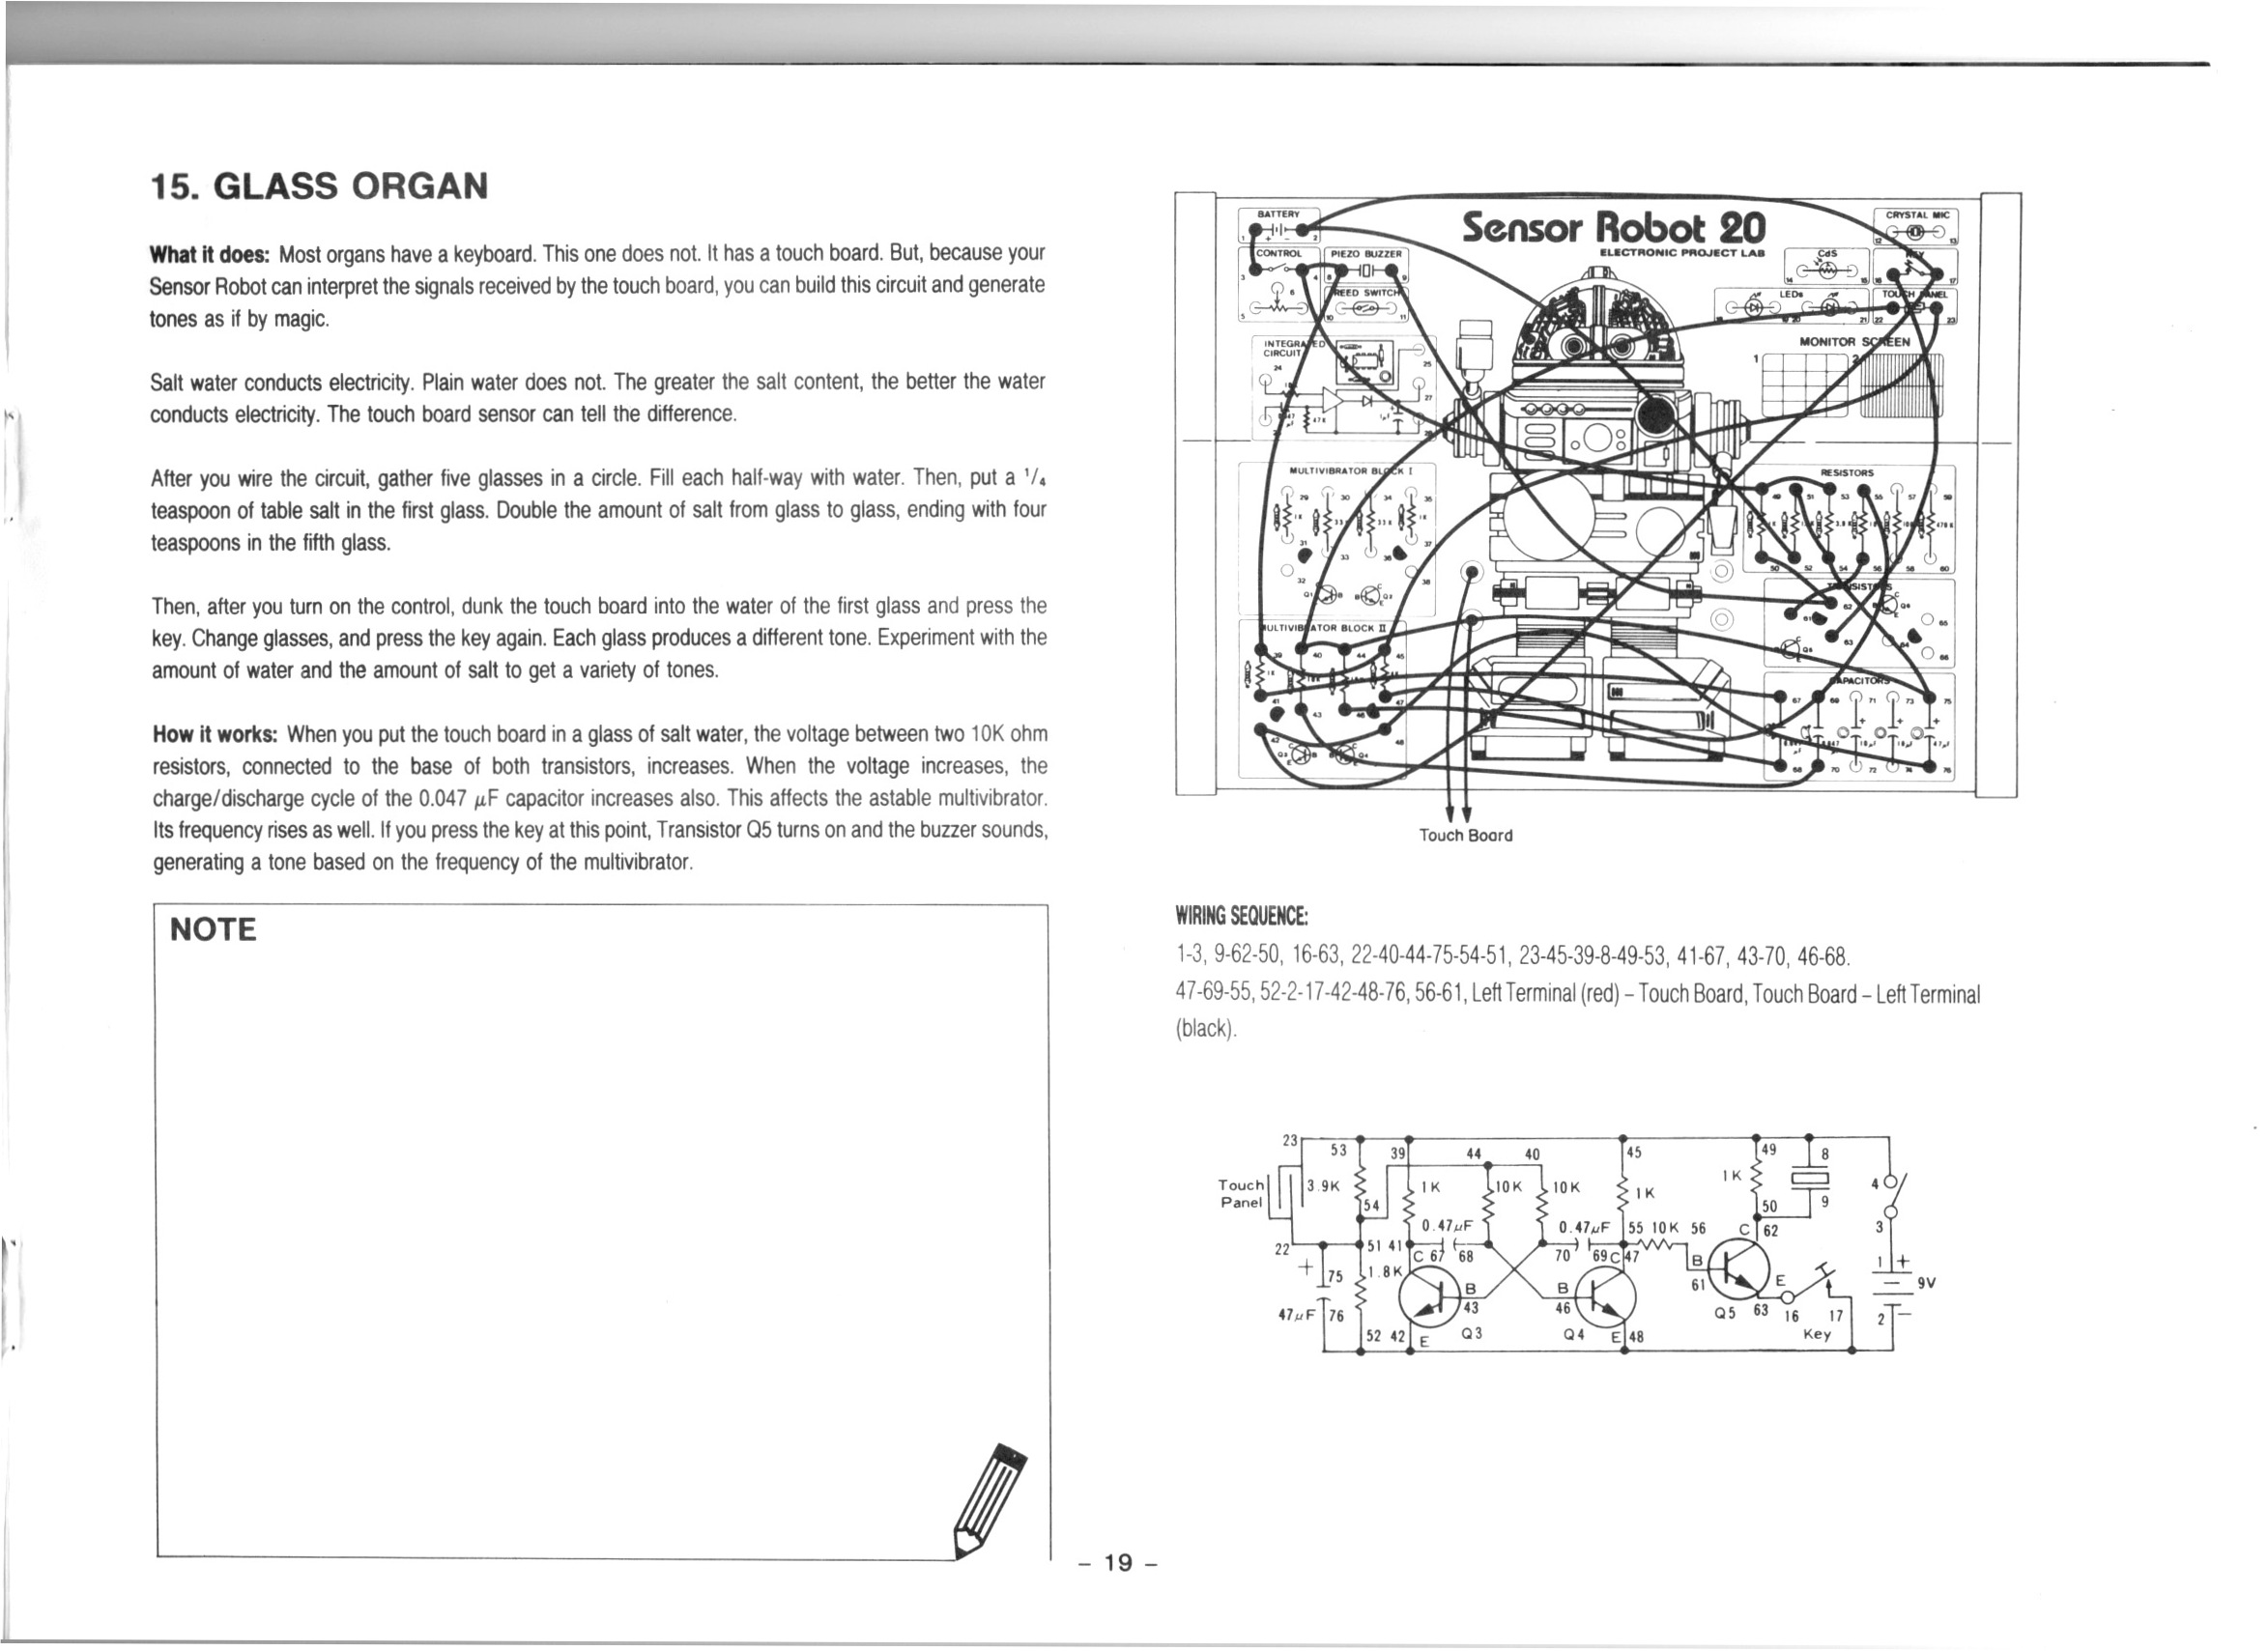
The salty water and the clean water didn’t have hugely different effects. It was hard to get a resistance reading because the resistances seemed to just continually increase. In the end I didn’t really understand that.
The products I purchase from AliExpress in the video are these:
We used the METCAL PS-900 Soldering Station to solder some jumpers onto a 10K potentiometer which we use to alter the frequency of the astable multivibrator.
We used the UNI-T UTi260B Thermal Imager to inspect the heat profile of the circuit. We see the resistors in the astable multivibrator get warm, along with other components.
We used the Fluke 17B+ Digital Multimeter to continuity test our point to point links, to test various resistances, to check for capacitance (there was none), and to measure the current draw. It was interesting to see the current draw increase with frequency.
The Goo & Adhesive Remover product I recommend is Goo Gone.
The cheap but excellent wire cutters I mention are these. I got a five pack for ten bucks.
Thanks very much for watching! And please remember to hit like and subscribe! :)
Following is a product I use picked at random from my collection which may appear in my videos. Clicking through on this to find and click on the green affiliate links before purchasing from eBay or AliExpress is a great way to support the channel at no cost to you. Thanks!
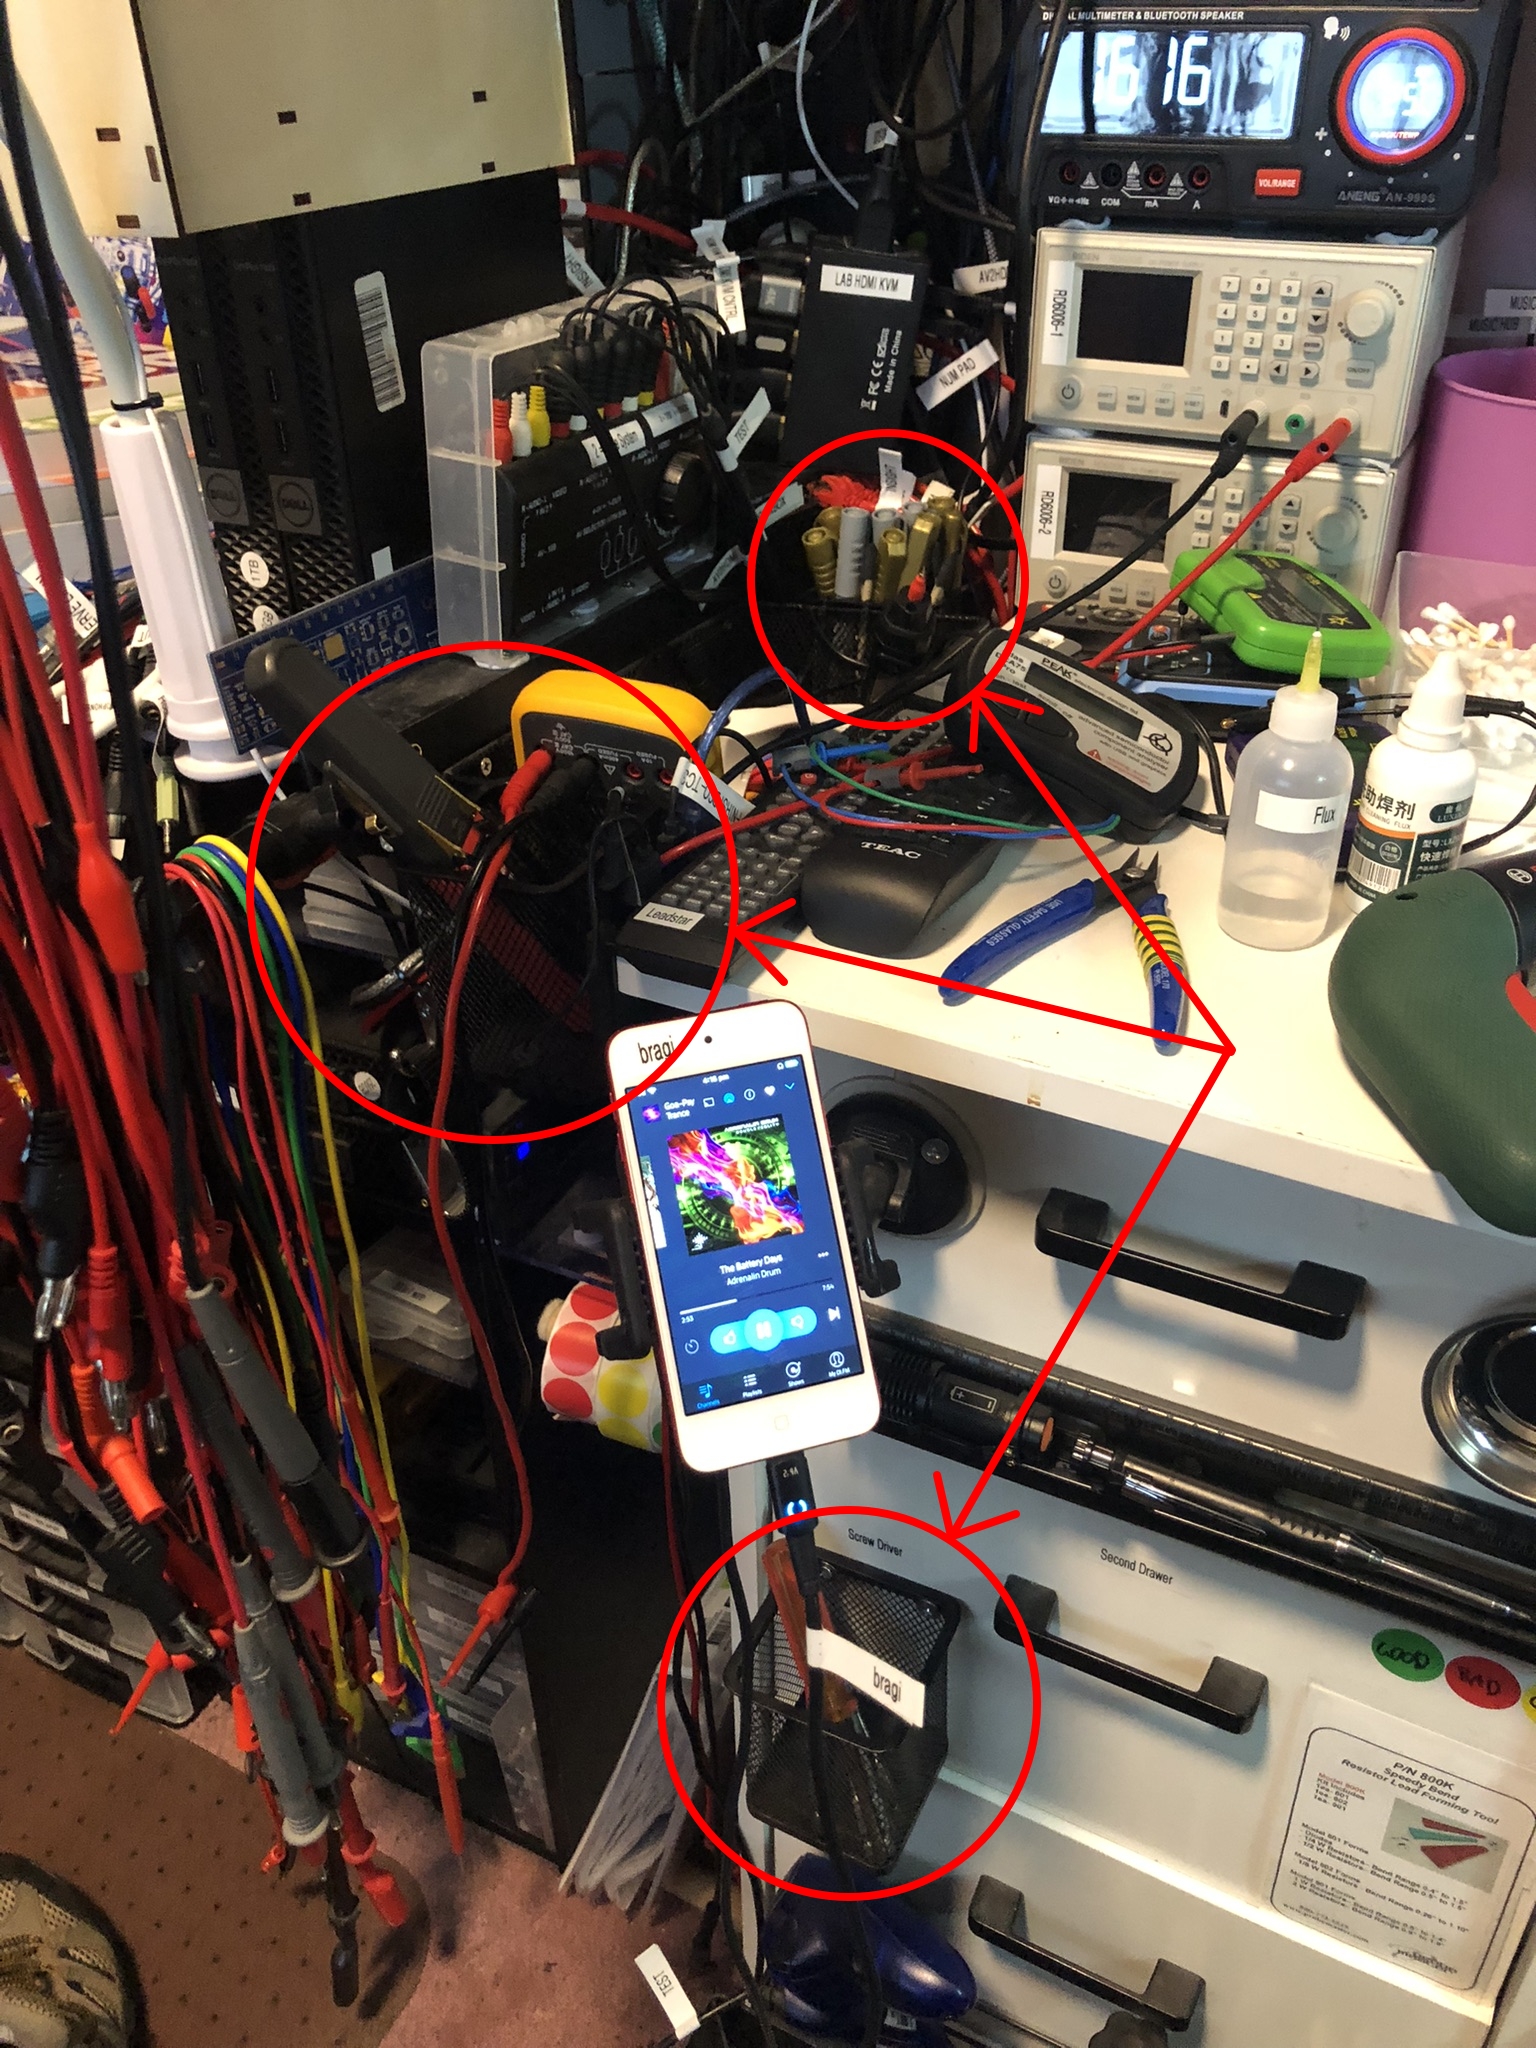
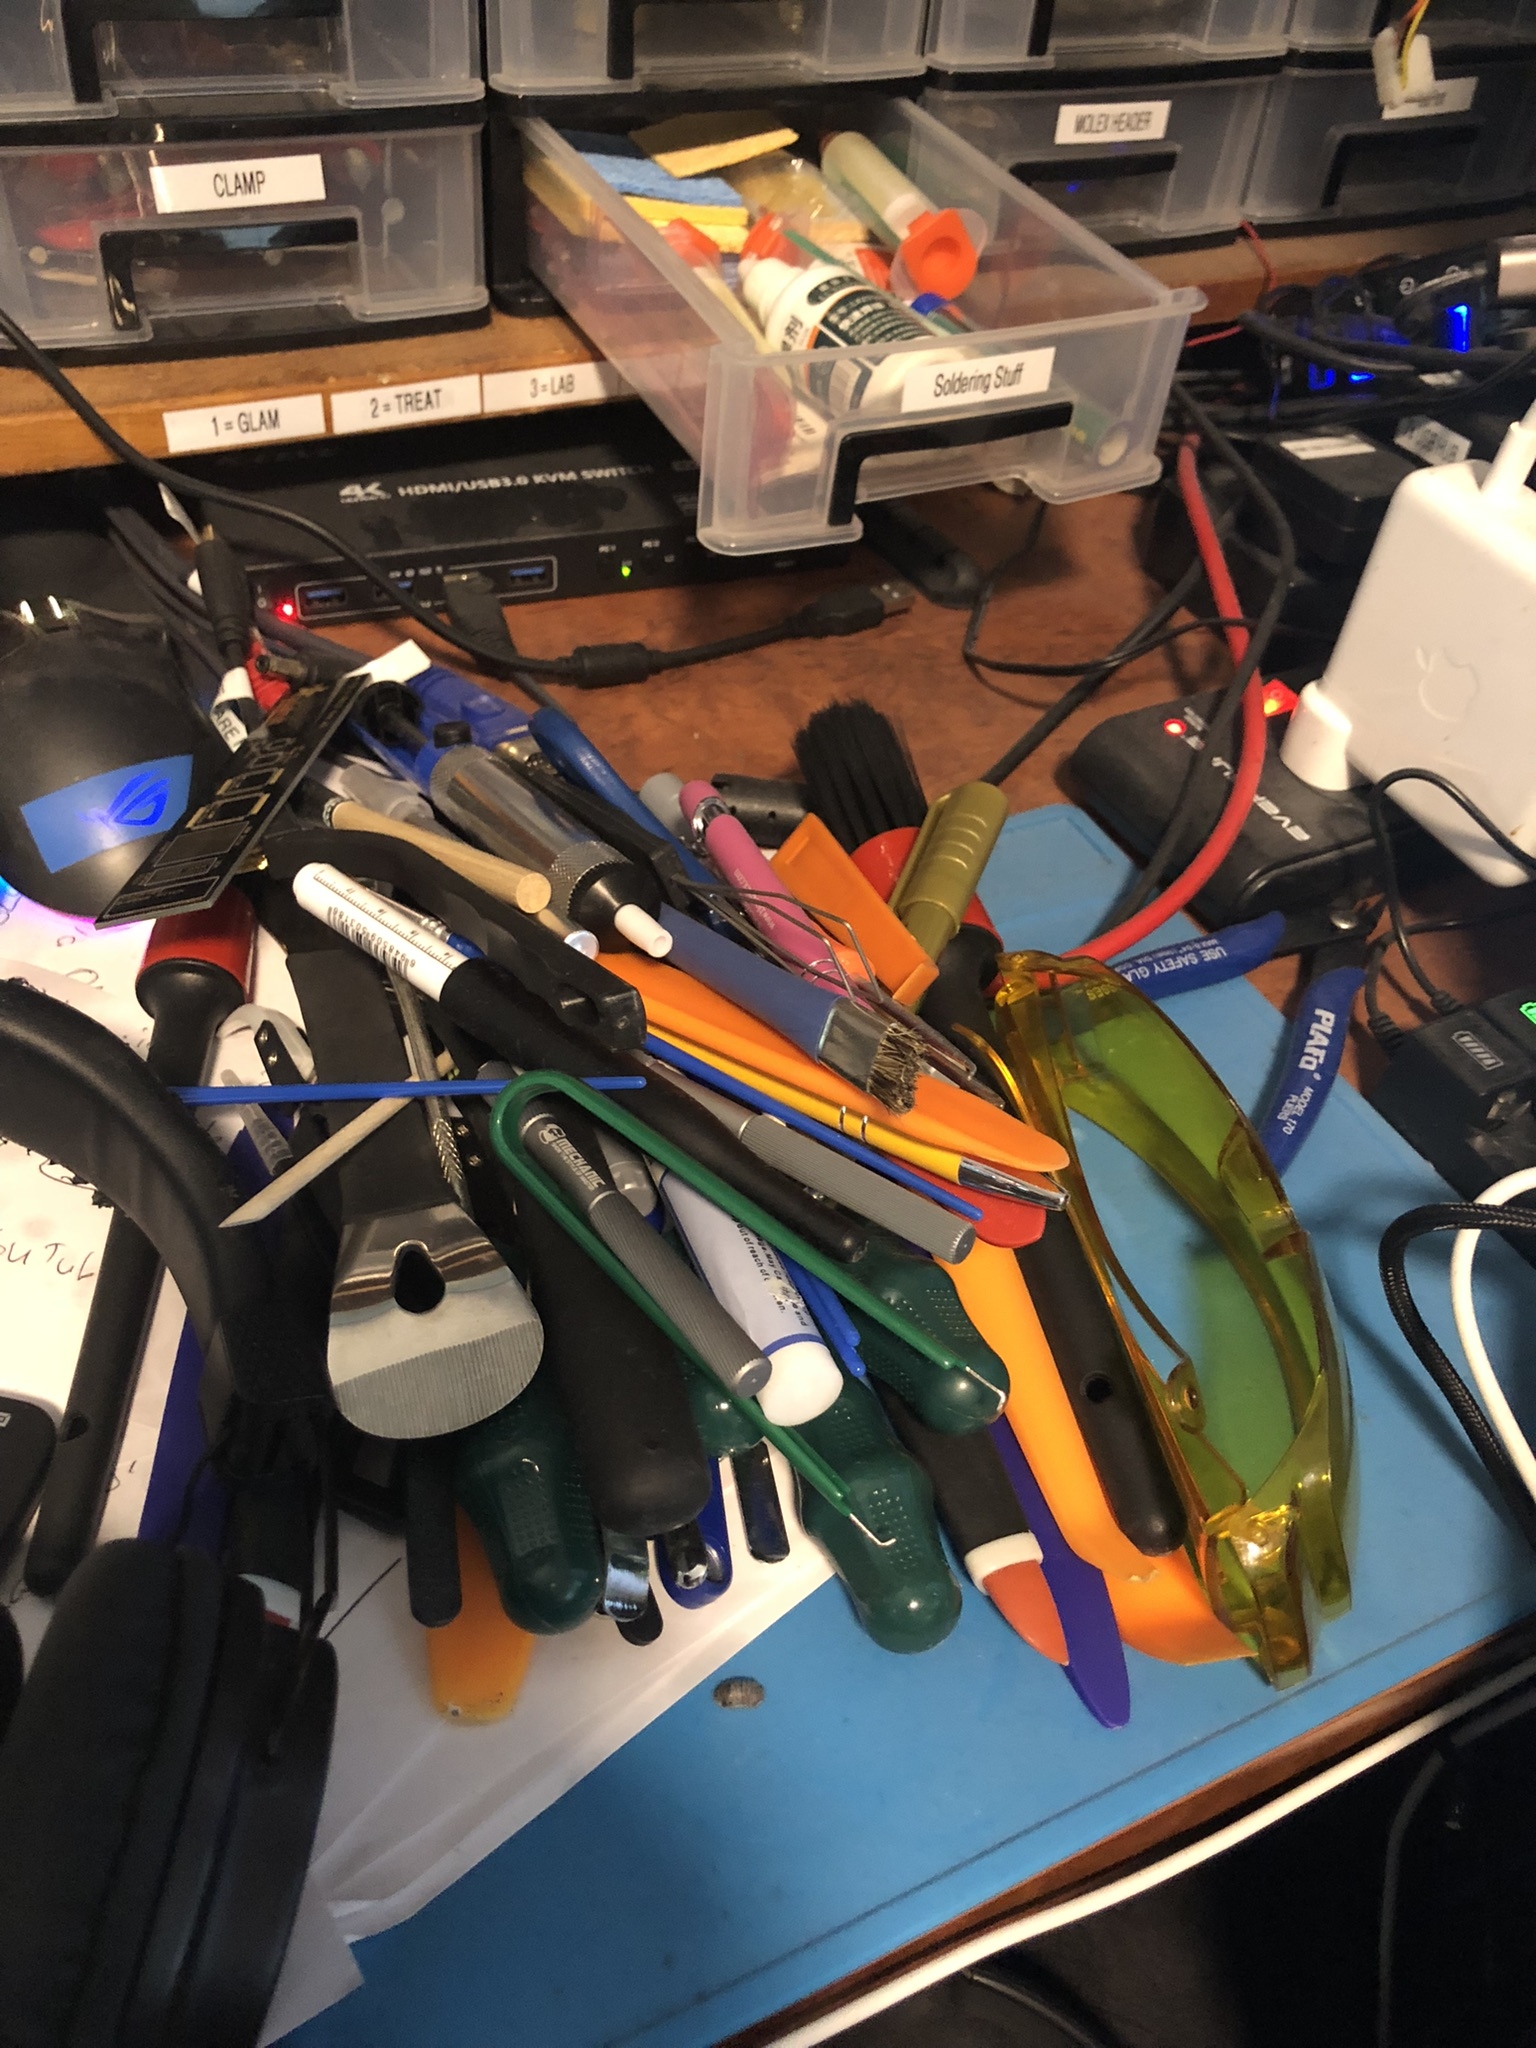
While I wait you can see in the bottom photo the bunch of tools without a home. In the pictures below I have circled in red the four mesh holders I have recently installed. They’re black on black so hard to see, sorry about that.
The two on the left are clipped on with zip ties. The other two are screwed in, one screwed into the second drawer and the other to some load bearing dowel I also installed today.
I’m a bit paranoid about the shelf my oscilloscope is installed in will come away from the wall, so I have buttressed it with a dowel I had them cut to size for me today at the shop (307mm, exactly).
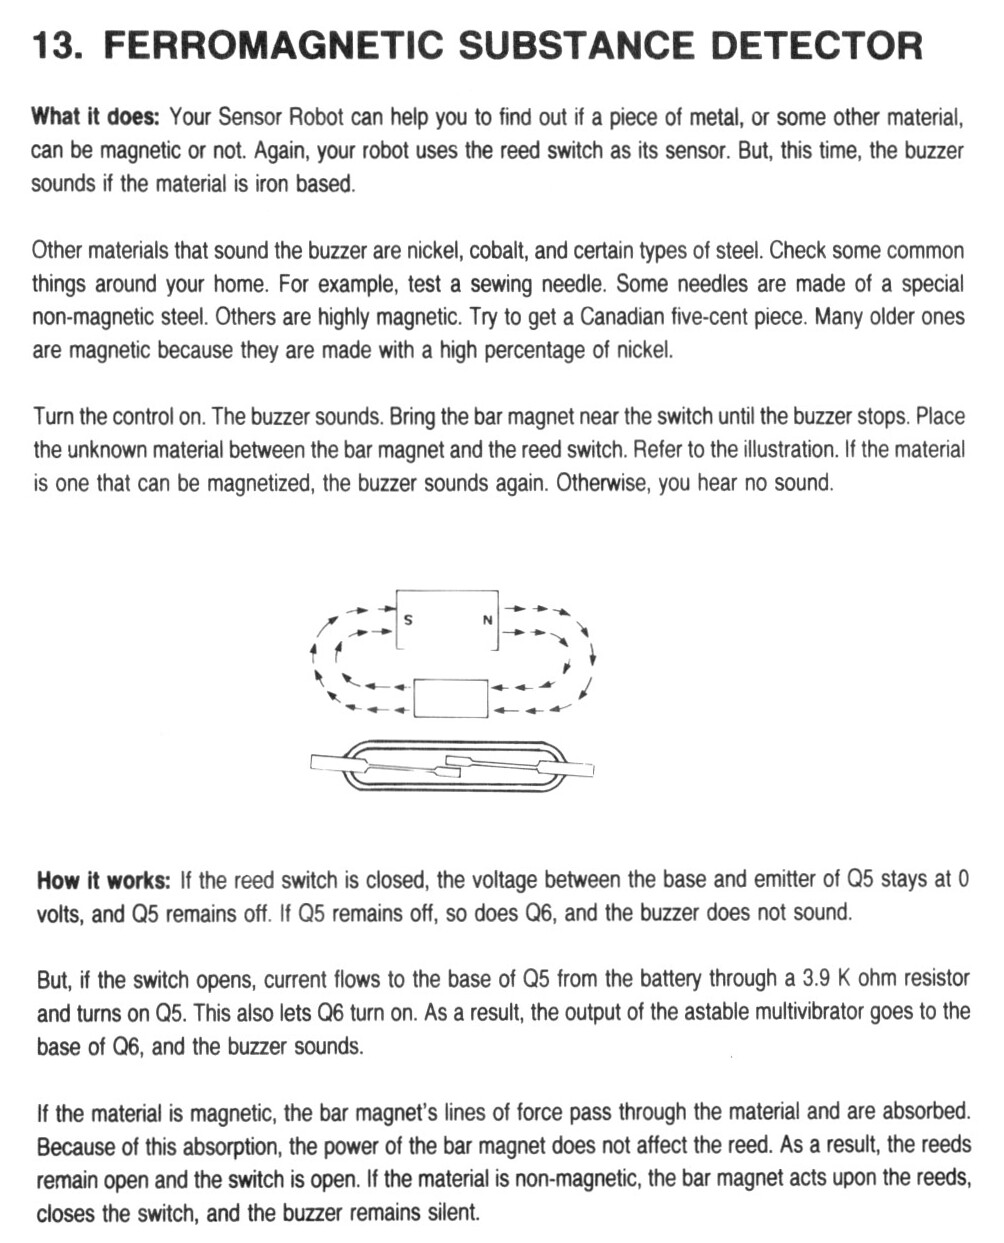
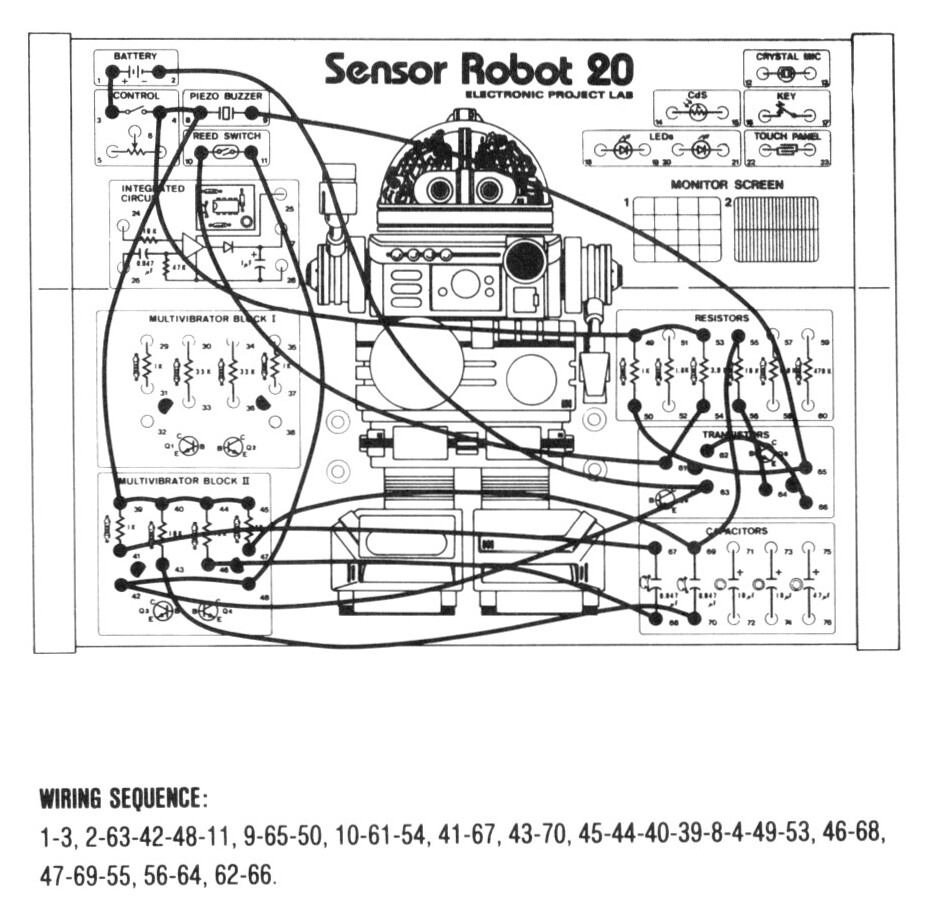
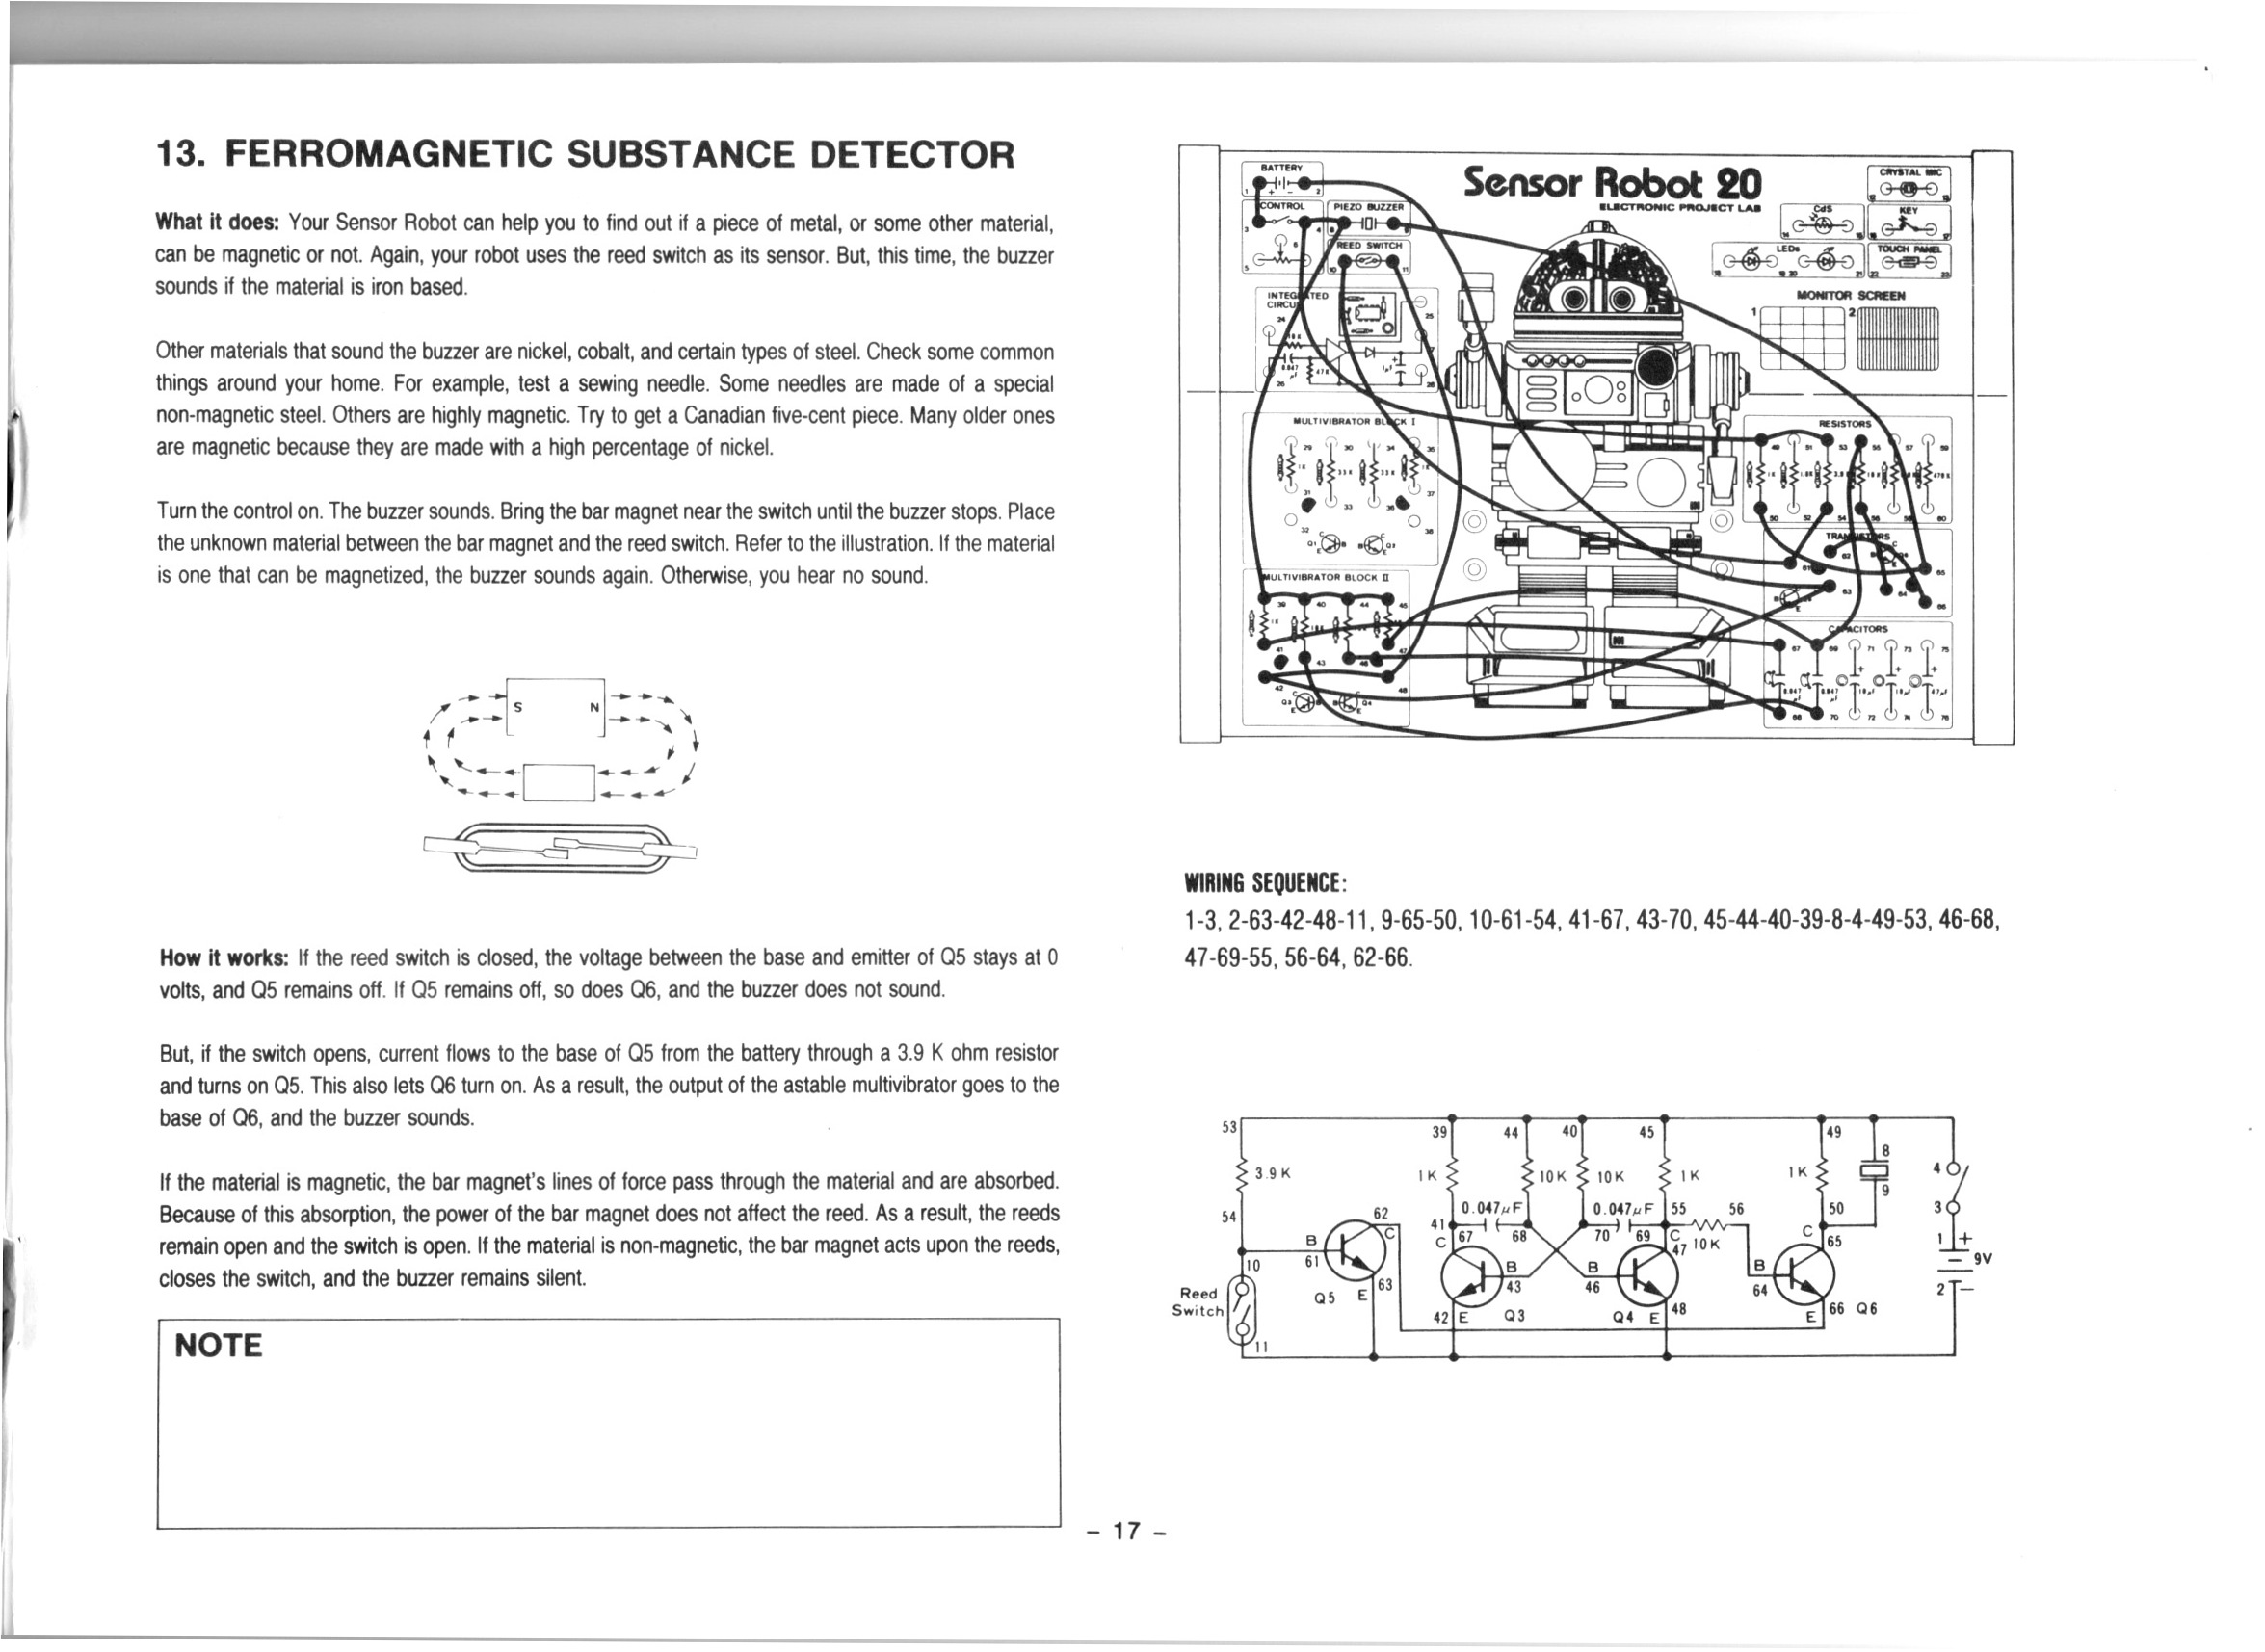
In this video we do the 13th project from the Maxitronix 20in1 (the Sensor Robot 20): Ferromagnetic Substance Detector.
In this project we use the reed switch to detect magnetic material. We use an astable multivibrator to generate a tone which sounds when magnetic material is detected.
We use the UNI-T UTi260B Thermal Imager to inspect the circuit board during operation and see the transistors for the astable multivibrator dissipating the most heat.
We also use a breakout board to add a volume control to the buzzer and to substitute a LED for the buzzer.
I really enjoyed this project, I think it’s the best one so far!
Thanks very much for watching! And please remember to hit like and subscribe! :)
Following is a product I use picked at random from my collection which may appear in my videos. Clicking through on this to find and click on the green affiliate links before purchasing from eBay or AliExpress is a great way to support the channel at no cost to you. Thanks!
I accidentally happened upon this while surfing the interwebs this evening and I thought it was a great hack: EXTRA HANDS FOR SOLDERING – OCTOPUS. This person makes a very respectable third hand out of a few scraps.