I have a new post on Hackaday: 2025 Component Abuse Challenge: Using Inductors To Steal Power From Qi Wireless Charging Base Station.
2025 Component Abuse Challenge: Using Inductors To Steal Power From Qi Wireless Charging Base Station
Reply

I have a new post on Hackaday: 2025 Component Abuse Challenge: Using Inductors To Steal Power From Qi Wireless Charging Base Station.
This post is part of my video blog and you can find more information about this video.
You can support this channel on Patreon: patreon.com/JohnElliotV
Silly Job Title: Capacitor Captain. I am the Capacitor Captain!
In this video we take a look inside Encyclopedia of Electronic Circuits Volume 4 by Rudolf F. Graf and William Sheets.
We noted while going through the book that πP is short for “microprocessor”, or, essentially what we’d just call a CPU these days.
Thanks very much for watching! And please remember to hit like and subscribe! :)
Following is a product I use picked at random from my collection which may appear in my videos. Clicking through on this to find and click on the green affiliate links before purchasing from eBay or AliExpress is a great way to support the channel at no cost to you. Thanks!
MECHANIC UV Curing Light notes notes |
Let’s go shopping!
This post is part of my video blog and you can find more information about this video.
You can support this channel on Patreon: patreon.com/JohnElliotV
Silly Job Title: Current Connoisseur. I am the Current Connoisseur!
In this video we continue to work through our Maxitronix 30in1, today doing project #4: The “Invisible Power” Radio. In this project we make a simple radio but it doesn’t work for us.
Thanks very much for watching! And please remember to hit like and subscribe! :)
Following is a product I use picked at random from my collection which may appear in my videos. Clicking through on this to find and click on the green affiliate links before purchasing from eBay or AliExpress is a great way to support the channel at no cost to you. Thanks!
Yum Cha Macro Programmable 8-Key Mechanical Keyboard |
Let’s go shopping!
This post is part of my video blog and you can find more information about this video.
You can support this channel on Patreon: patreon.com/JohnElliotV
Silly Job Title: Hack in Residence. I am the Hack in Residence!
In this video we take a look at what arrived in the mail:
We use the Pro’sKit SS-331H Desoldering Pump to talk about the cleaning spikes.
We use the Peak Electronic Design Atlas DCA75 Pro Semiconductor Analyzer to test our 10A10 rectifying diodes.
We use the Brother P-Touch D210 Label Maker for labeling.
We use the Hakko CHP 3C-SA Precision Tweezers to clean up.
We use the Victorinox Swiss Champ Red Swiss Army Knife to open envelopes.
We use the Kaisi S-160 45x30cm Repair Mat as our workspace.
Thanks very much for watching! And please remember to hit like and subscribe! :)
Following is a product I use picked at random from my collection which may appear in my videos. Clicking through on this to find and click on the green affiliate links before purchasing from eBay or AliExpress is a great way to support the channel at no cost to you. Thanks!
3ELIGHTING 14″-42″ VESA Wall Mount |
Let’s go shopping!
This post is part of my video blog and you can find more information about this video.
You can support this channel on Patreon: patreon.com/JohnElliotV
Silly Job Title: Electron Enchanter. I am the Electron Enchanter!
In this video we continue to work our way through Learning the Art of Electronics. In this video we start 1L Lab: DC Circuits.
Today we do some experiments to determine the voltage burden of our DVM when it is in current-measuring mode.
We use the Riden RD6006 Bench Power Supply to power our test circuit.
We use the Fluke 17B+ Digital Multimeter to measure current and voltage.
We use the EEVblog BM2257 Digital Multimeter to measure current and voltage.
We use the EEVblog BM036 Digital Multimeter to measure current.
We use the Multicomp Pro MP701033 Resistor Decade Box as our variable resistor.
We use the Carpenter Mechanical Pencil to take notes.
We use the Kaisi S-160 45x30cm Repair Mat as our workspace.
Thanks very much for watching! And please remember to hit like and subscribe! :)
Following is a product I use picked at random from my collection which may appear in my videos. Clicking through on this to find and click on the green affiliate links before purchasing from eBay or AliExpress is a great way to support the channel at no cost to you. Thanks!
Maxitronix 10in1 Electronics Project Lab Kit notes notes |
Let’s go shopping!
This post is part of my video blog and you can find more information about this video.
You can support this channel on Patreon: patreon.com/JohnElliotV
Silly Job Title: Plugerinerer. I am the Plugerinerer!
In this video we continue to work our way through Learning the Art of Electronics. In this video we finish the first chapter 1N DC Circuits.
Today we do some experiments to verify Kirchhoff’s Voltage Law.
We use the Riden RD6006 Bench Power Supply for power.
We use the Fluke 17B+ Digital Multimeter to measure current.
We use the EEVblog BM2257 Digital Multimeter to measure voltage.
We use the EEVblog BM036 Digital Multimeter to measure current.
We use the Sharp EL-546L Scientific Calculator to crunch some numbers.
We use the Multicomp Pro MP701033 Resistor Decade Box for variable resistance.
We use the Carpenter Mechanical Pencil to make our notes.
We use the Kaisi S-160 45x30cm Repair Mat as our workspace.
Thanks very much for watching! And please remember to hit like and subscribe! :)
Following is a product I use picked at random from my collection which may appear in my videos. Clicking through on this to find and click on the green affiliate links before purchasing from eBay or AliExpress is a great way to support the channel at no cost to you. Thanks!
Wozniak Solder Lugs notes notes |
Let’s go shopping!
I have a new post on Hackaday: Filming At The Speed Of Light, About One Foot Per Nanosecond.
I have a new post on Hackaday: F/0.38 Camera Lens Made With Oil Immersion Microscope Objective.
This post is part of my video blog and you can find more information about this video.
You can support this channel on Patreon: patreon.com/JohnElliotV
Silly Job Title: Outlet Overlord. I am the Outlet Overlord!
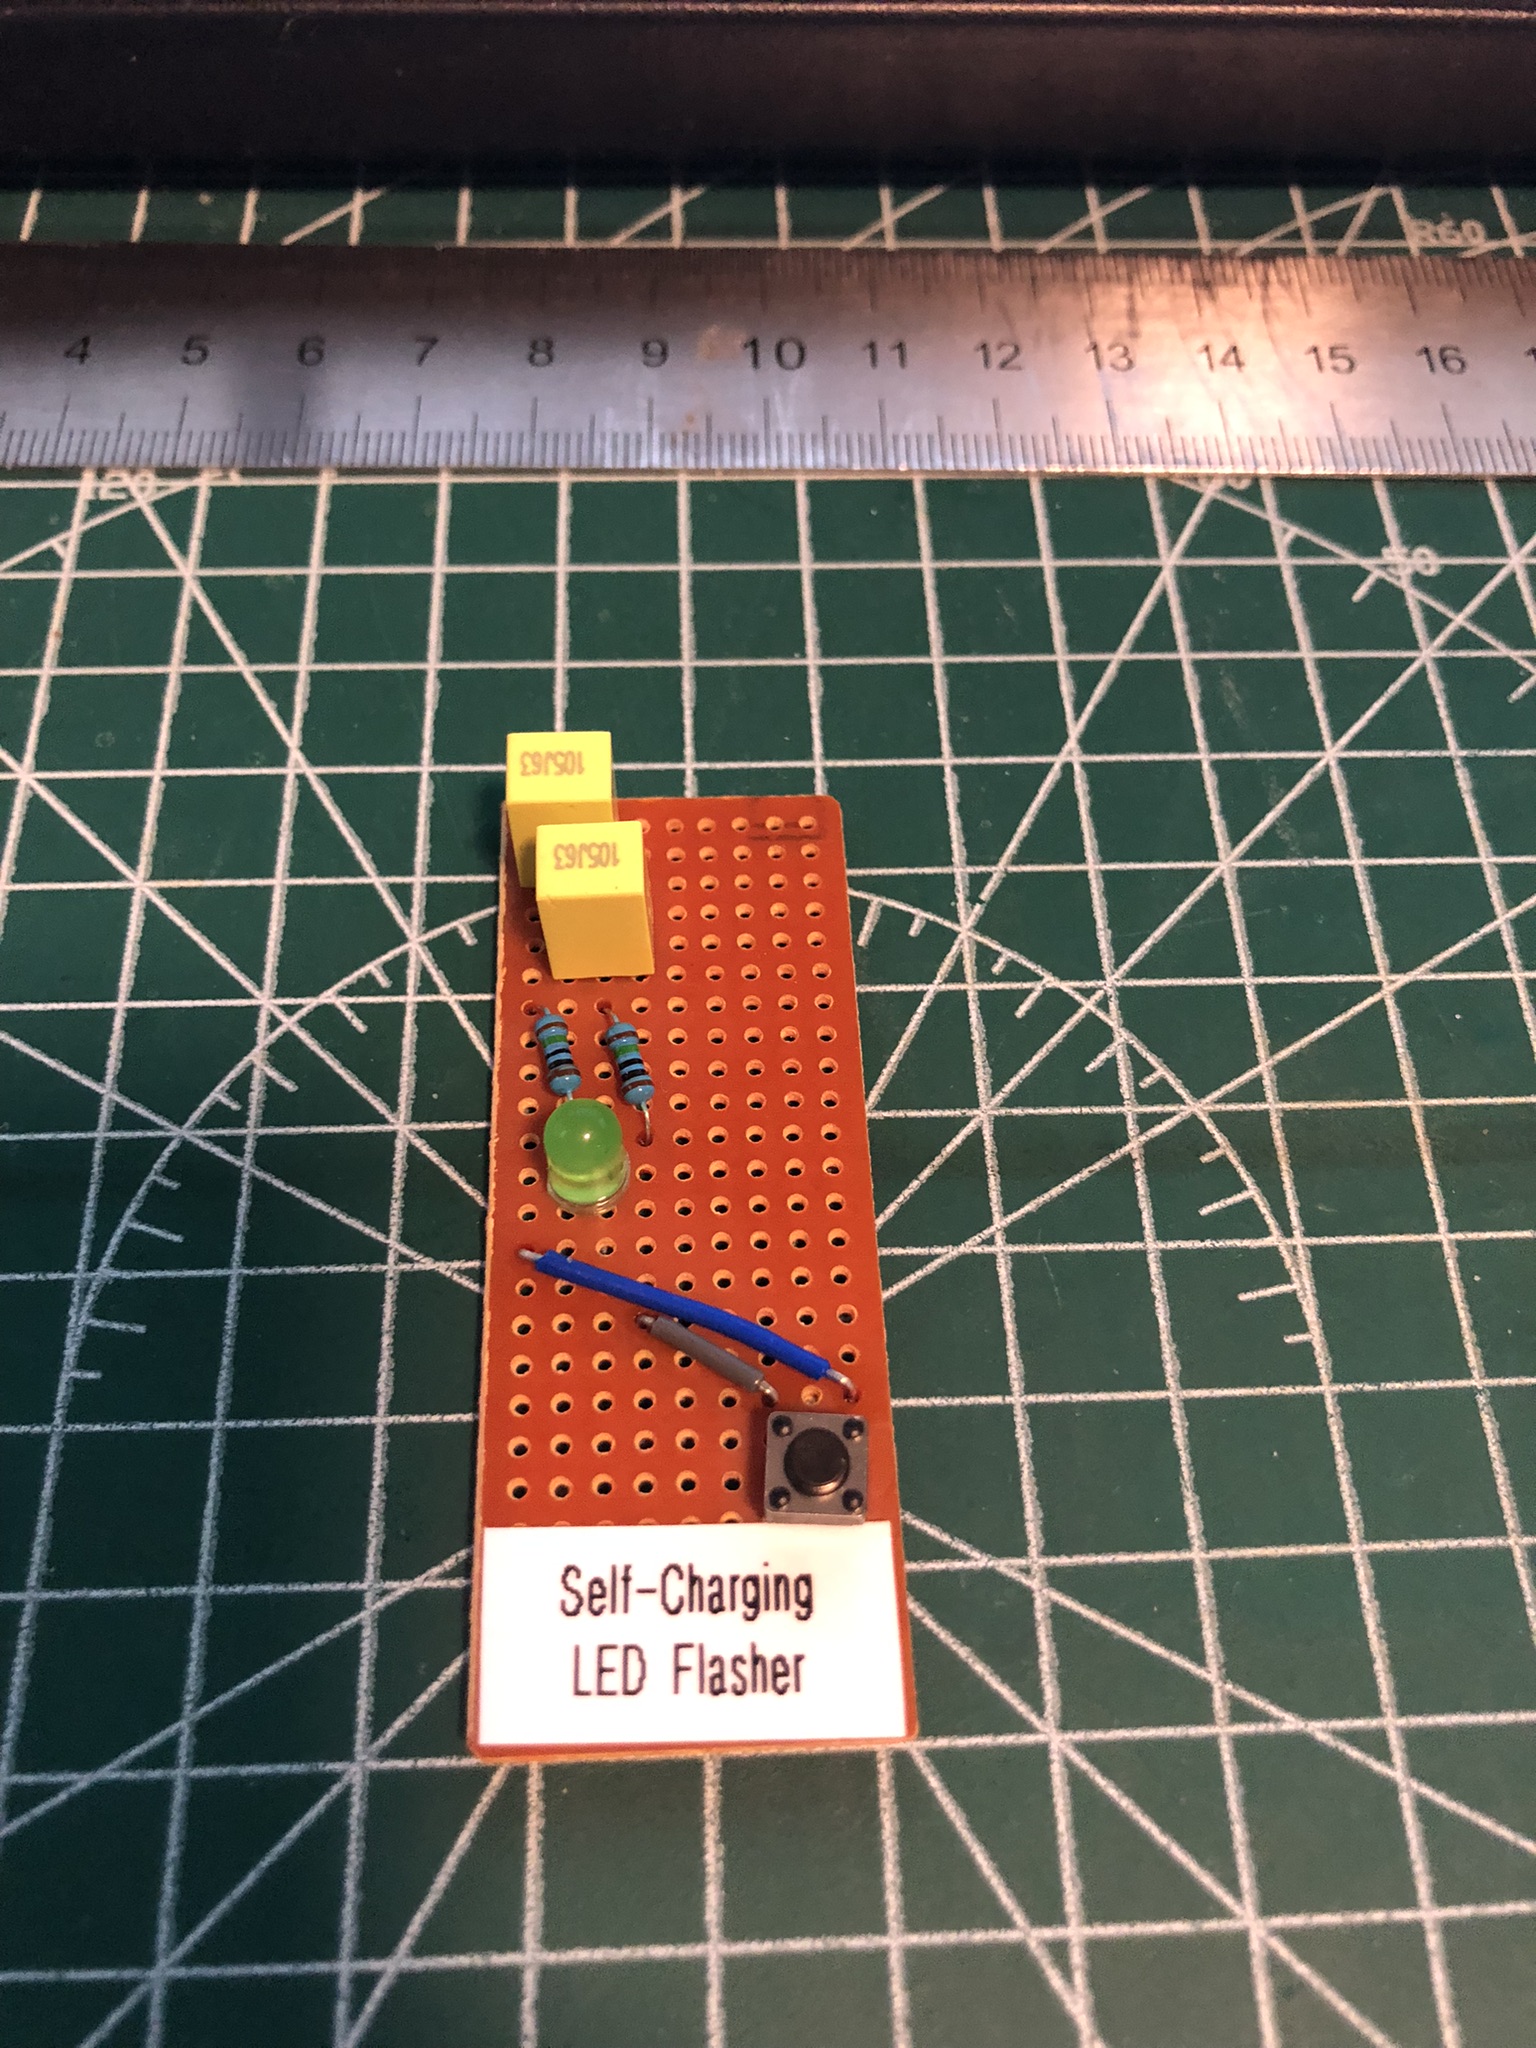
In this video we build the A Self-Charging LED Flasher By Burkhard Kainka. This project was submitted for the Hackaday Component Abuse Challenge 2025.
The fun thing about this project is that it works even though it doesn’t have a power supply. That’s because the LED sucks energy from the ambient light to charge the capacitors!
It took me three goes to make this work. The first go was with 100 nF ceramic caps on veroboard, and that didn’t work. The next go was with 470 µF electrolytic caps on breadboard, and that didn’t work. Finally I had a go with 1 µF polypropylene film caps and that worked!
We use the METCAL PS-900 Soldering Station for soldering.
We use the Pro’sKit SS-331H Desoldering Pump for desoldering.
We use the MUIN Solder Fume Extractor to clear the air.
We use the Riden RD6006 Bench Power Supply for test power.
We use the EEVblog BM2257 Digital Multimeter for voltage and other measurements.
We use the Brother P-Touch D210 Label Maker for making labels.
We use the Bysameyee Head-Mounted Magnifier for magnification and light.
We use the Scotch Titanium Scissors to cut things.
We use the Carpenter Mechanical Pencil to make notes.
We use the Hakko CHP 3C-SA Precision Tweezers for tweezering.
We use the Plato Model 170 Wire Cutter for cutting.
We use the Victorinox Swiss Champ Red Swiss Army Knife for its blade.
We use the Kaisi S-160 45x30cm Repair Mat as our workspace.
Thanks very much for watching! And please remember to hit like and subscribe! :)
Following is a product I use picked at random from my collection which may appear in my videos. Clicking through on this to find and click on the green affiliate links before purchasing from eBay or AliExpress is a great way to support the channel at no cost to you. Thanks!
Wowstick Wowpad Magnetic Screwpad |
Let’s go shopping!