This post is part of my video blog and you can find more information about this video over here.
You can support this channel on Patreon: patreon.com/JohnElliotV
Silly Job Title: Relay Renegade.
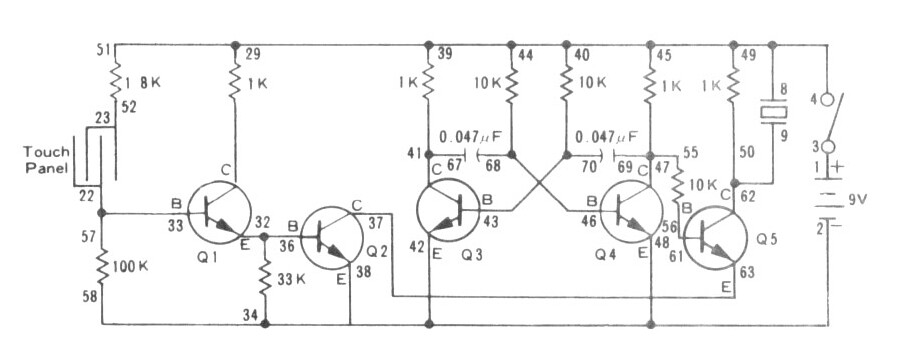
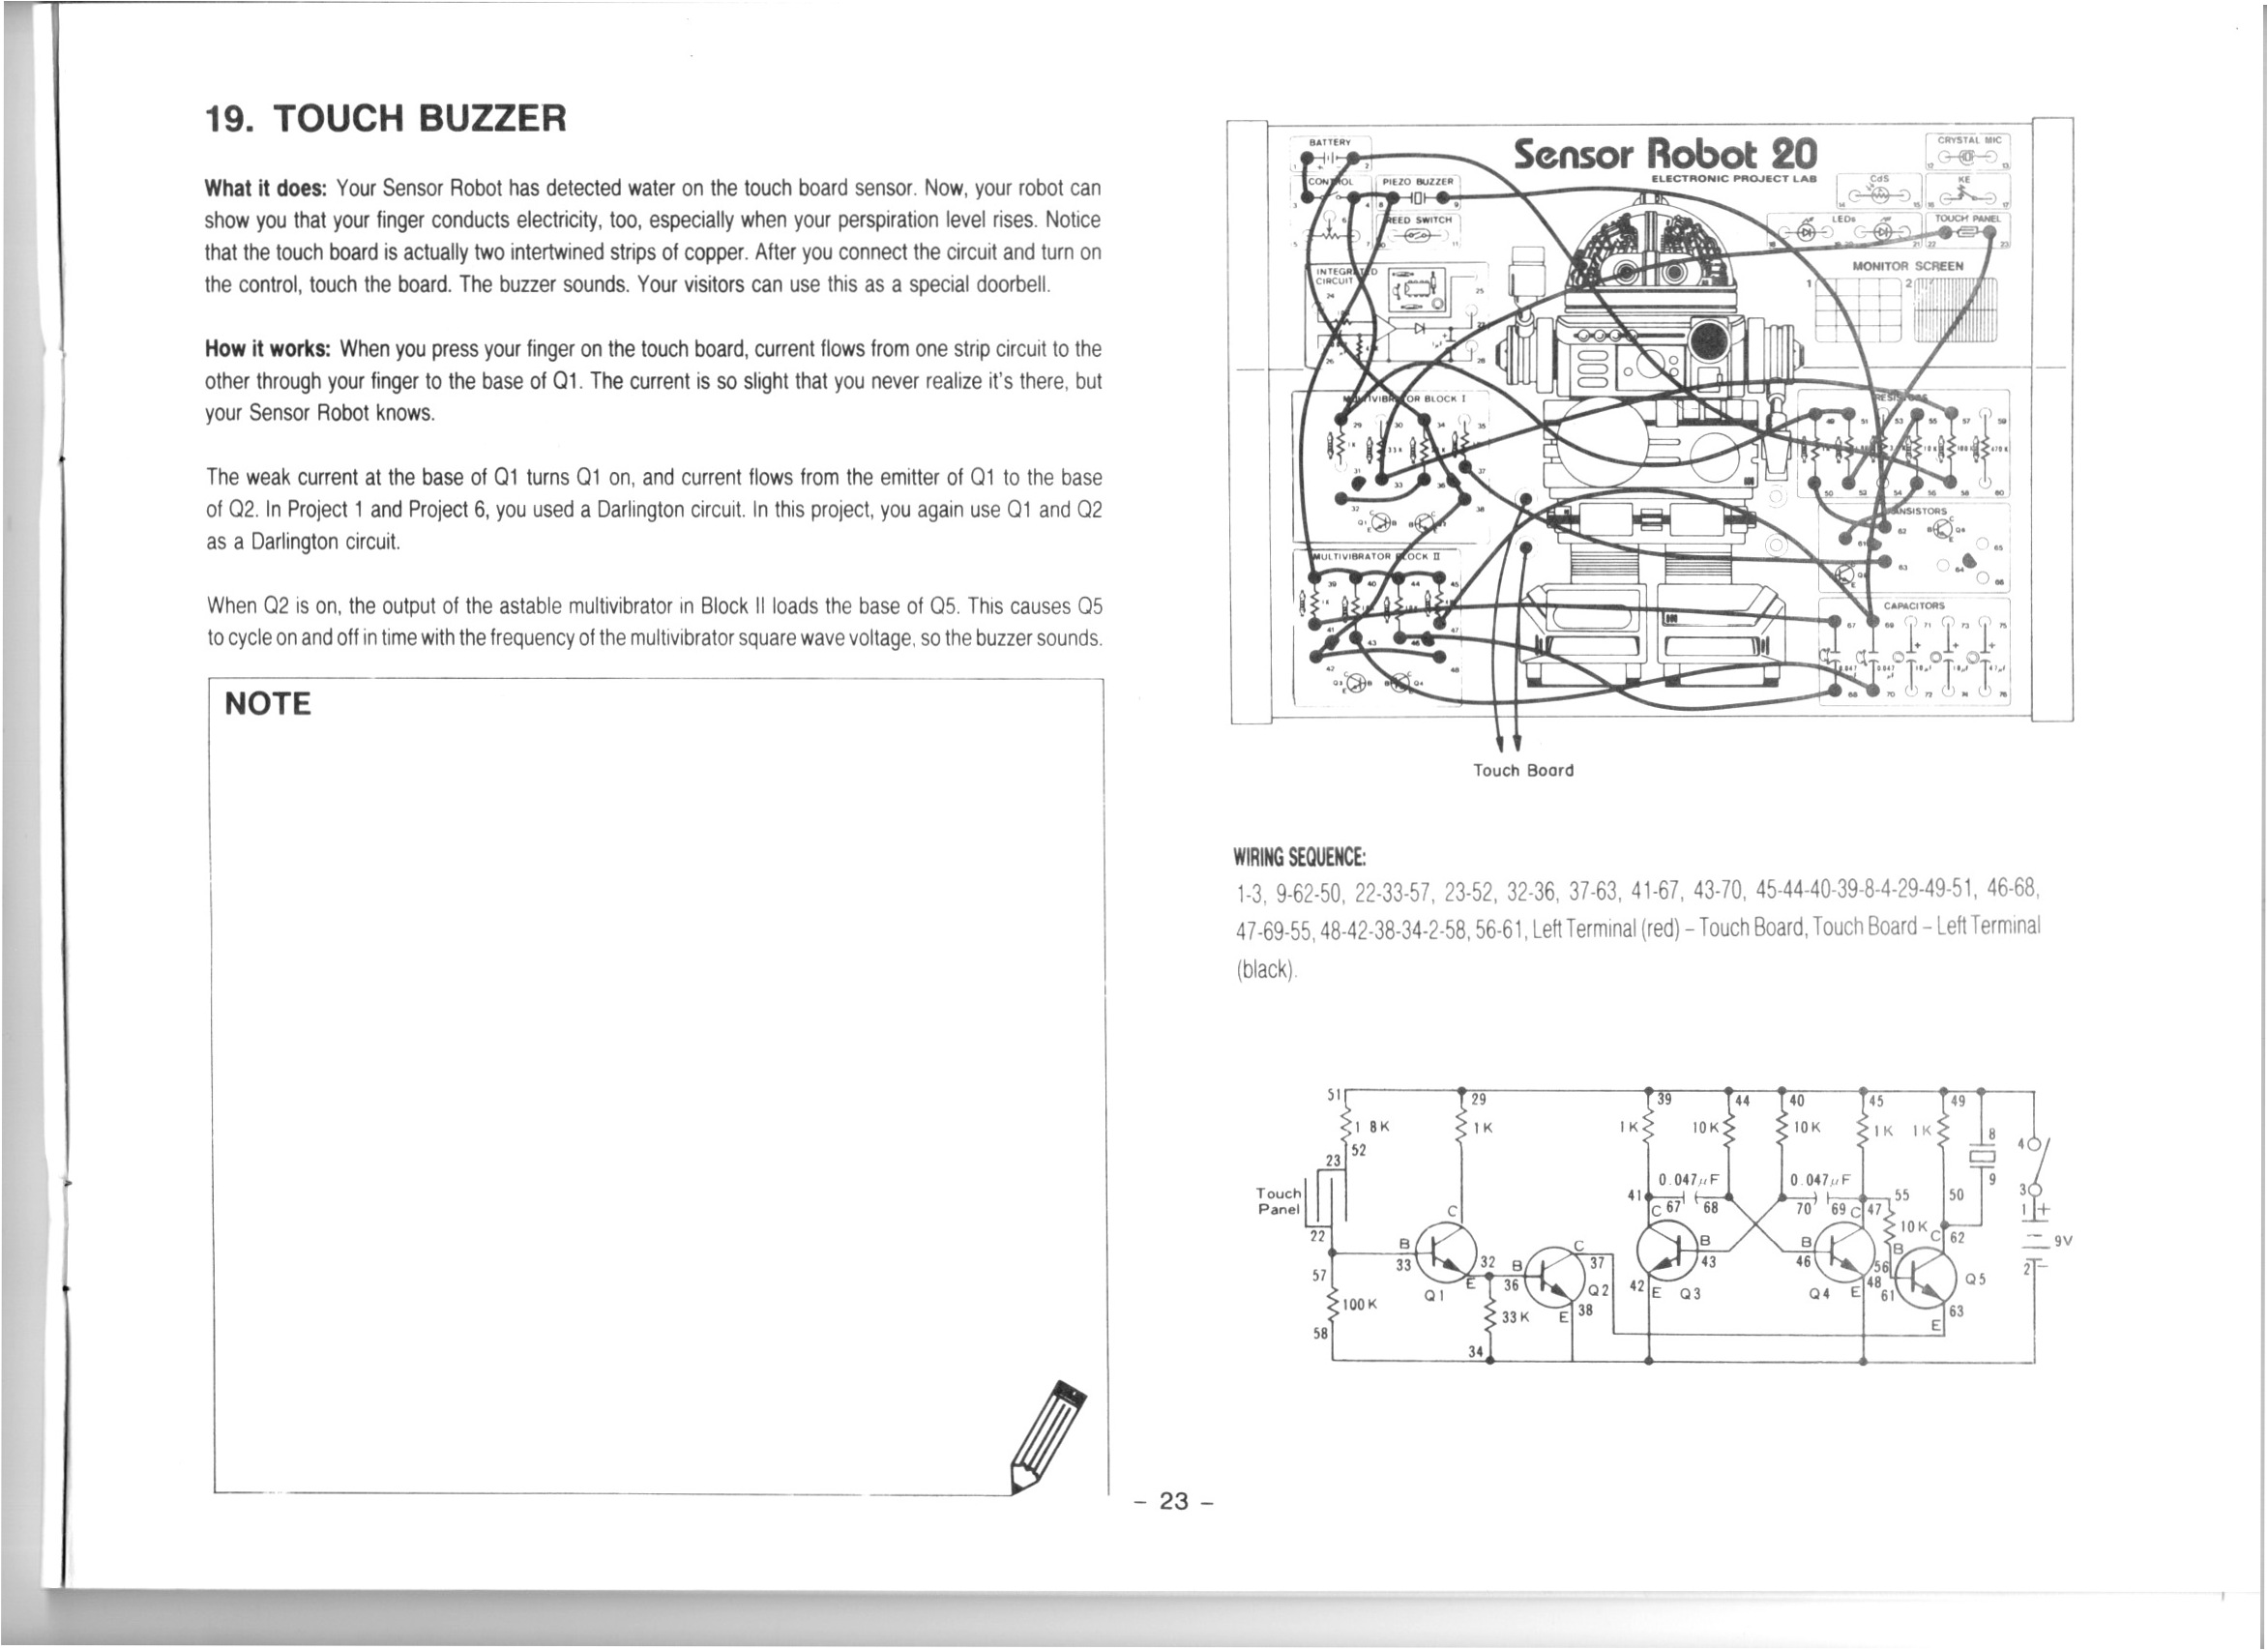
In this video we build project #1 of our Maxitronix 30in1, the Intro Project.
We use the Rigol MSO5074 Mixed Signal Oscilloscope to examine our circuit.
We use the UNI-T UTi260B Thermal Imager to examine the thermals.
We use the EEVblog BM2257 Digital Multimeter to test continuity and measure current and resistance.
We use the Peak Electronic Design Atlas LCR45 LCR Meter to get vital statistics for our transformer and piezo earphone.
We use the Riden RD6006 Bench Power Supply to power our test circuit.
We use the Horusdy Soldering Station with Hot Air Gun to shrink our heat shrink.
We use the Scotch Titanium Scissors to cut our heat shrink.
We use the Plato Model 170 Wire Cutter to cut wire.
Thanks very much for watching! And please remember to hit like and subscribe! :)
Following is a product I use picked at random from my collection which may appear in my videos. Clicking through on this to find and click on the green affiliate links before purchasing from eBay or AliExpress is a great way to support the channel at no cost to you. Thanks!
Yum Cha 10pc File & Rasp Set Metal File |
Let’s go shopping!