“Design in Practice” by Rich Hickey
Reply

I enjoy hearing from Iain McGilchrist. I do believe he is truly wise.
This post is part of my video blog and you can find more information about this video on this show’s homepage which is here.
You can support this channel on Patreon: patreon.com/JohnElliotV
Silly Job Title: Charge Charmer
This video is part of the New Book feature of my video blog.
In this video I review the venerable The Art of Electronics 3rd Edition by Paul Horowitz by Winfield Hill published in 2015. This monstrous tome includes some 1,220 pages.
This is a long video, because this is a long book!
While I was writing up these notes for the video I found a wealth of fun stuff. Here are a few links:
Thanks very much for watching! And please remember to hit like and subscribe!
Following is a product I use picked at random from my collection which may appear in my videos. Clicking through on this to find and click on the green affiliate links before purchasing from eBay or AliExpress is a great way to support the channel at no cost to you. Thanks!
Plato Model 170 Wire Cutter notes notes |
Let’s go shopping!
This post is part of my video blog.
I’m not sure what I should say about this. Or if I should say anything about it at all.
Man. So. Today, this happened. I was watching a new video from Adrian Black and his EEVBlog multimeter failed:
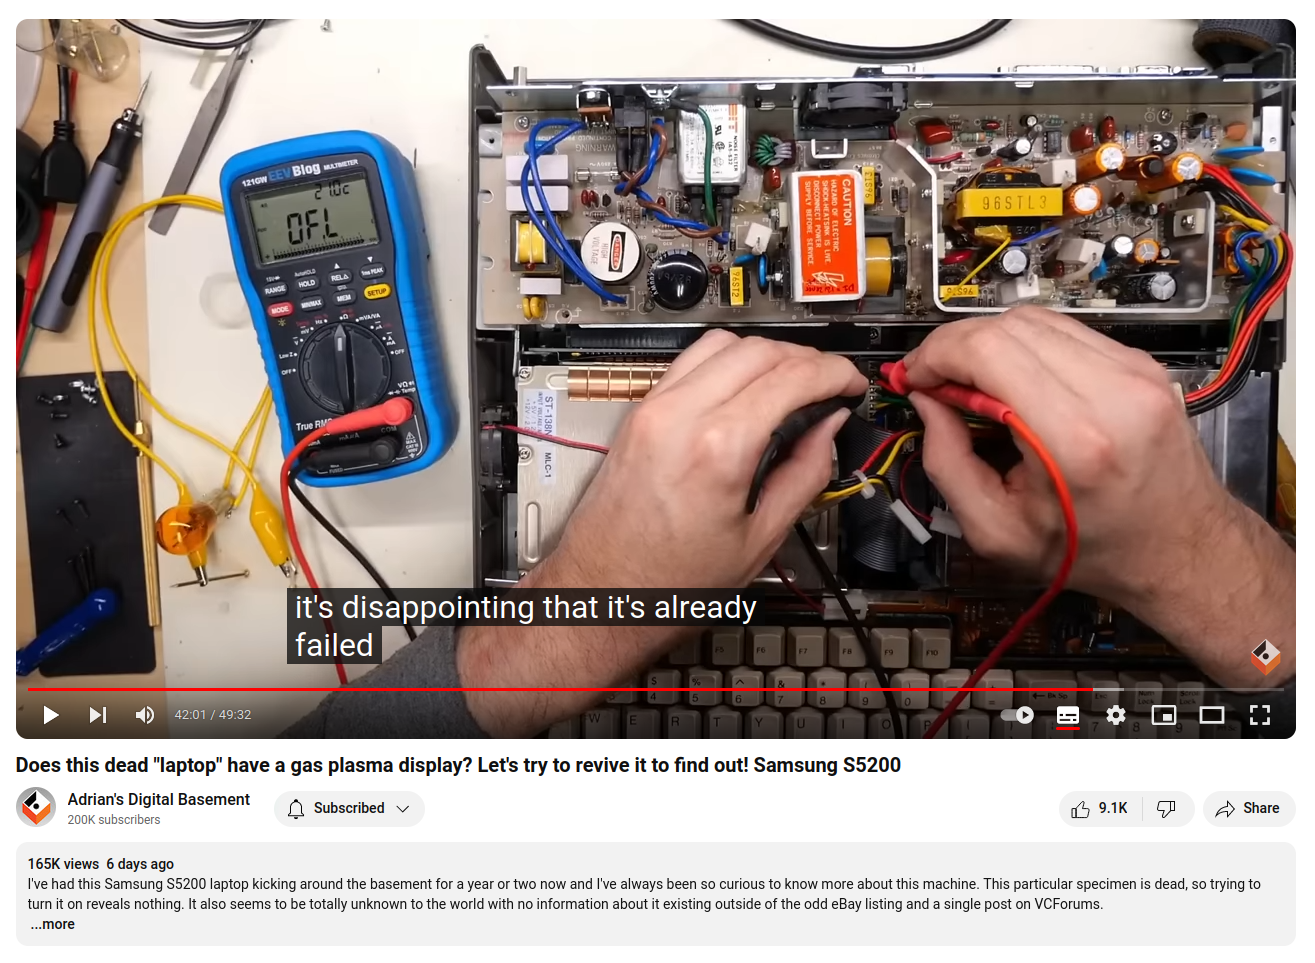
I have been saving my pennies and planning to buy an EEVBlog 121GW Multimeter because a lot of the makers around the interwebs have one as a nod to Dave Jones over on the EEVBlog, but that’s just so embarrassing that it’s failing. Of all the equipment you have you need to trust your test equipment the most and this is… well, just sad I guess.
This post is part of my video blog: In The Lab With Jay Jay.
You can support this channel on Patreon: patreon.com/JohnElliotV
This post is part of my video blog and you can find more information about this video on this show’s homepage which is here.
You can support this channel on Patreon: patreon.com/JohnElliotV
In this video I do the third Maxitronix 10in1 Electronic Project Lab project: Diode Experiment.
When I looked at the resistor on the bottom I thought it was red – brown – black – gold which would have been 21Ω but I think I misread brown and that was actually purple which would be 27Ω which stacks better with the two measurements I made both of which said 27Ω.
In the video we examine the forward voltage of our germanium diode and get various readings. Typically a germanium diode should be around 0.3V versus silicon diodes which are usually around 0.7V.
The component testers we use are these:
On the FNIRSI component tester the Ir is the “reverse current”, also known as the “leakage current”. This is the small amount of current which flows through the diode when it is reverse biased (that is, basically, connected the wrong way around).
I asked ChatGPT a few questions about diodes and their specifications which you can read here: Germanium Diode Forward Voltage if you’re at all interested in such things. Of course you should be doubly suspicious of anything you read on the internet. :)
The really amazing learning for me in this experiment was how hot the germanium diode got versus the lamp, which was so surprising. Just goes to show how good an idea it is to actually do experiments and measure things! The thermal imager we used was the UNI-T UTi260B.
Also I think I’m coming around to the view that an oscilloscope is a pretty poor voltmeter. My oscilloscope is an MSO5074 70MHz 4 Channel MIXED SIGNAL OSCILLOSCOPE and I love it but I think in future I will limit my use of the oscilloscope to situations where I’m actually dealing with some sort of oscillator. I think simple digital multimeters would have been better test equipment to use for the kinds of readings I was trying to take in this experiment.
I hope you enjoy the video. Stay tuned for the upcoming projects. If you’re interested in seeing them don’t forget to subscribe!
Also, if you’re interested in getting any of these Maxitronix kits yourself the best place I know to look is on eBay. Let me know if you find them somewhere else!
Thanks very much for watching! And please remember to hit like and subscribe!
Following is a product I use picked at random from my collection which may appear in my videos. Clicking through on this to find and click on the green affiliate links before purchasing from eBay or AliExpress is a great way to support the channel at no cost to you. Thanks!
aToolTour Black Hexagon Deburring Drill Bit notes notes |
Let’s go shopping!
Some different perspectives on what the tech job scene is like these days, and then some other random things. Honestly I am not sure what has happened in my feed today.