I’ve been refactoring my bench.
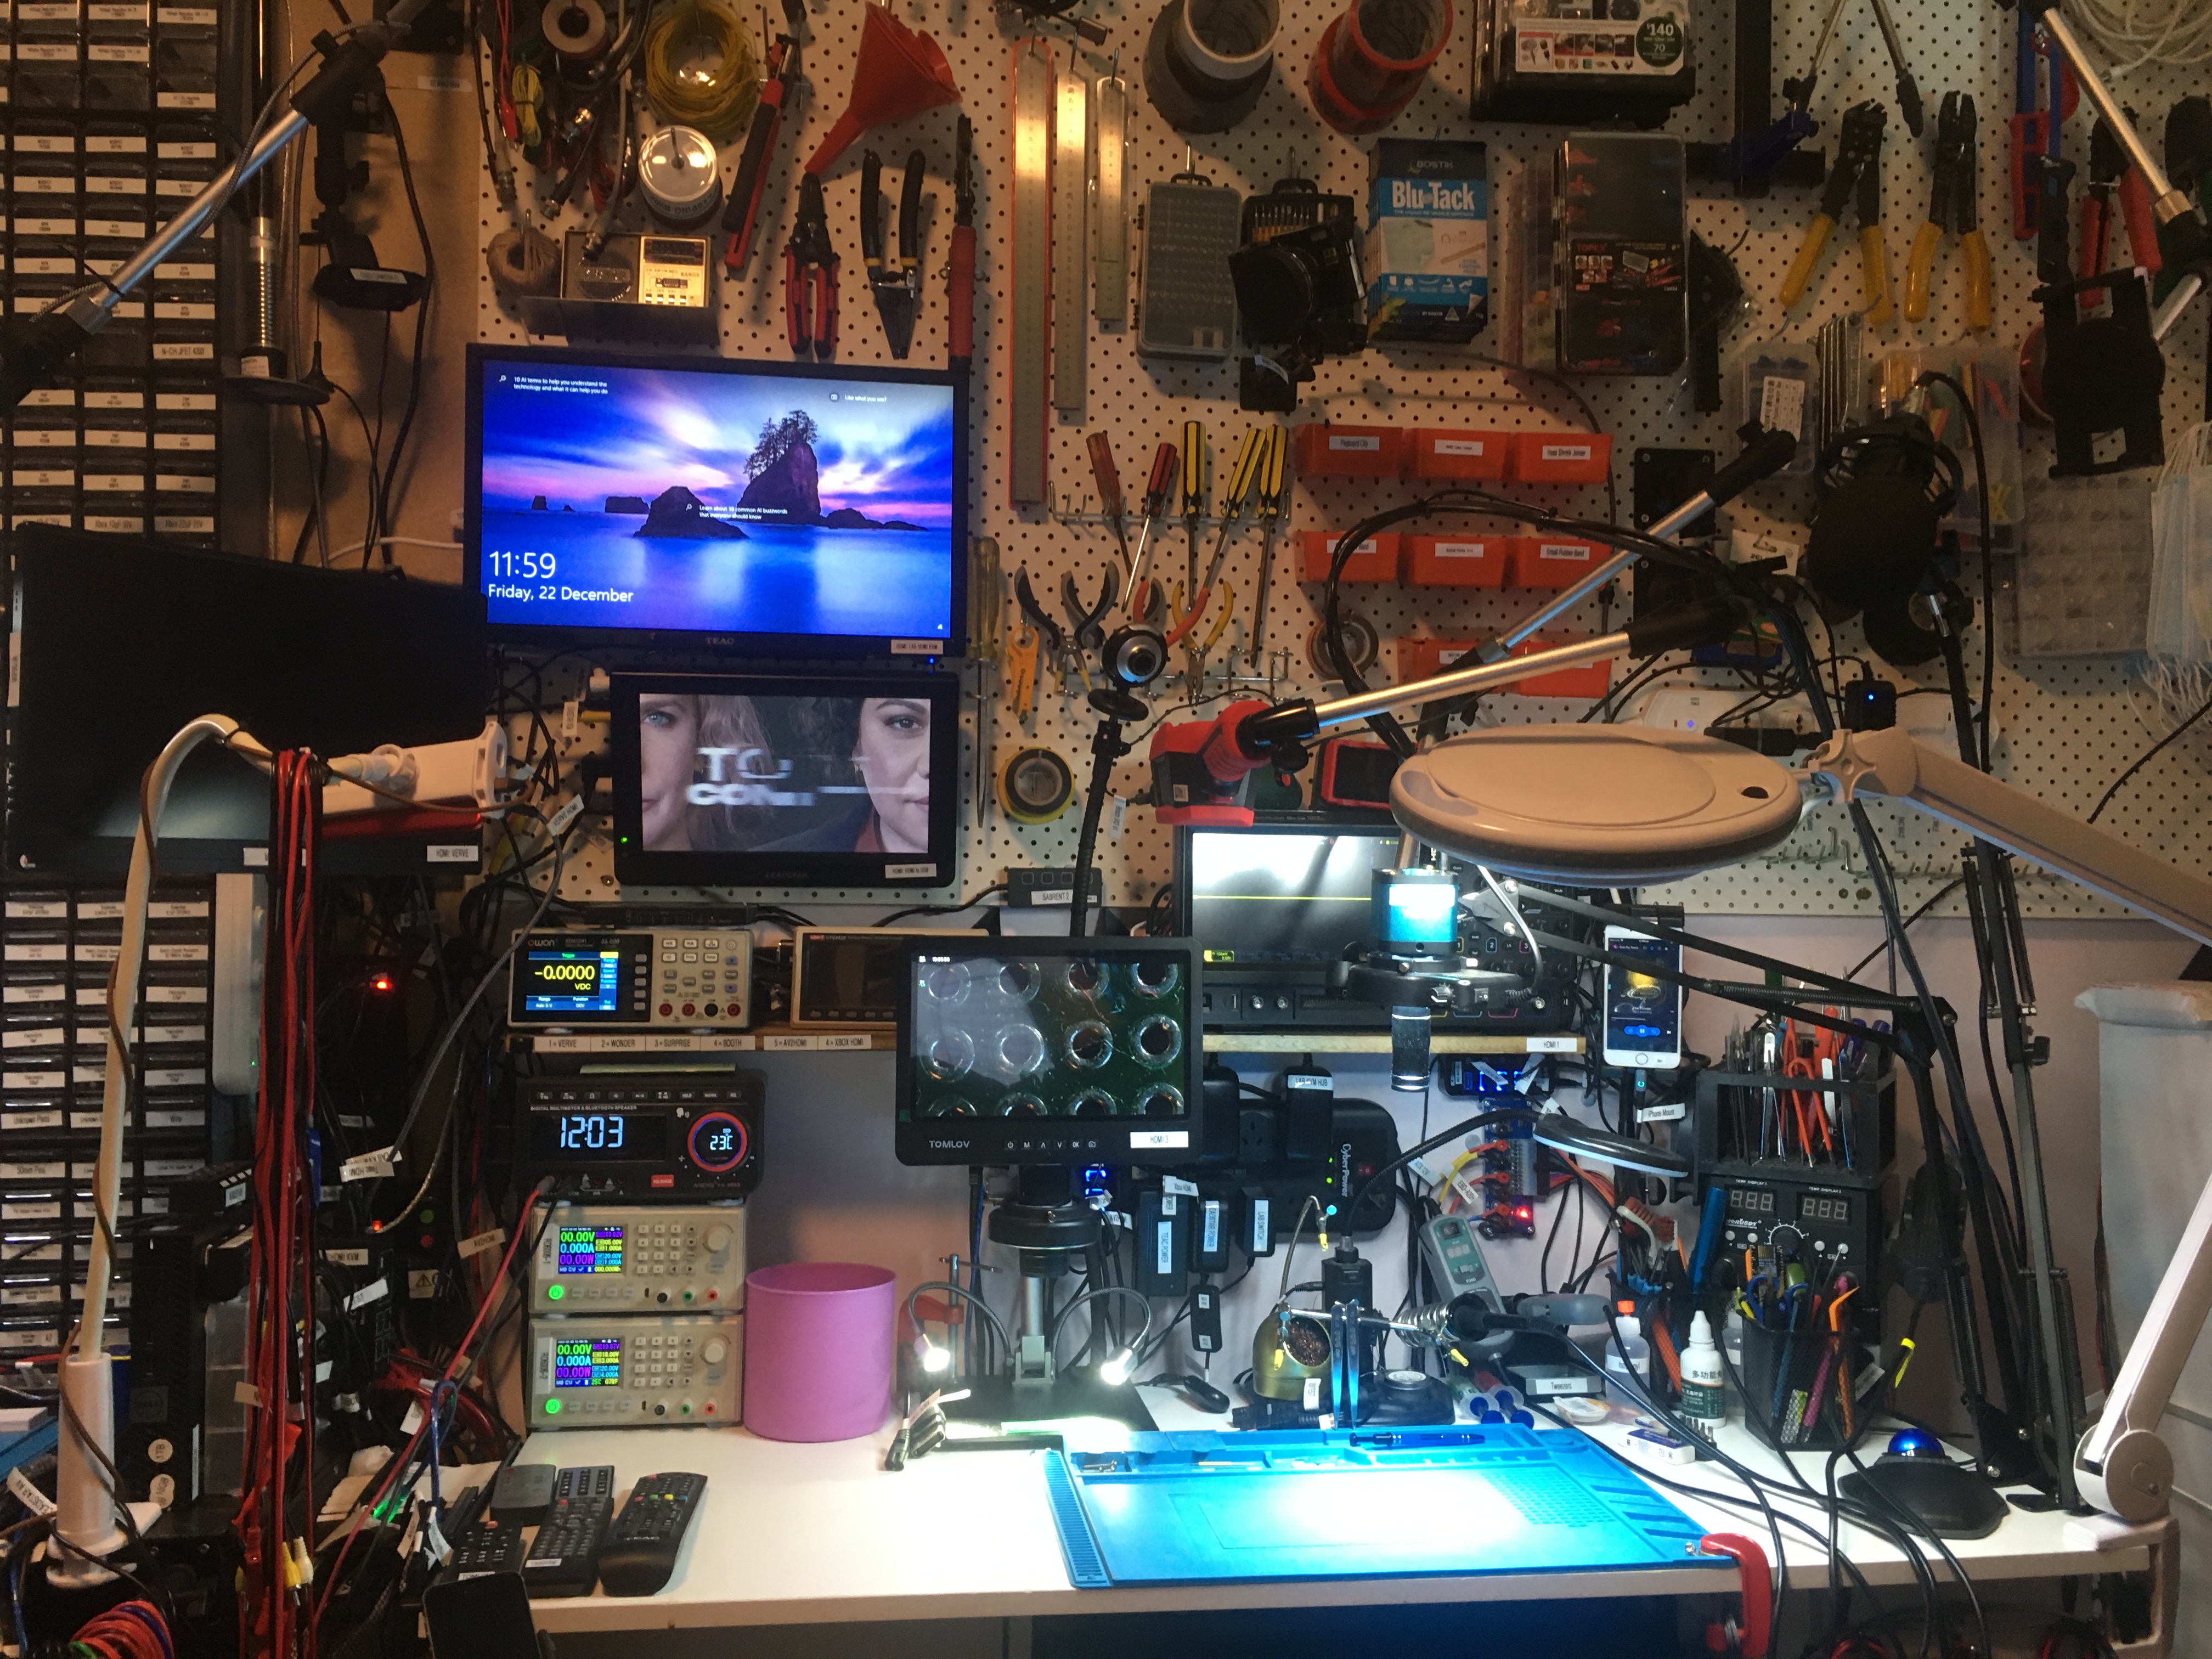

I’ve been refactoring my bench.
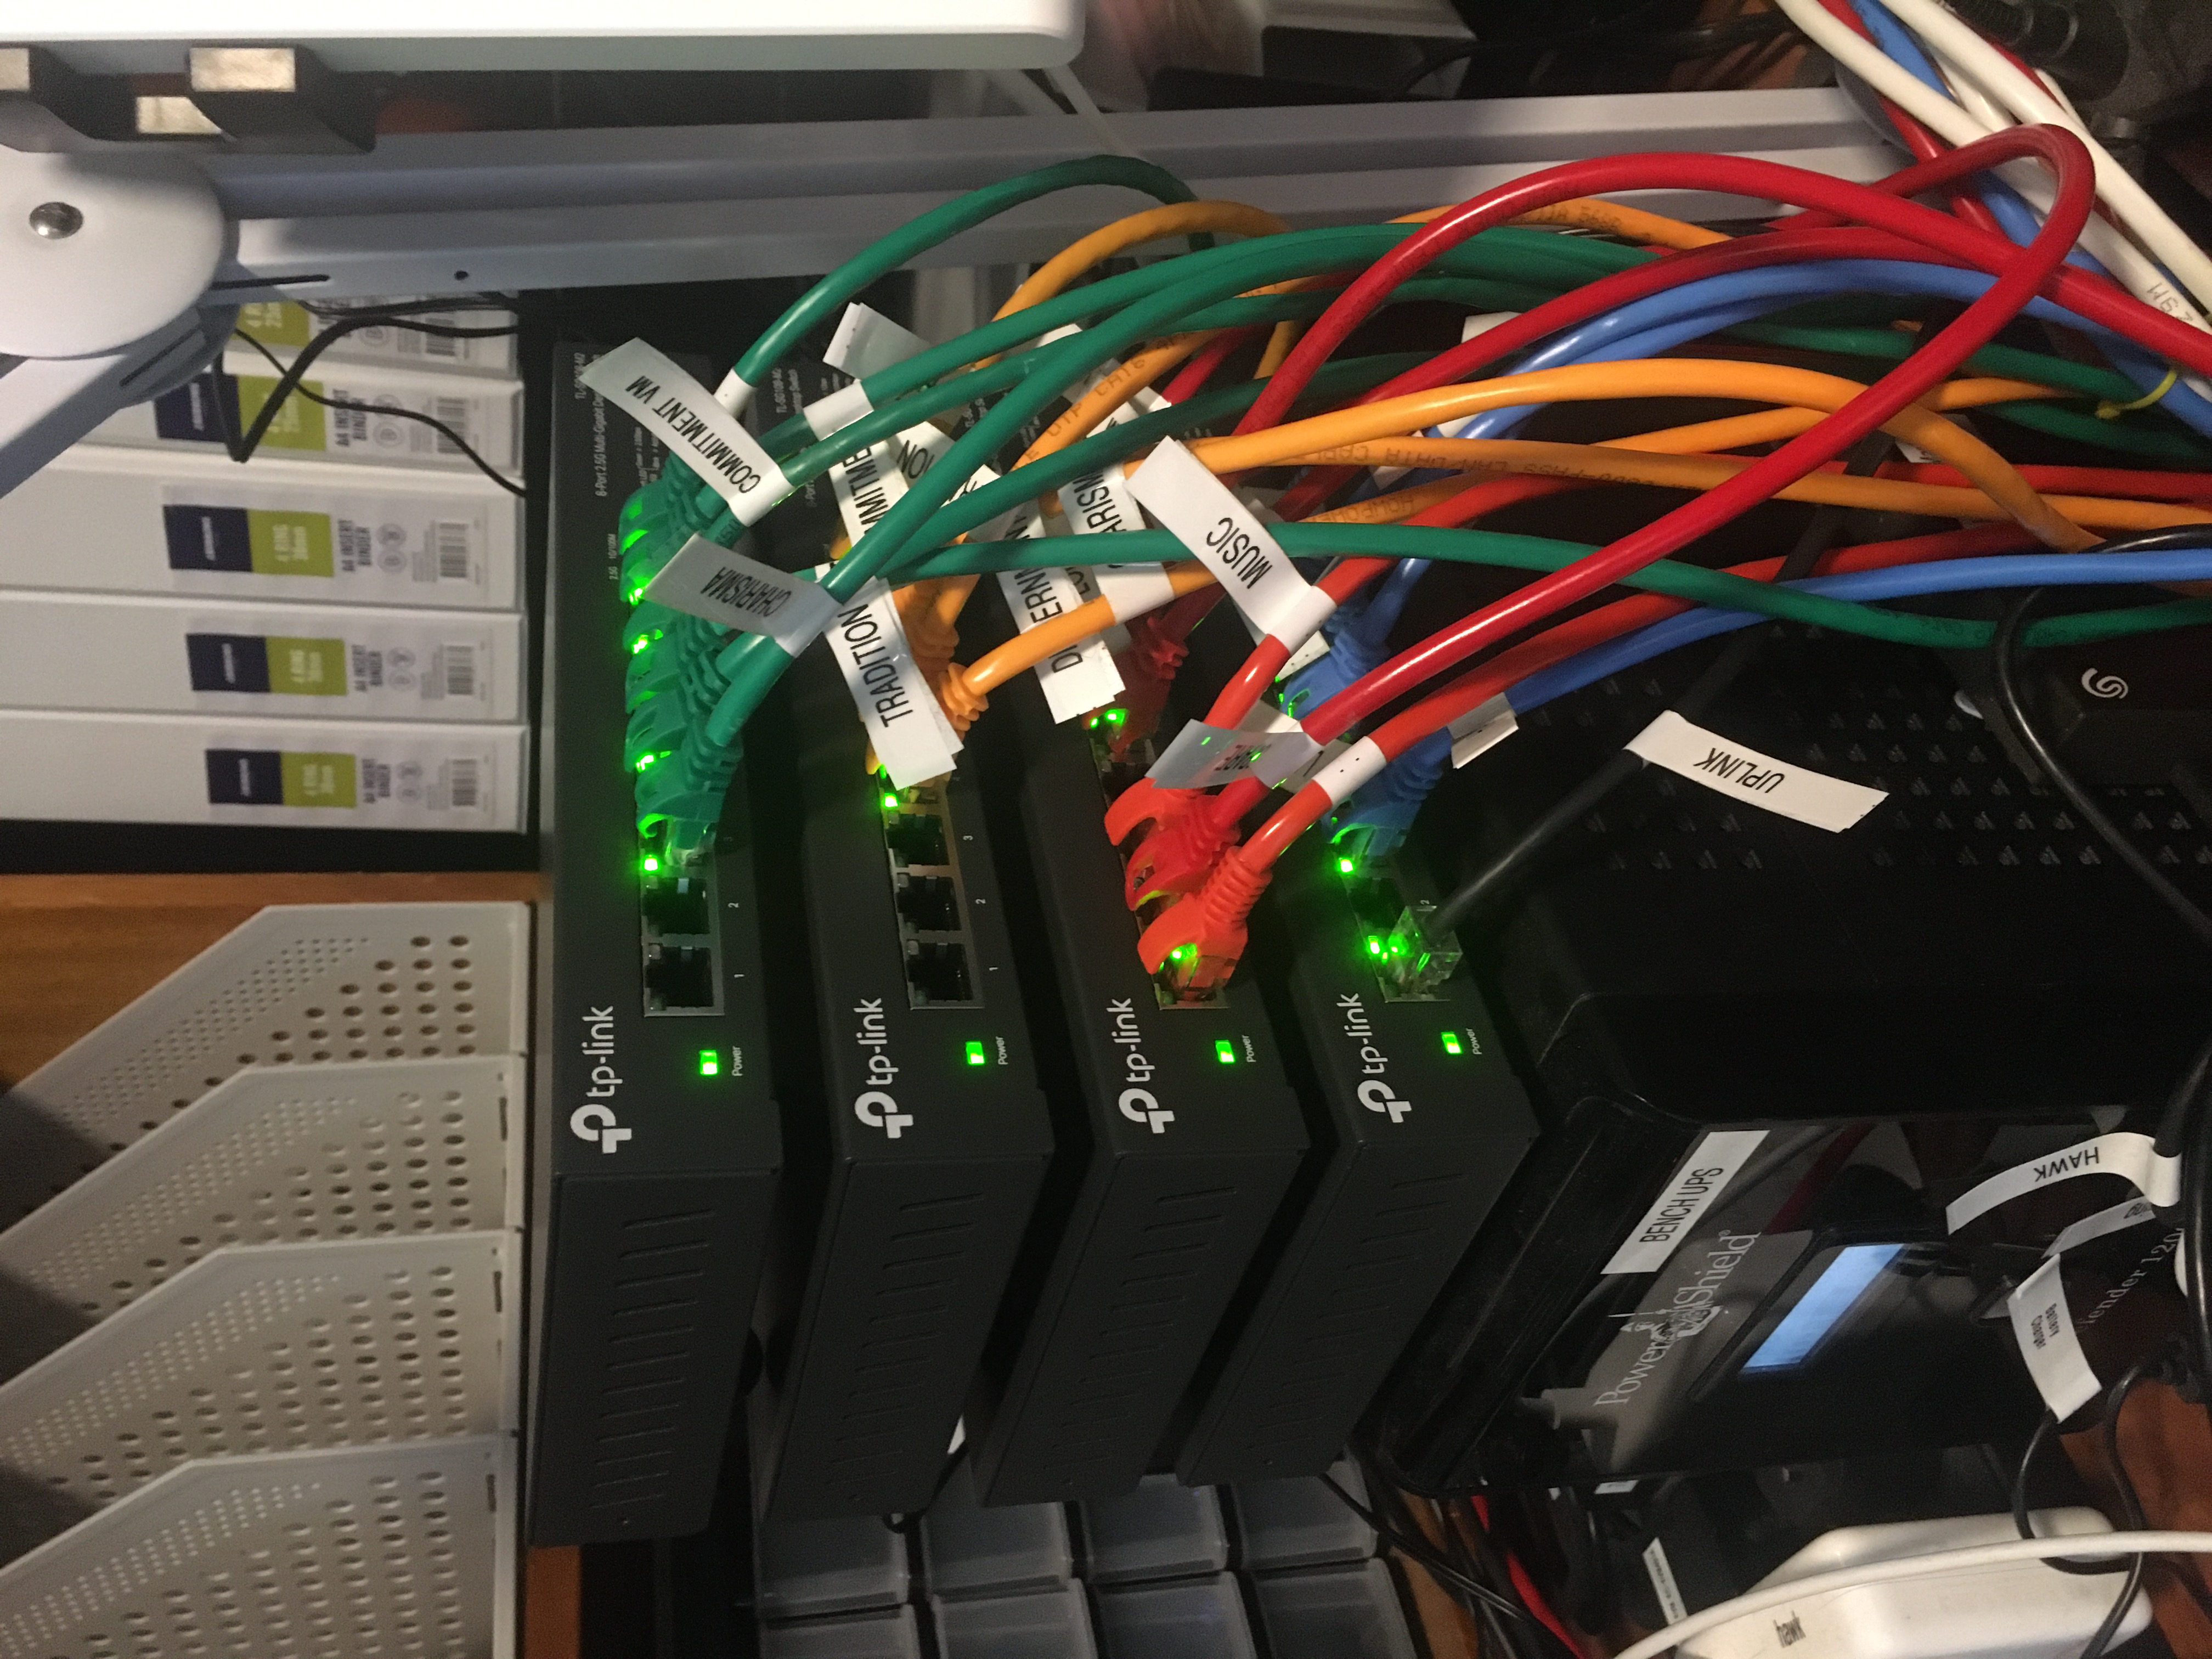
Added capacity for an extra six hosts on my LAN and now most of my network infrastructure supports 2.5Gbps ethernet speeds. And my janky rack is obsolete now.
The equipment is four TP-Link TL-SG108-M2 ethernet switches which I got from Amazon.
Oh, and I should probably mention that the TP-Link switches come with piddly little adhesive feet, but I didn’t use them, I got some of these big honkin’ ones instead: 25x Rubber Feet Pads Self Adhesive Isolation Feet Speakers Foot Shock Absorption. My logic is that more space between switches equals better cooling.
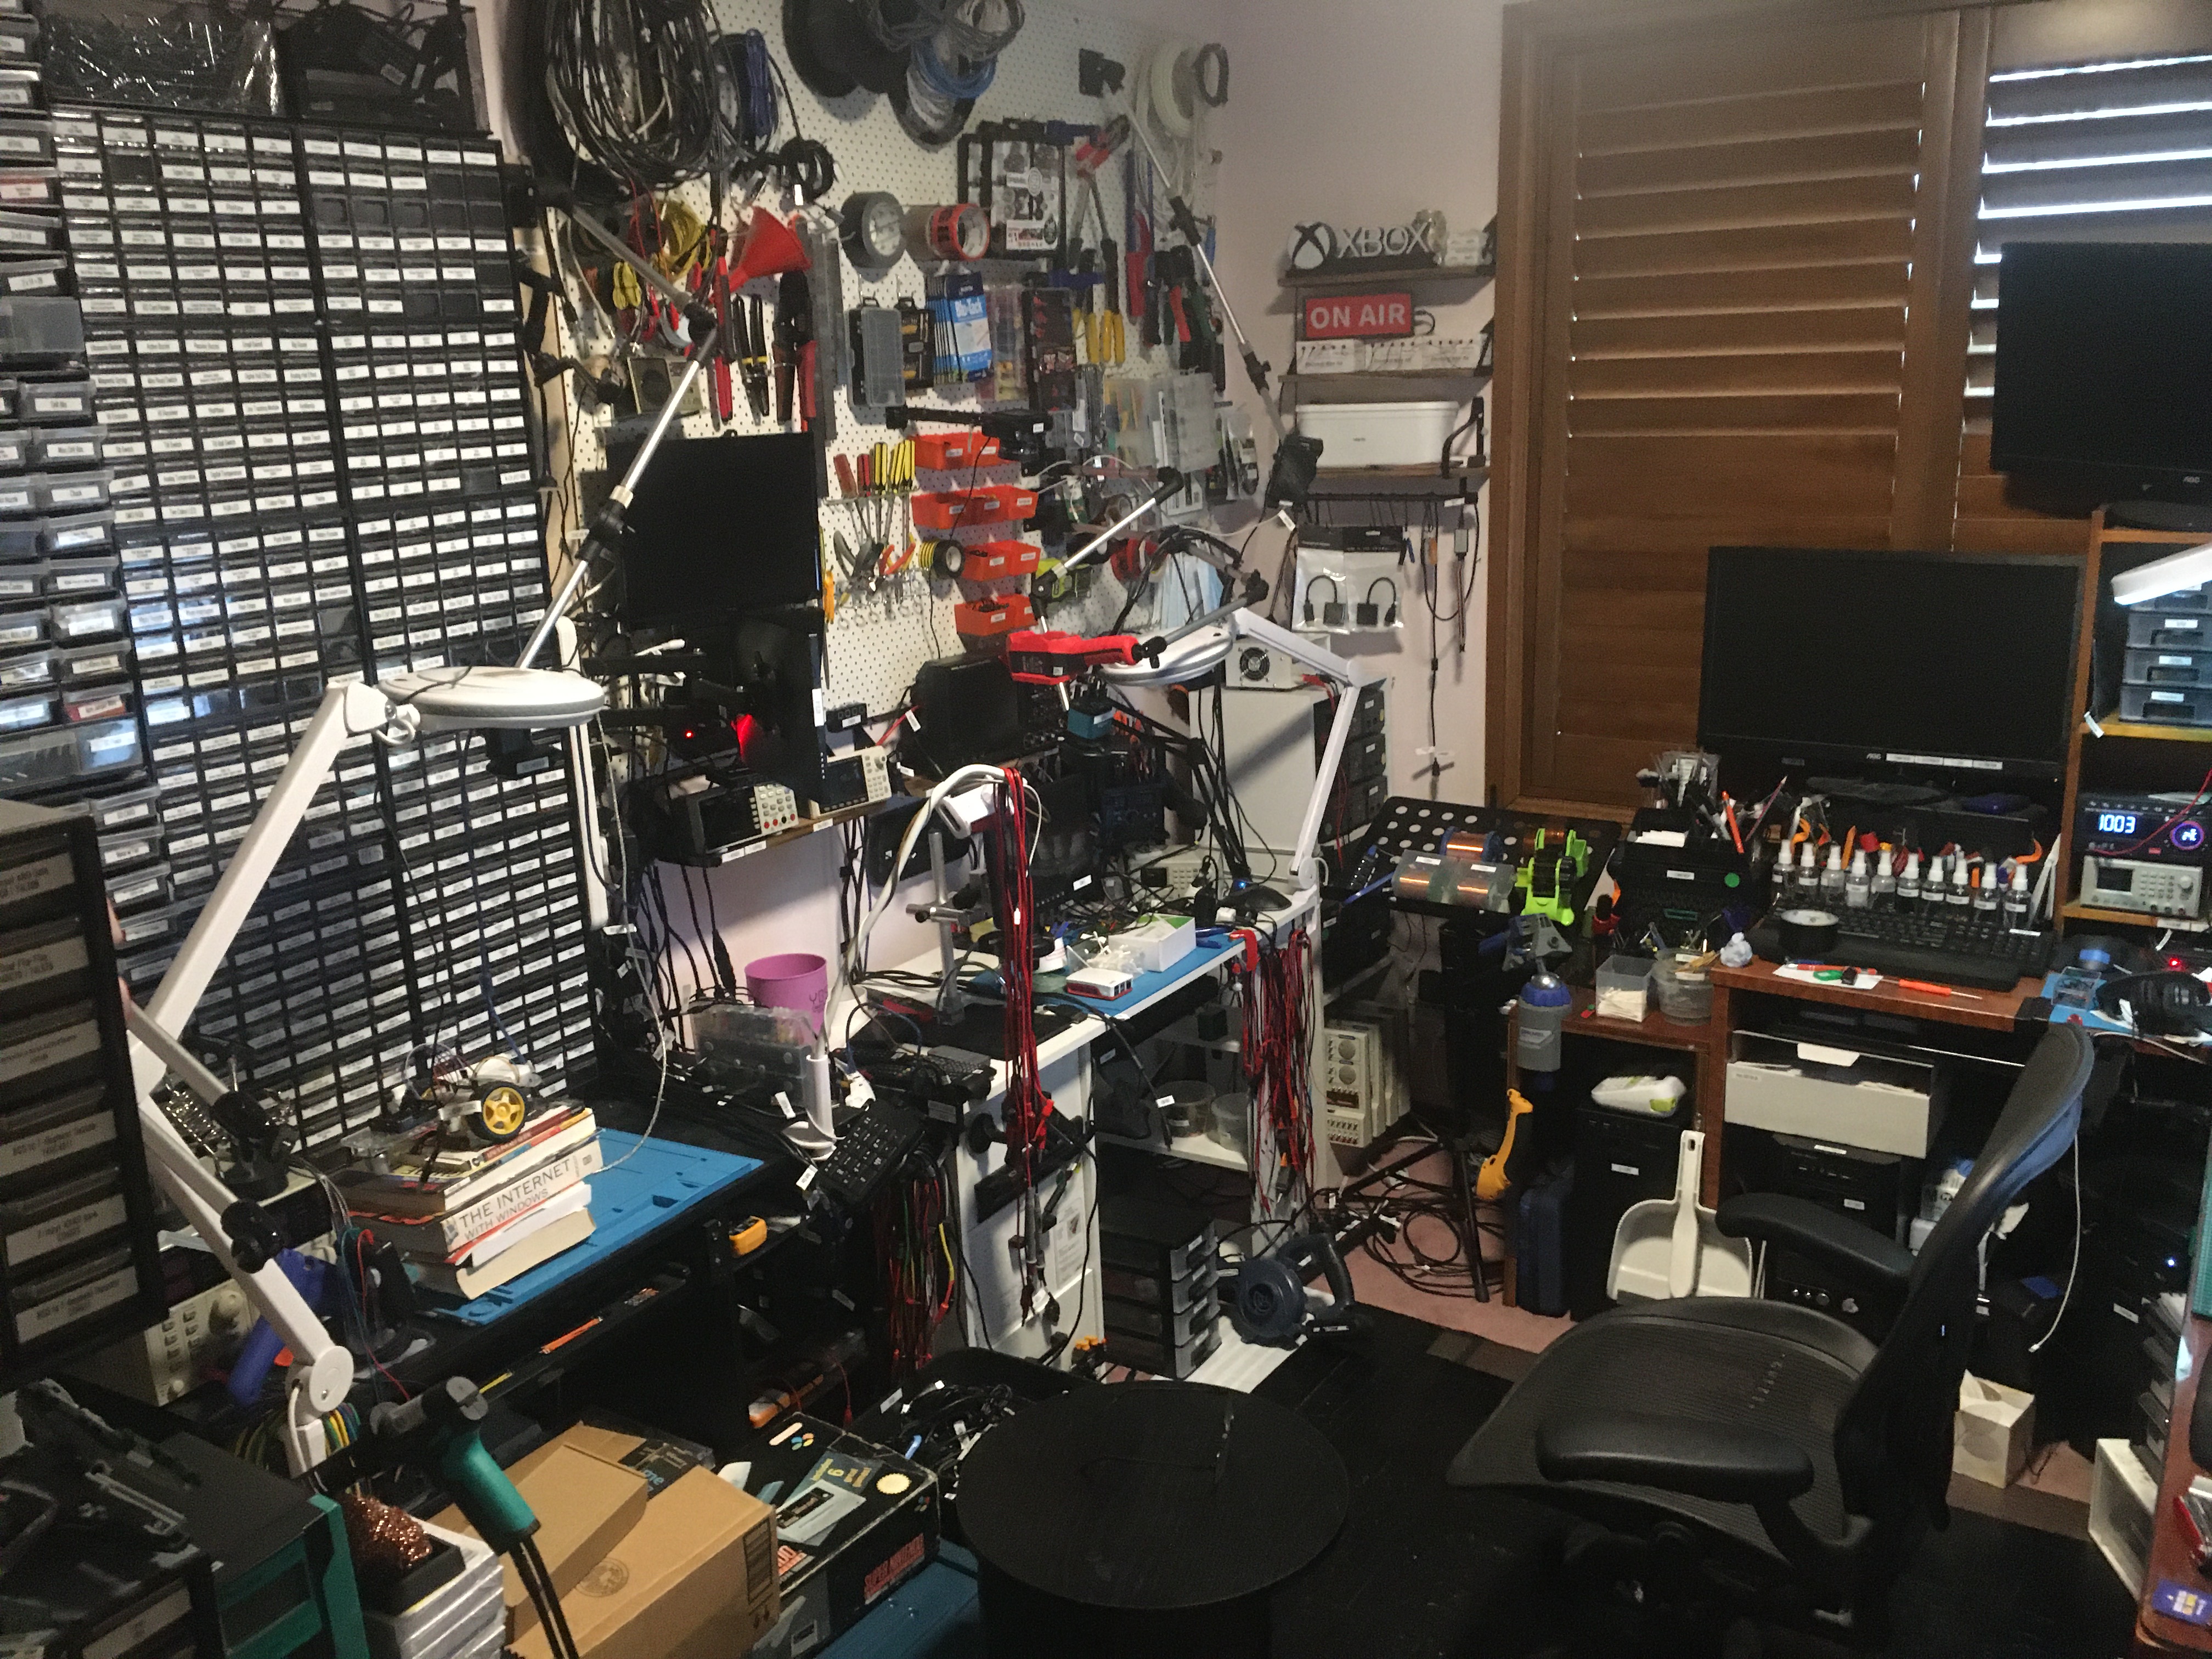
These are some of the cables I pulled out of the lab yesterday which haven’t been plugged back in yet. I’m just waiting for my new computer to be installed before I complete the cabling.
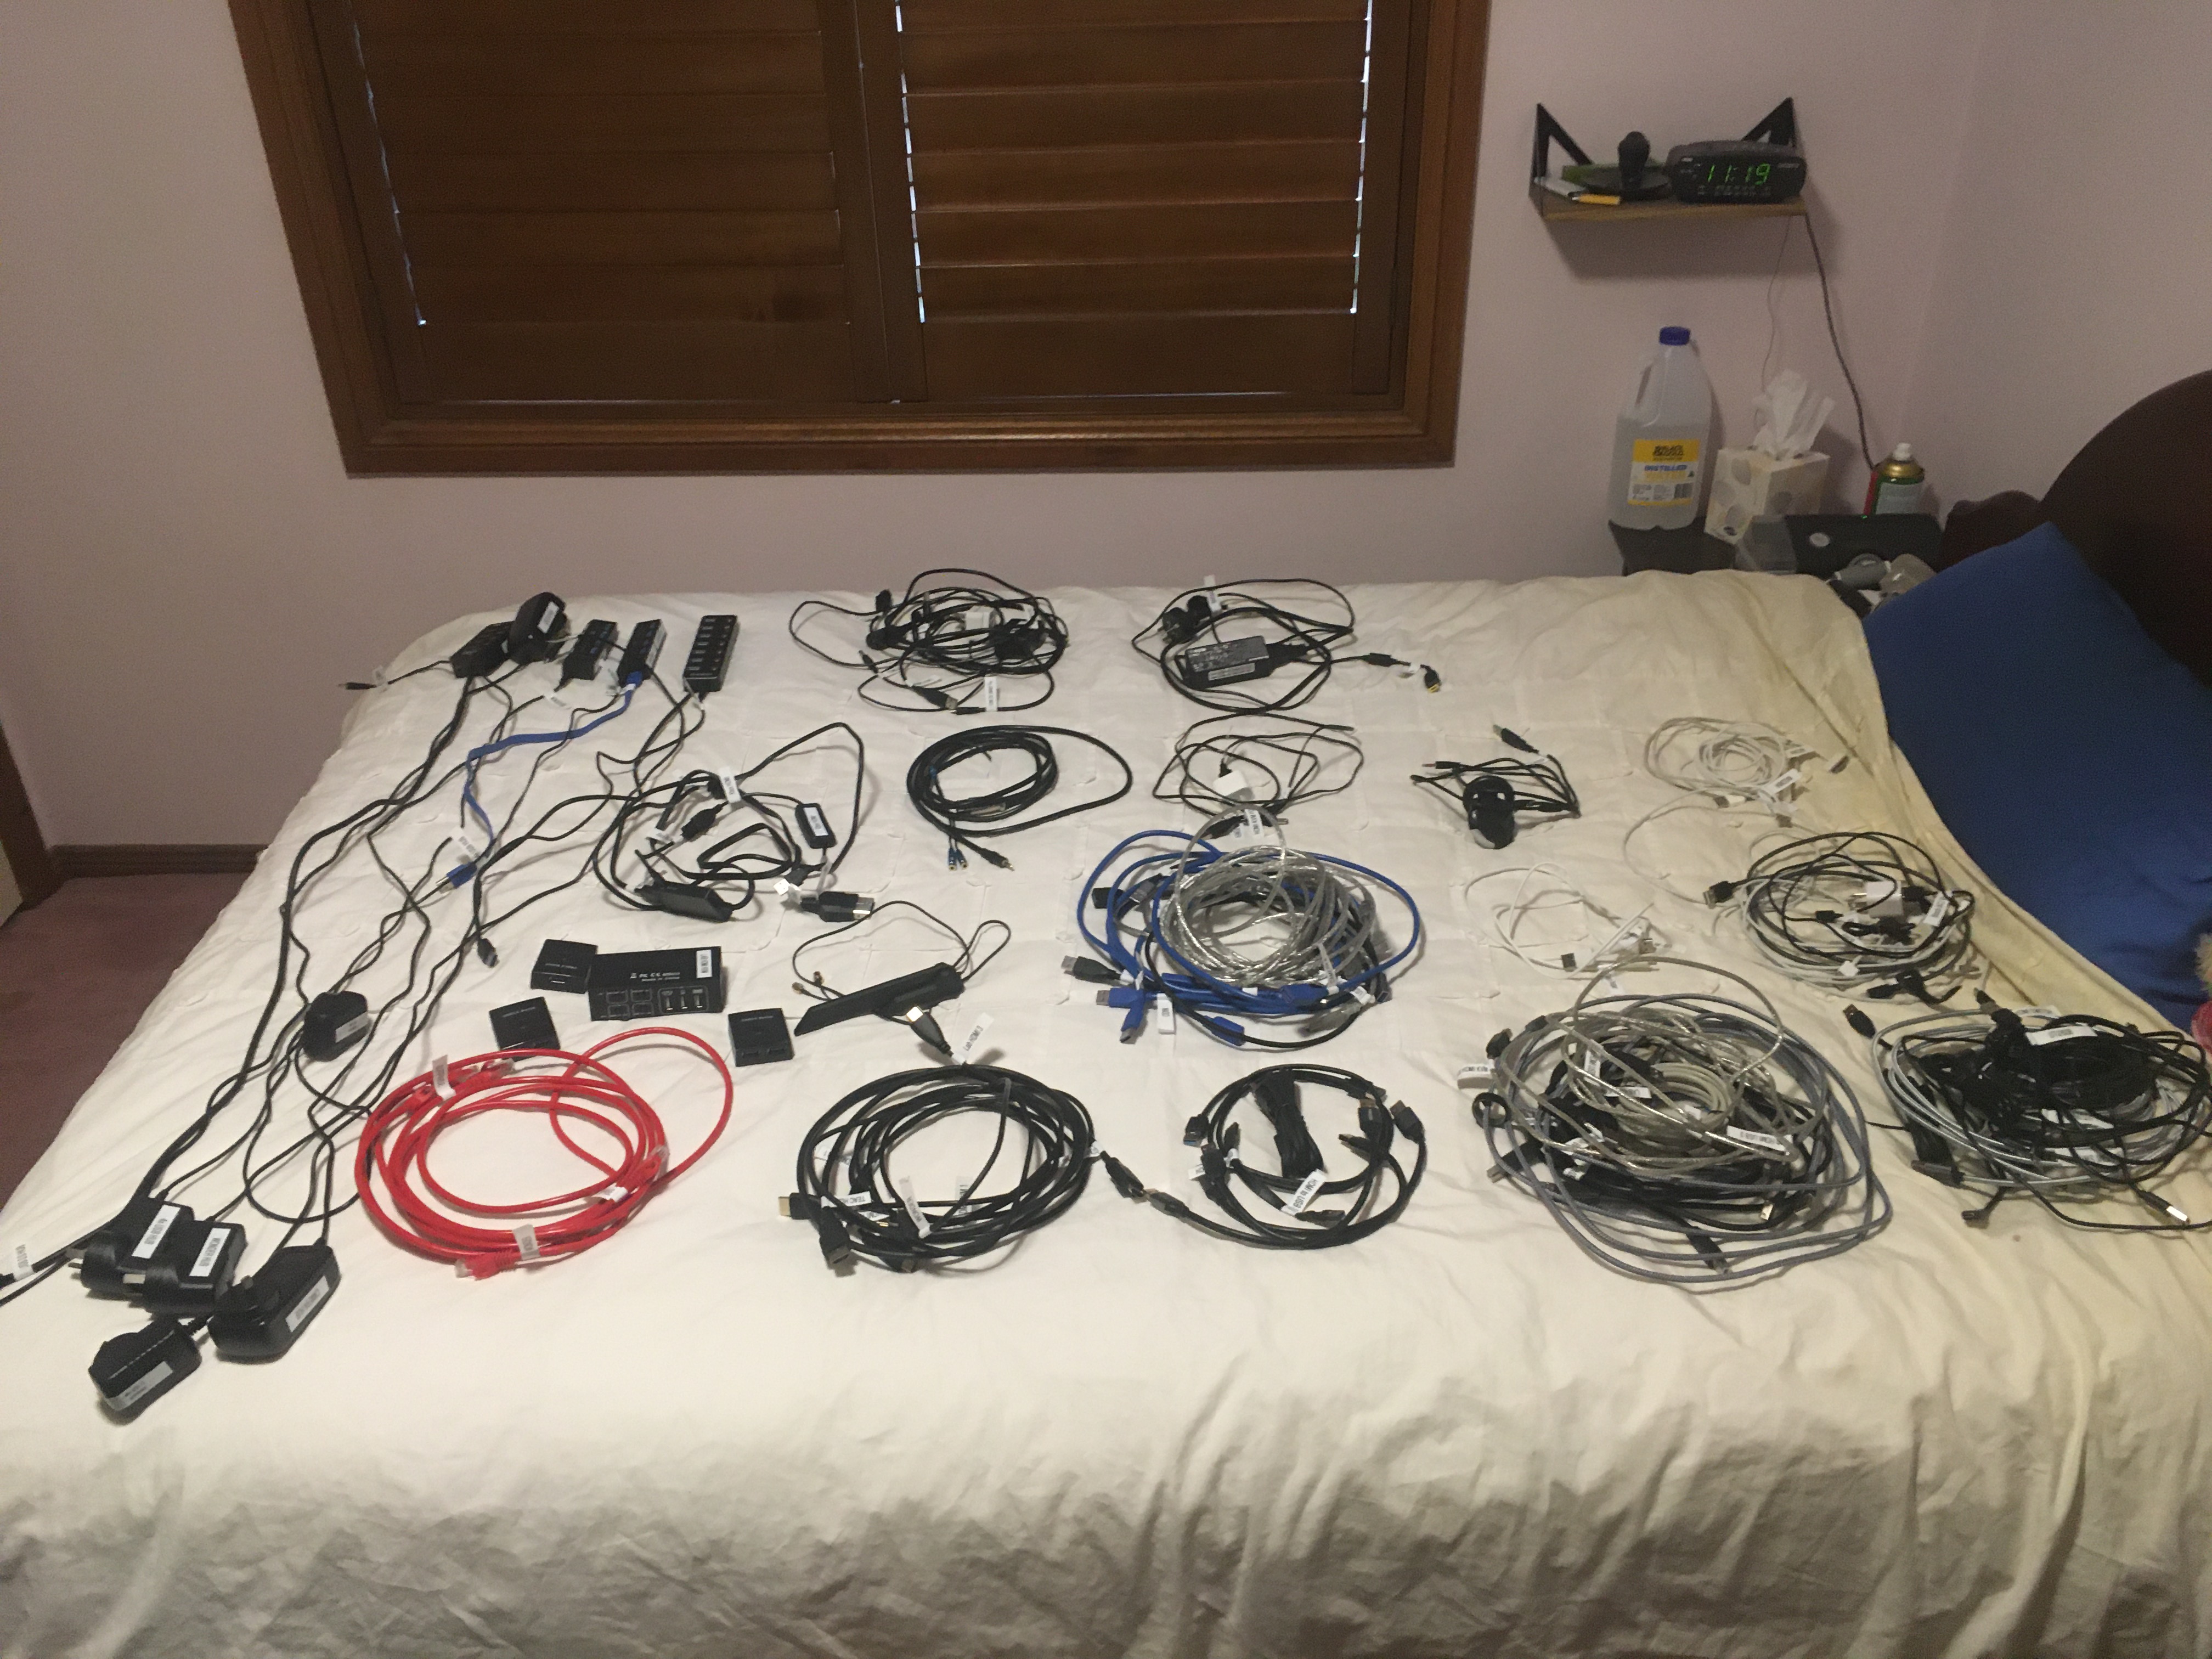
Man, my lab is in disarray. I’m getting ready to welcome my new computer ‘verve‘. Had to recable pretty much everything.
This post is part of my video blog: In The Lab With Jay Jay.
You can support this channel on Patreon: patreon.com/JohnElliotV
This is a long and unedited video of me upgrading my computer from ‘longing’ https://www.jj5.net/sixsigma/Longing to ‘lore’ https://www.jj5.net/sixsigma/Lore
As I said today was computer upgrade day. I made a video of me doing the upgrade, it runs for about two hours: Motherboard upgrade from ASUS PRIME B550M-A to ASUS ProArt B550-CREATOR. It was pretty uneventful and so far it seems to have been successful too. Yay.
Thanks very much for watching! And please remember to hit like and subscribe! :)
Following is a product I use picked at random from my collection which may appear in my videos. Clicking through on this to find and click on the green affiliate links before purchasing from eBay or AliExpress is a great way to support the channel at no cost to you. Thanks!
aToolTour Black Hexagon Deburring Drill Bit notes notes |
Let’s go shopping!
Well I’ve been procrastinating on, and preparing for, my server upgrade and today is gonna be the day.
Later this afternoon I will be upgrading ‘longing‘ to ‘lore‘.
This will involve:
Fingers crossed. Wish me luck!
I found this kickass resource: Super Nintendo Development Wiki. See for instance Schematics, Ports, and Pinouts.
One of my YouTube viewers Max donated some stuff to the channel today. How cool is that!? Expect to see some Nintendo awesomeness in the near future. <3
I think my next laptop might be a Framework Laptop.
