This post is part of my video blog and you can find more information about this video over here.
You can support this channel on Patreon: patreon.com/JohnElliotV
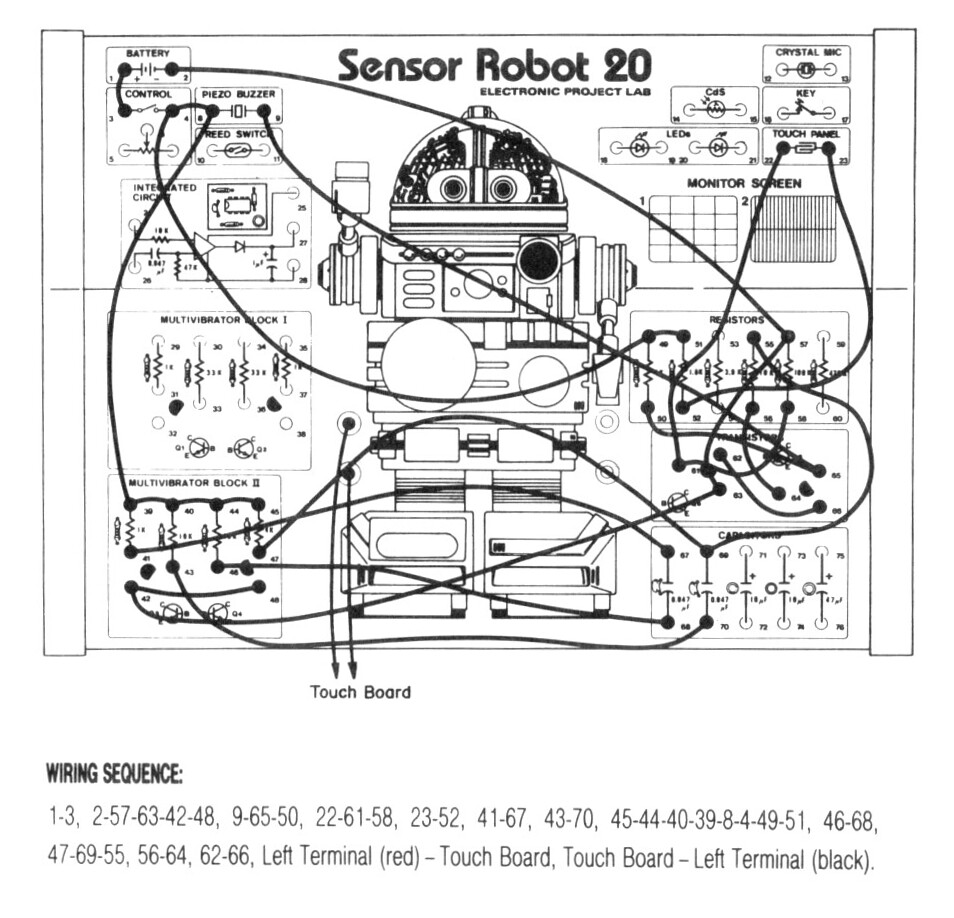
In this video we conclude our Maxitronix 20in1.
The videos we made for this feature of the show:
- Introducing Maxitronix 20in1
- Brightness Alarm | Project 1/20
- Darkness Alarm | Project 2/20
- Electronic Candles | Project 3/20
- Light Alarm With Latch | Project 4/20
- Light-Controlled Organ | Project 5/20
- Photometer | Project 6/20
- Shot In The Dark I | Project 7/20
- Shot In The Dark II | Project 8/20
- Visitor Alarm | Project 9/20
- Speech Conductor | Project 10/20
- Burglar Alarm | Project 11/20
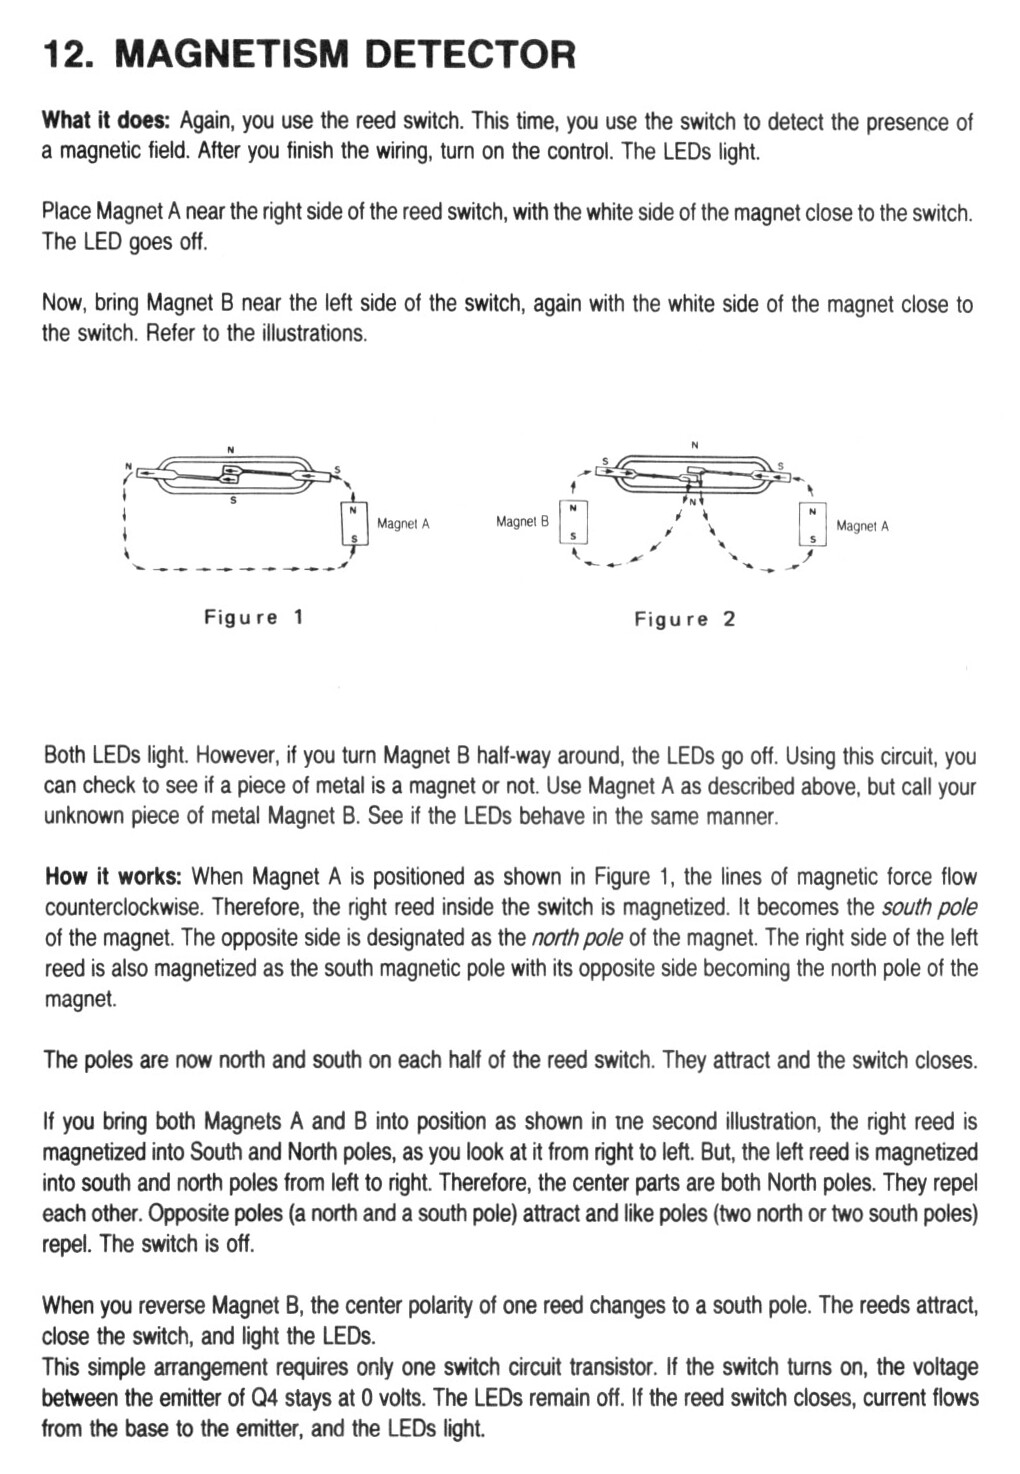
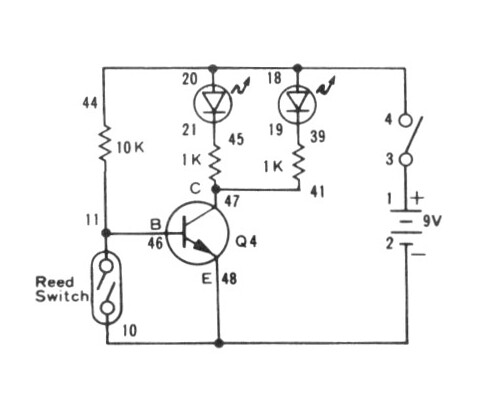
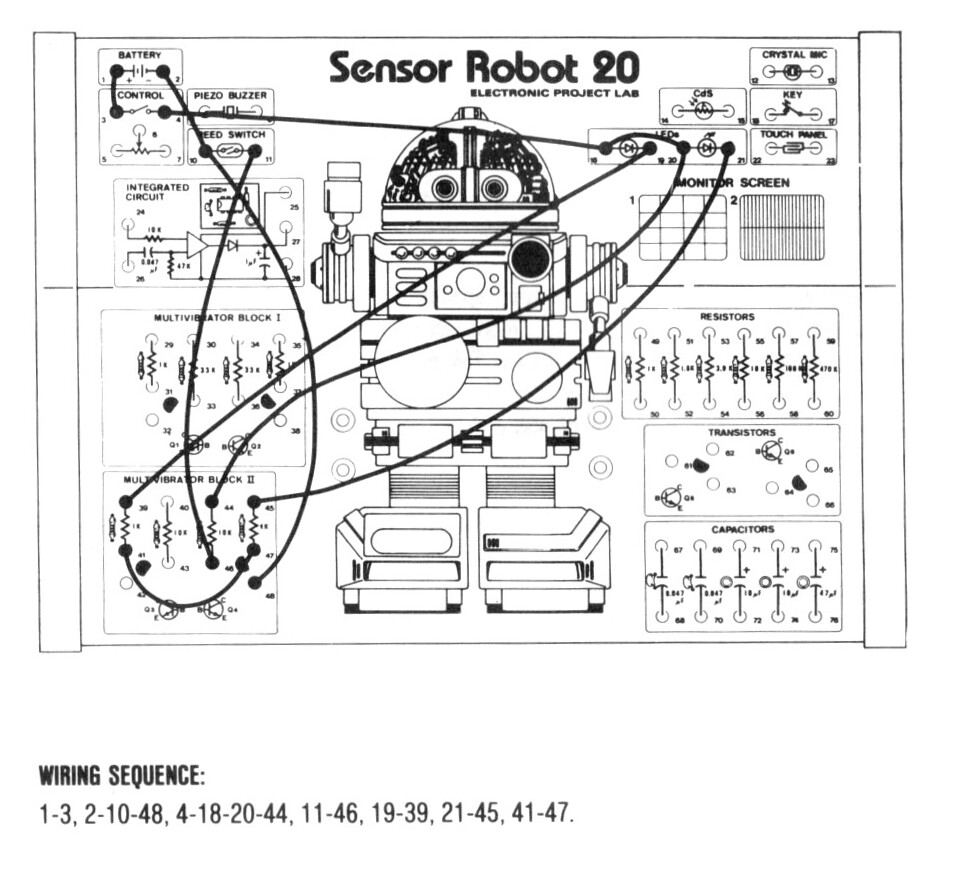
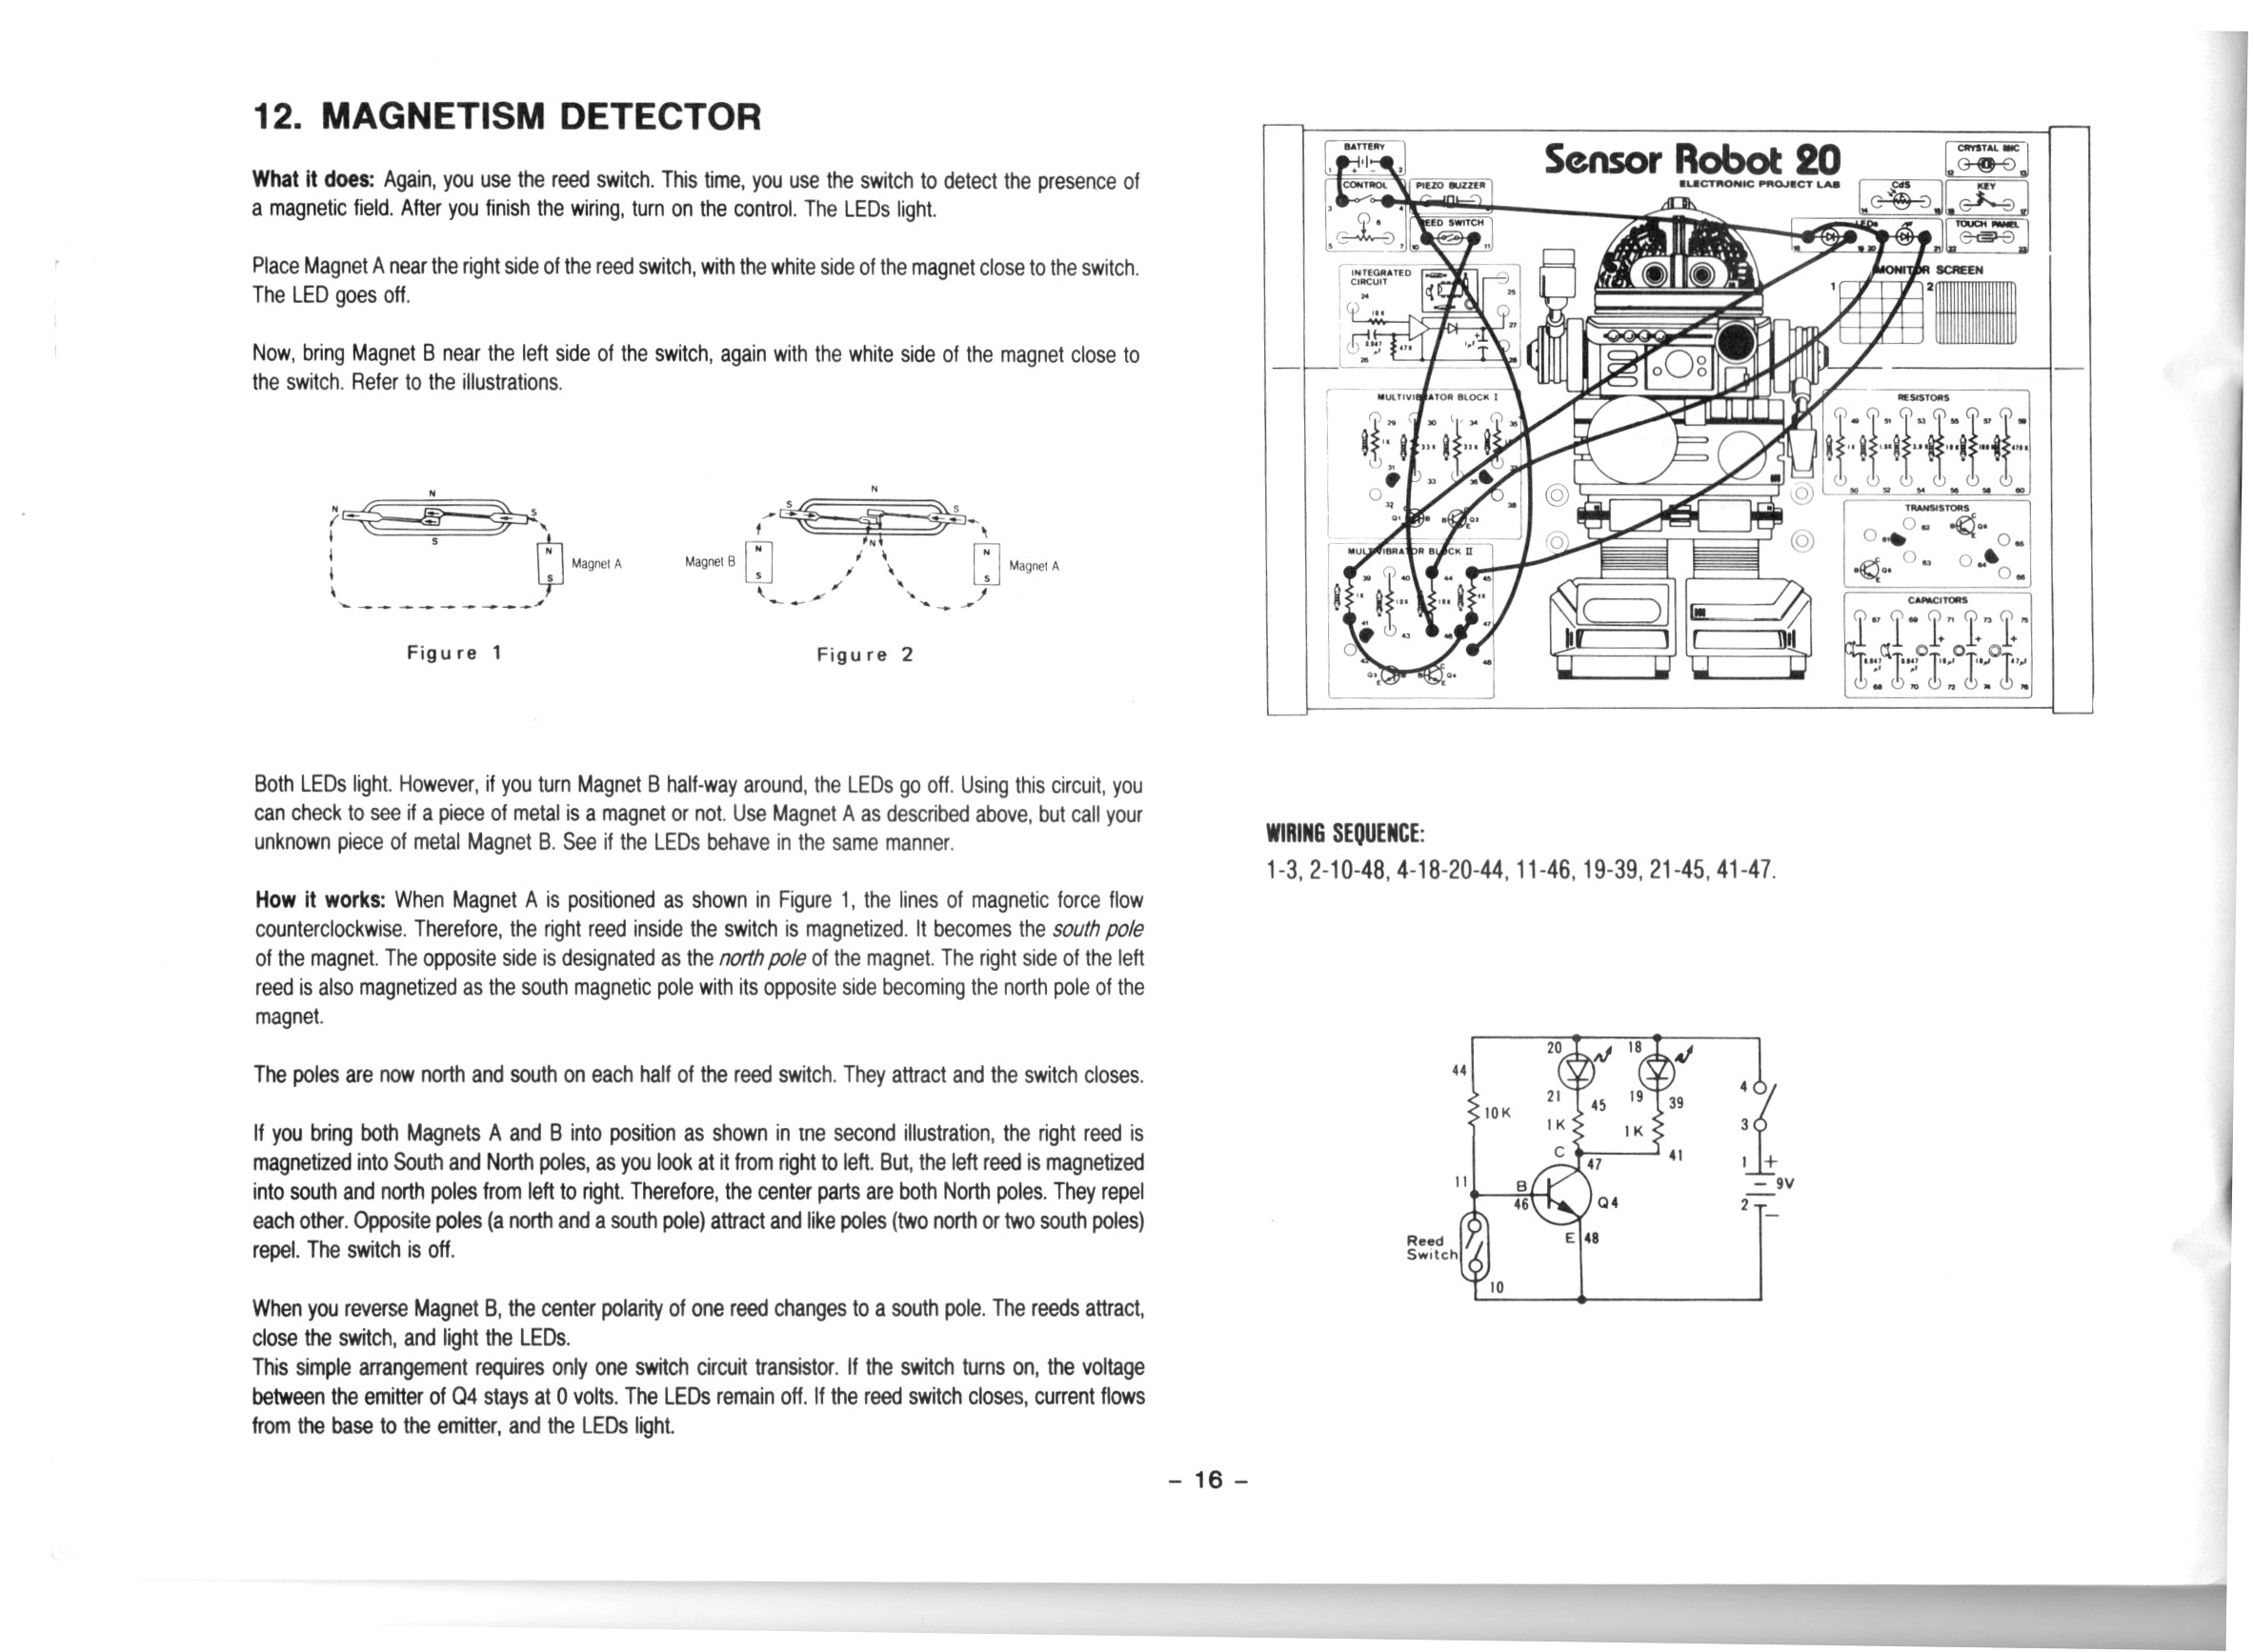
- Magnetism Detector | Project 12/20
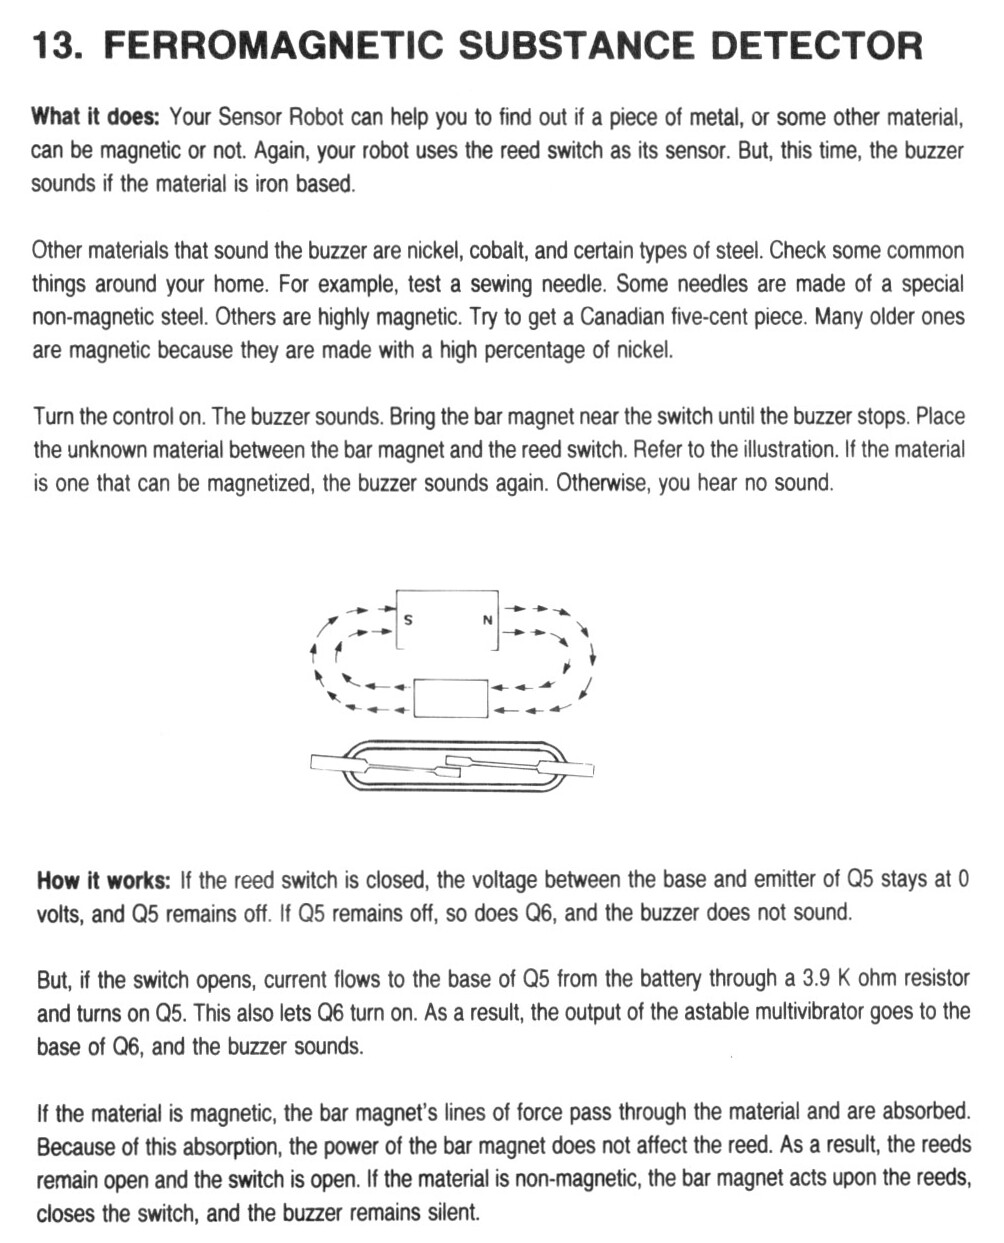
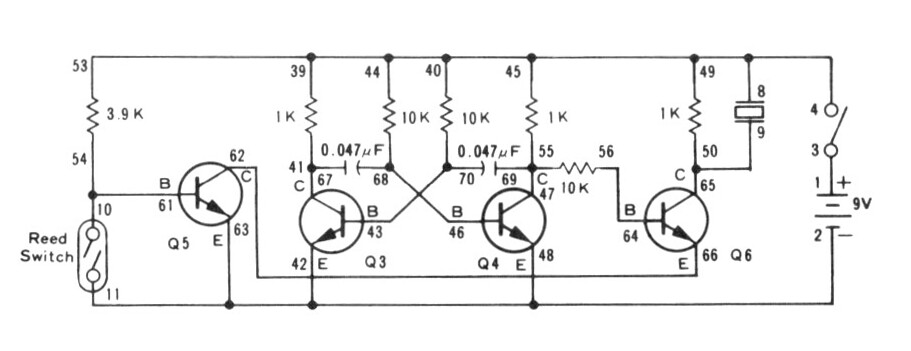
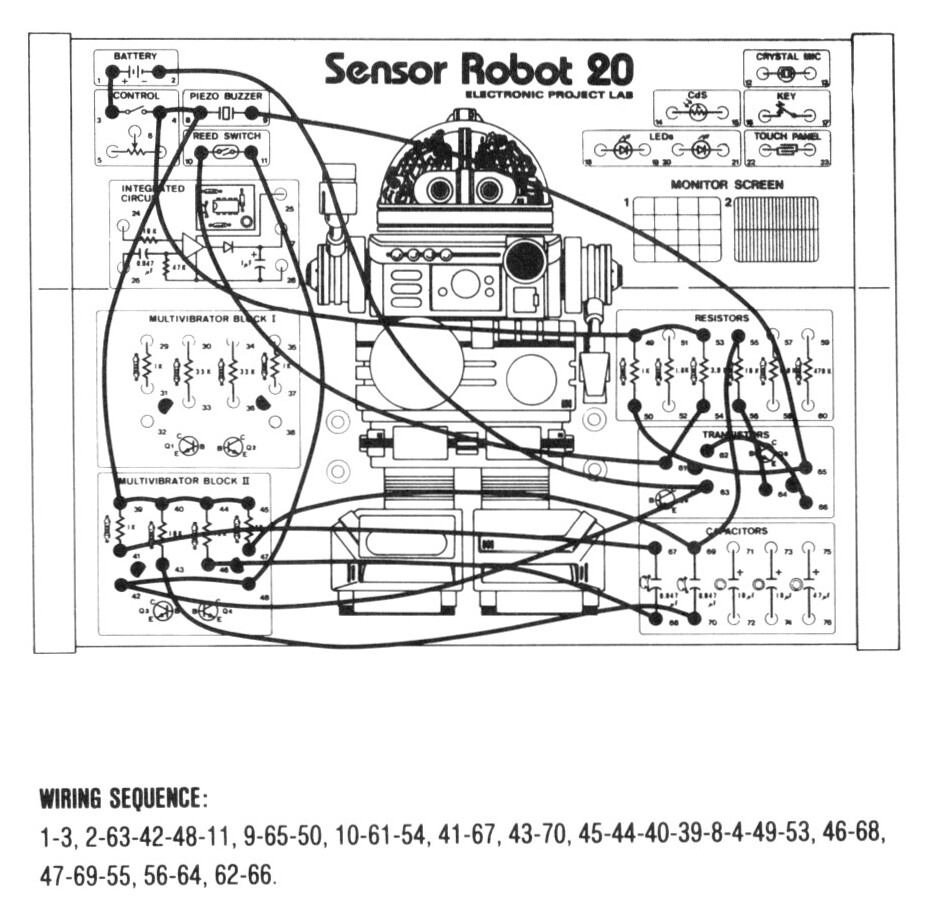
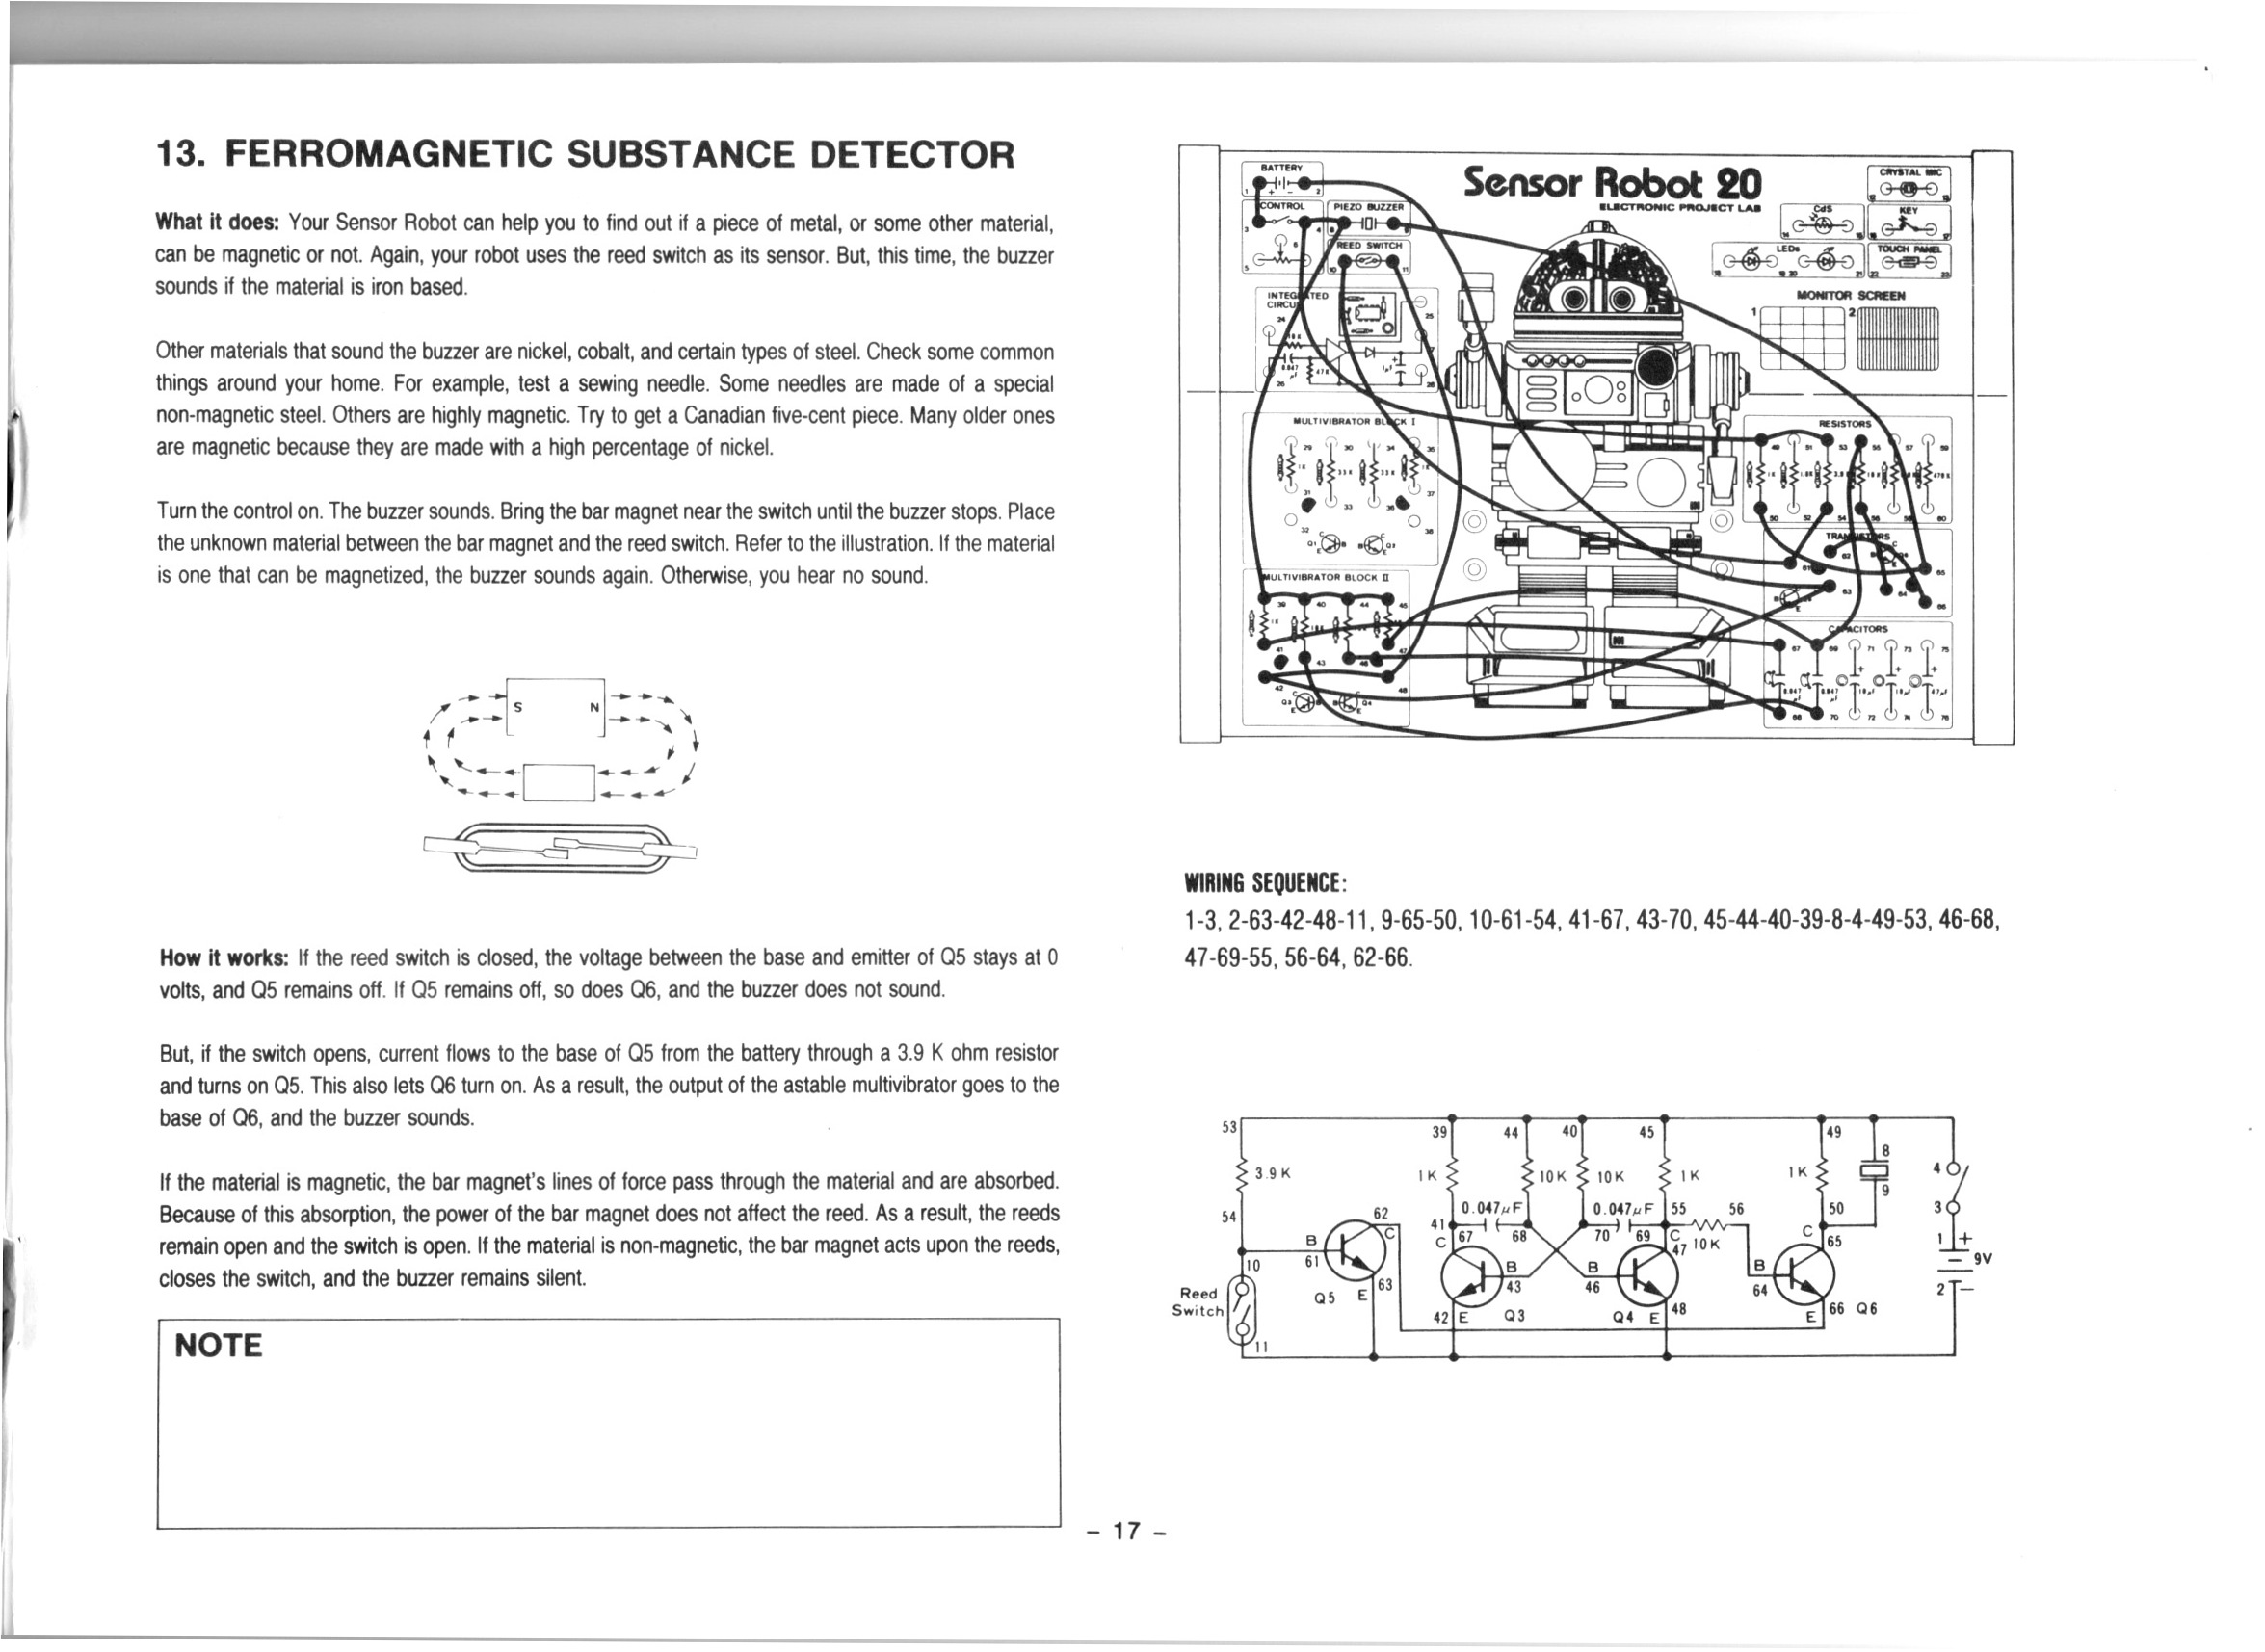
- Ferromagnetic Substance Detector | Project 13/20
- Non-Touch Switch | Project 14/20
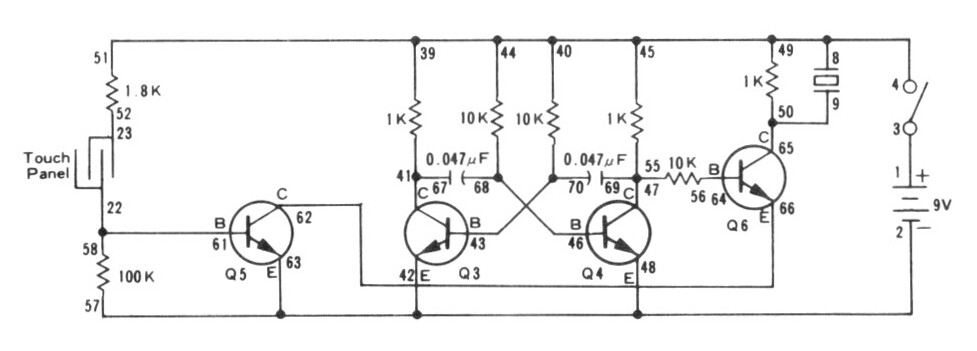
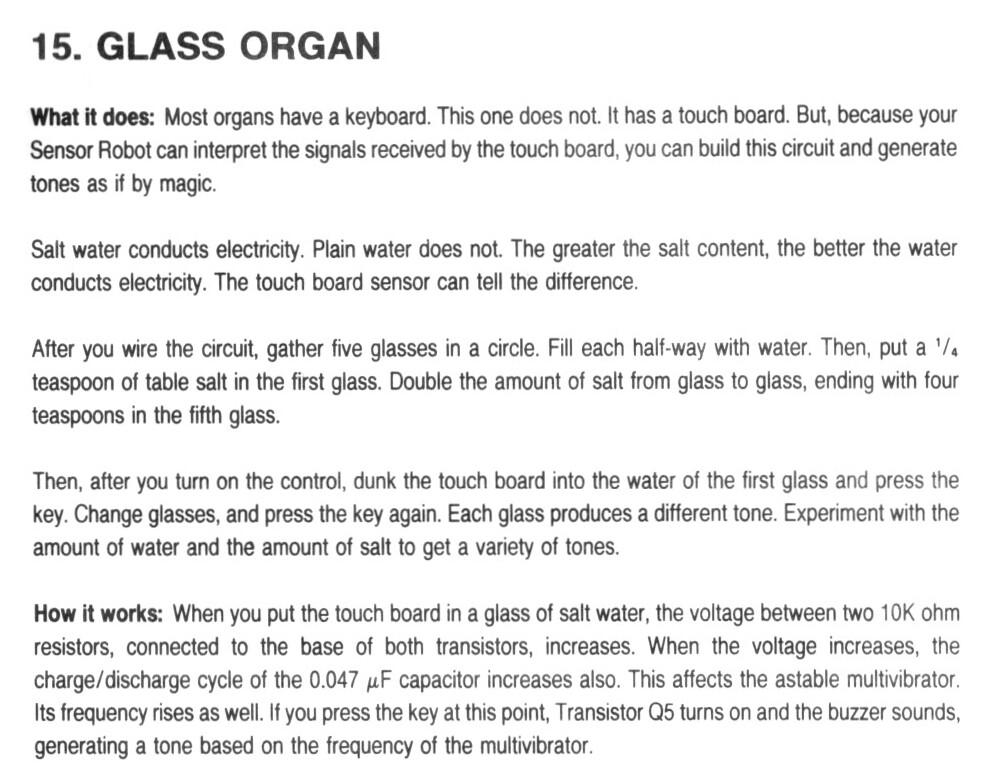
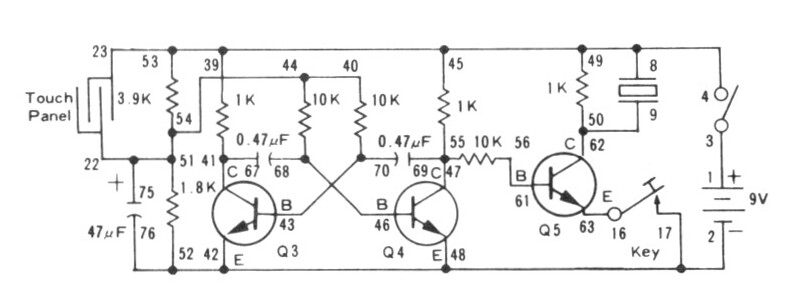
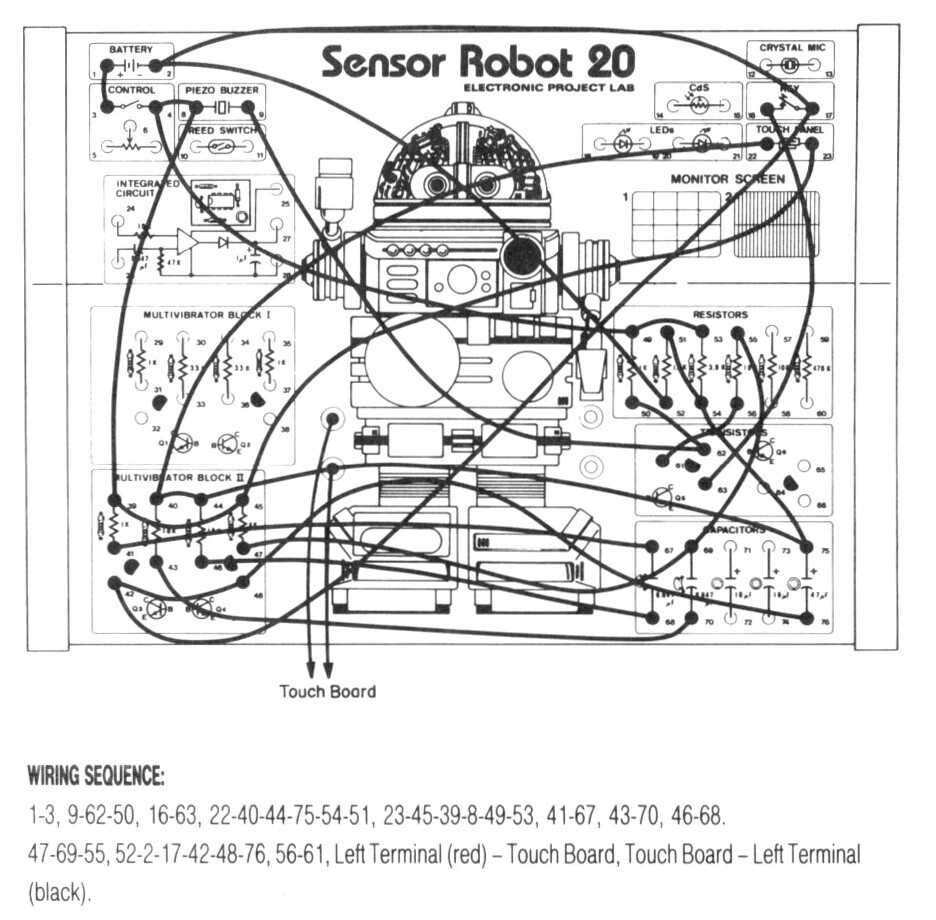
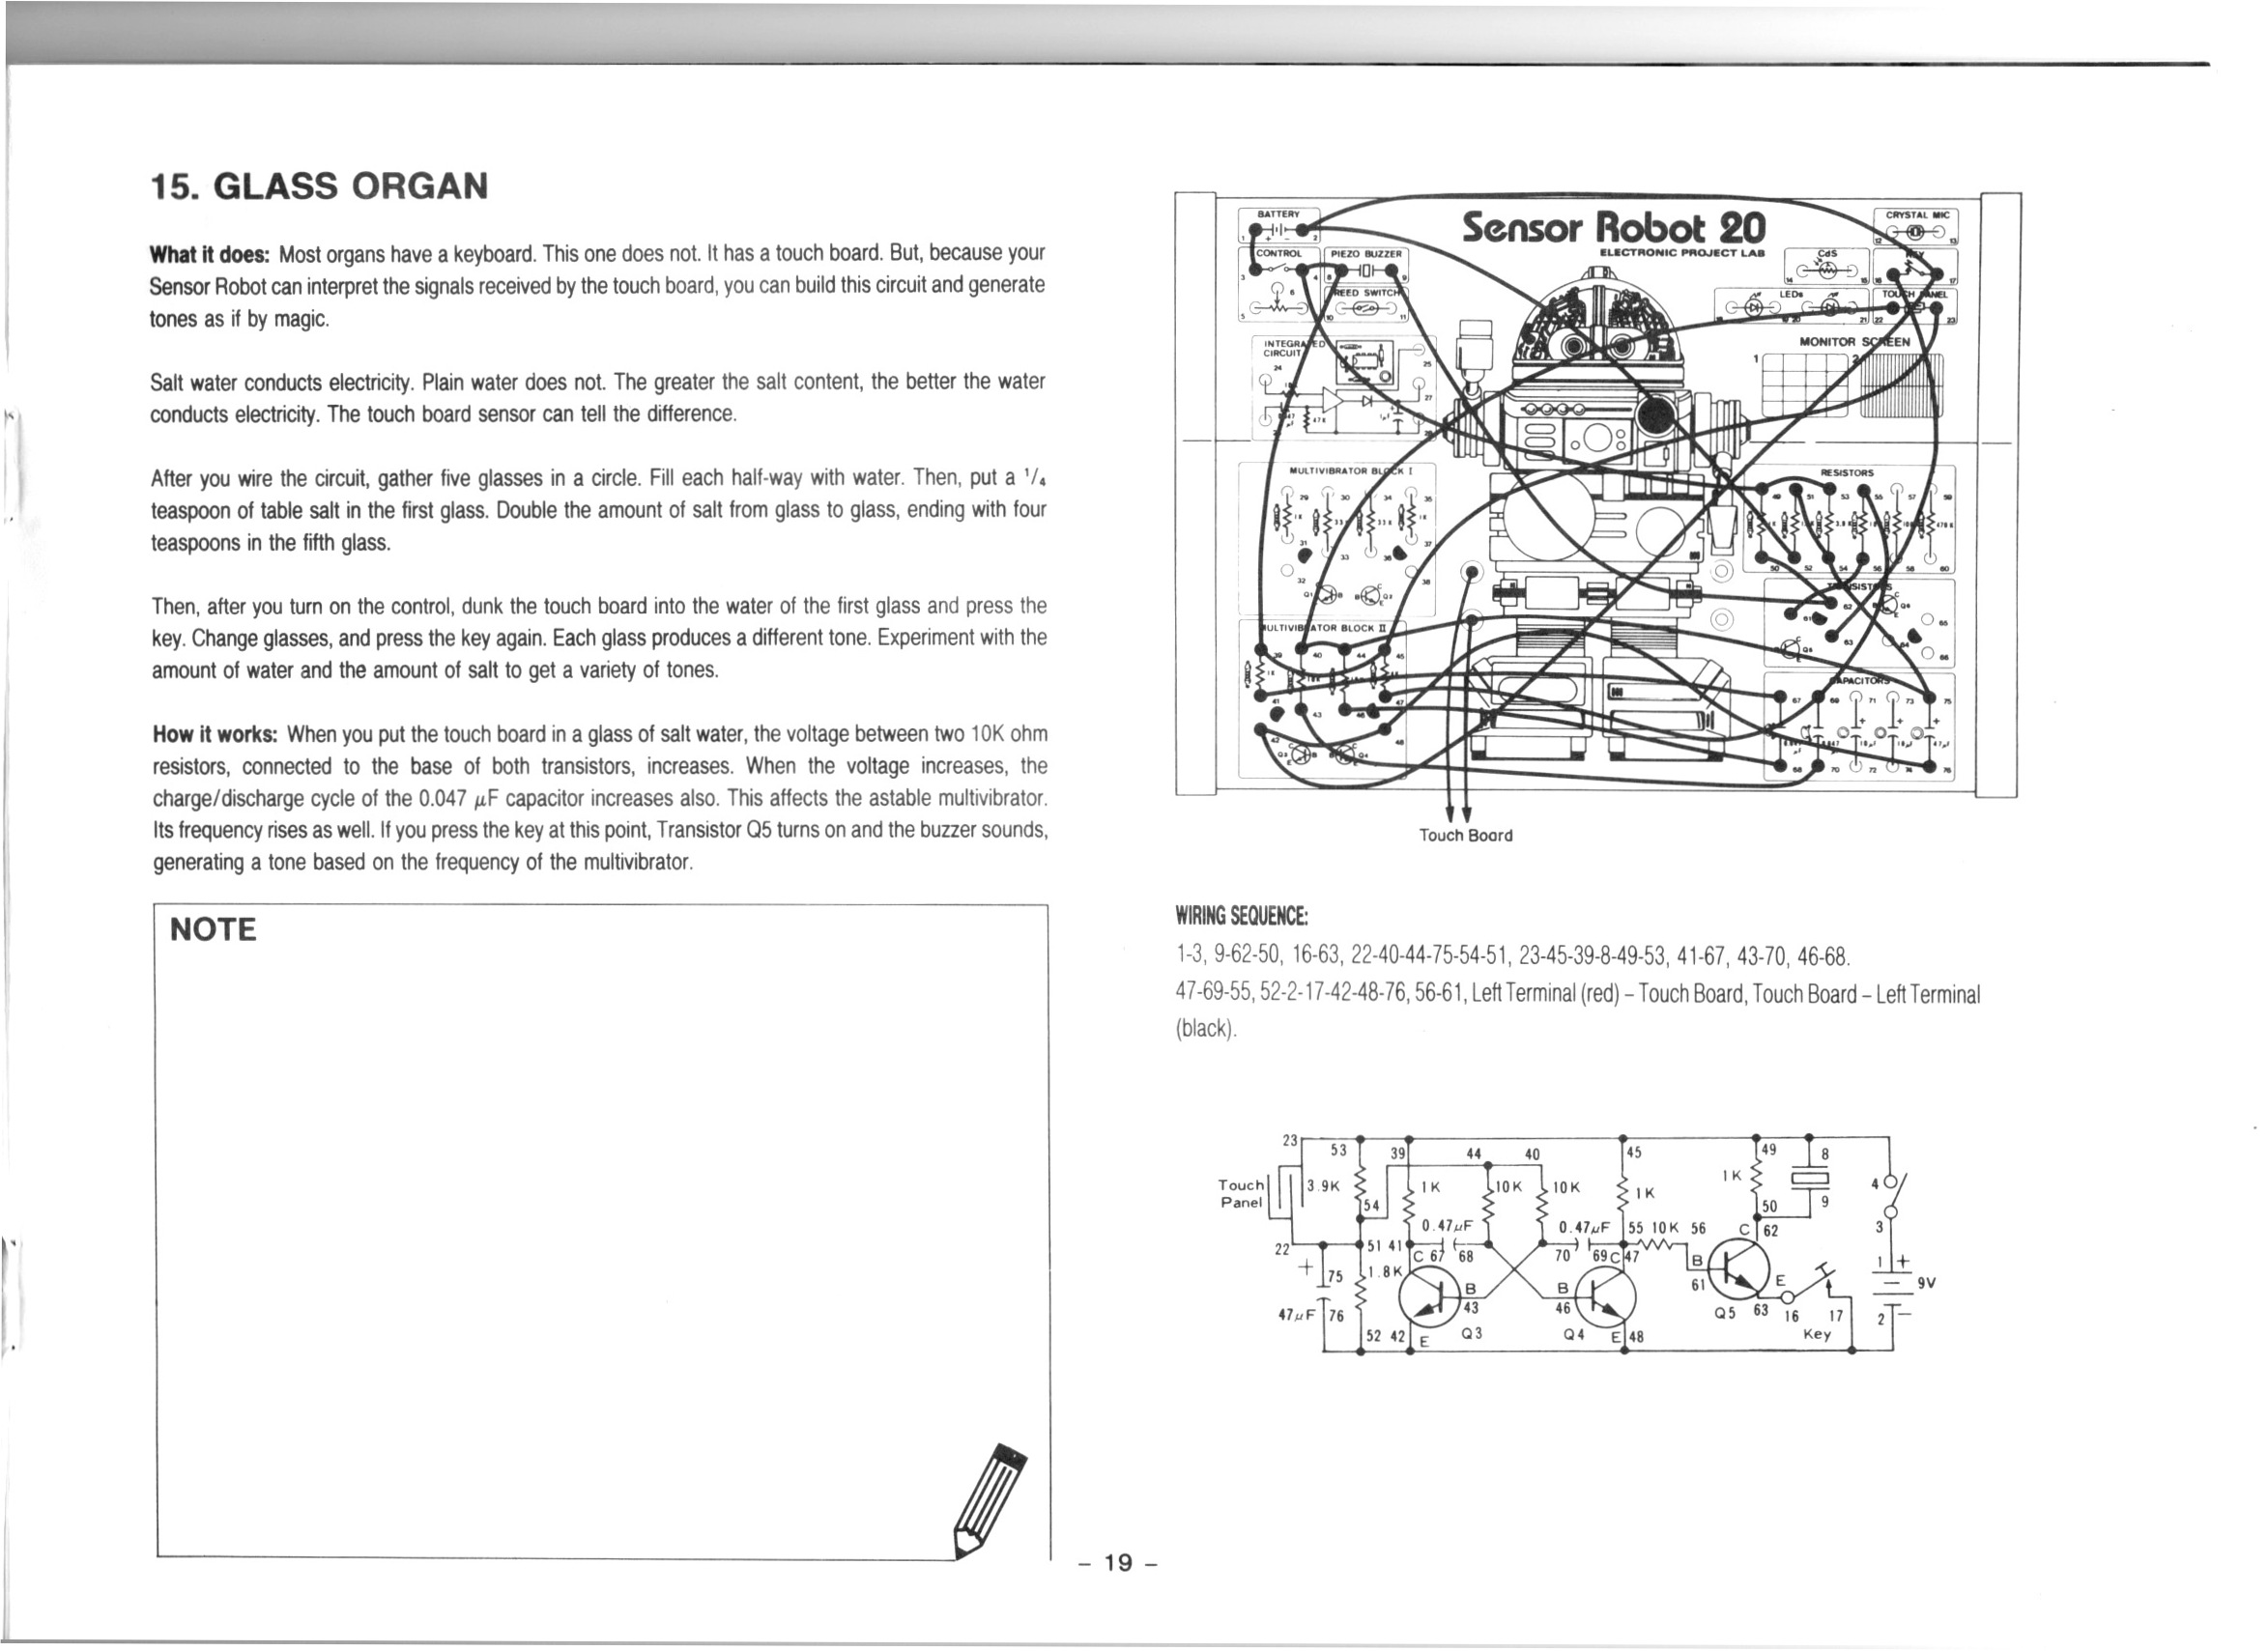
- Glass Organ | Project 15/20
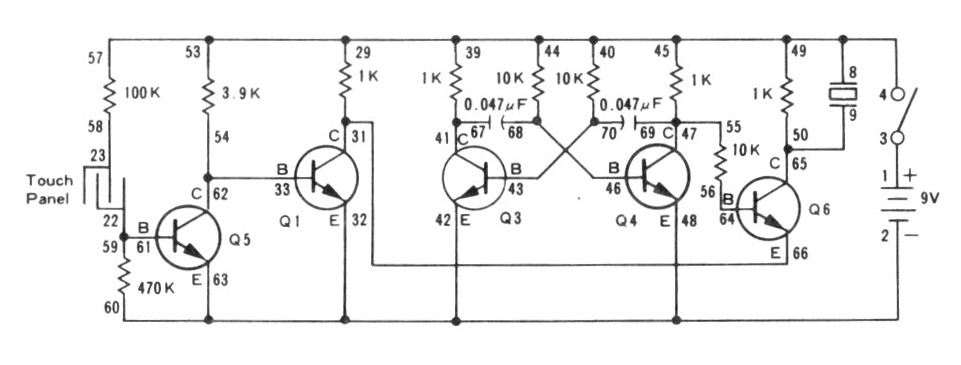
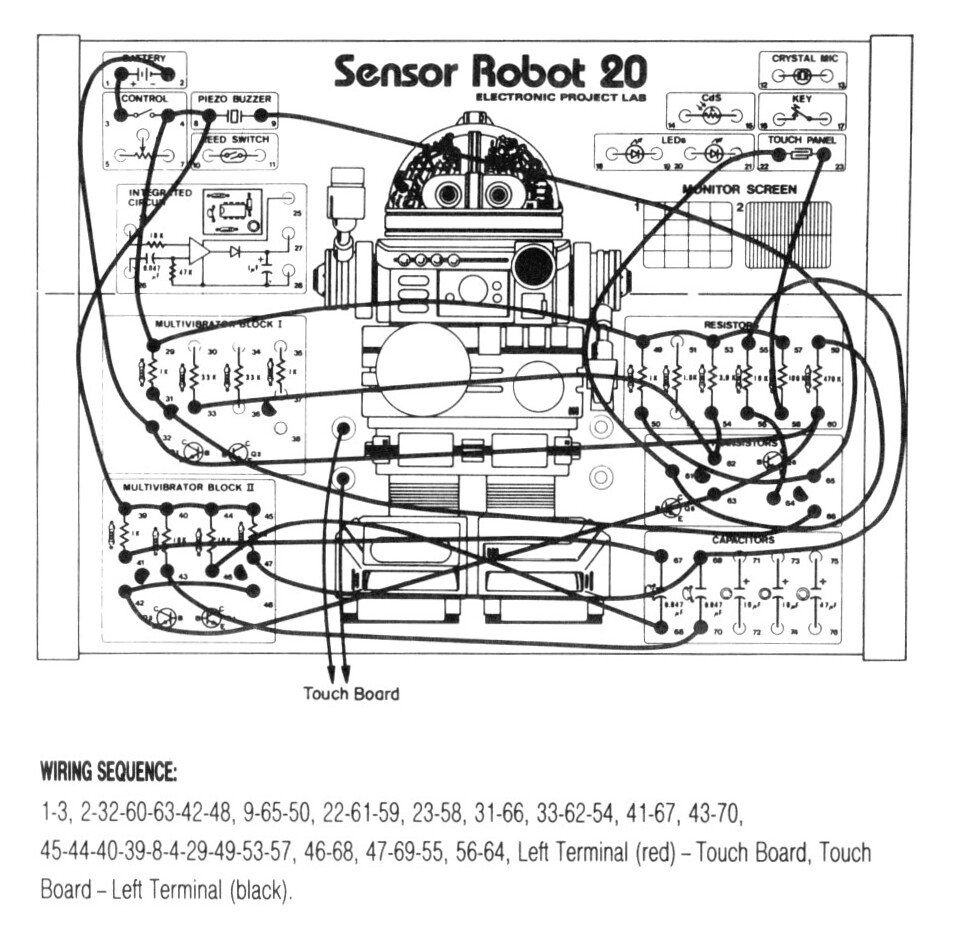
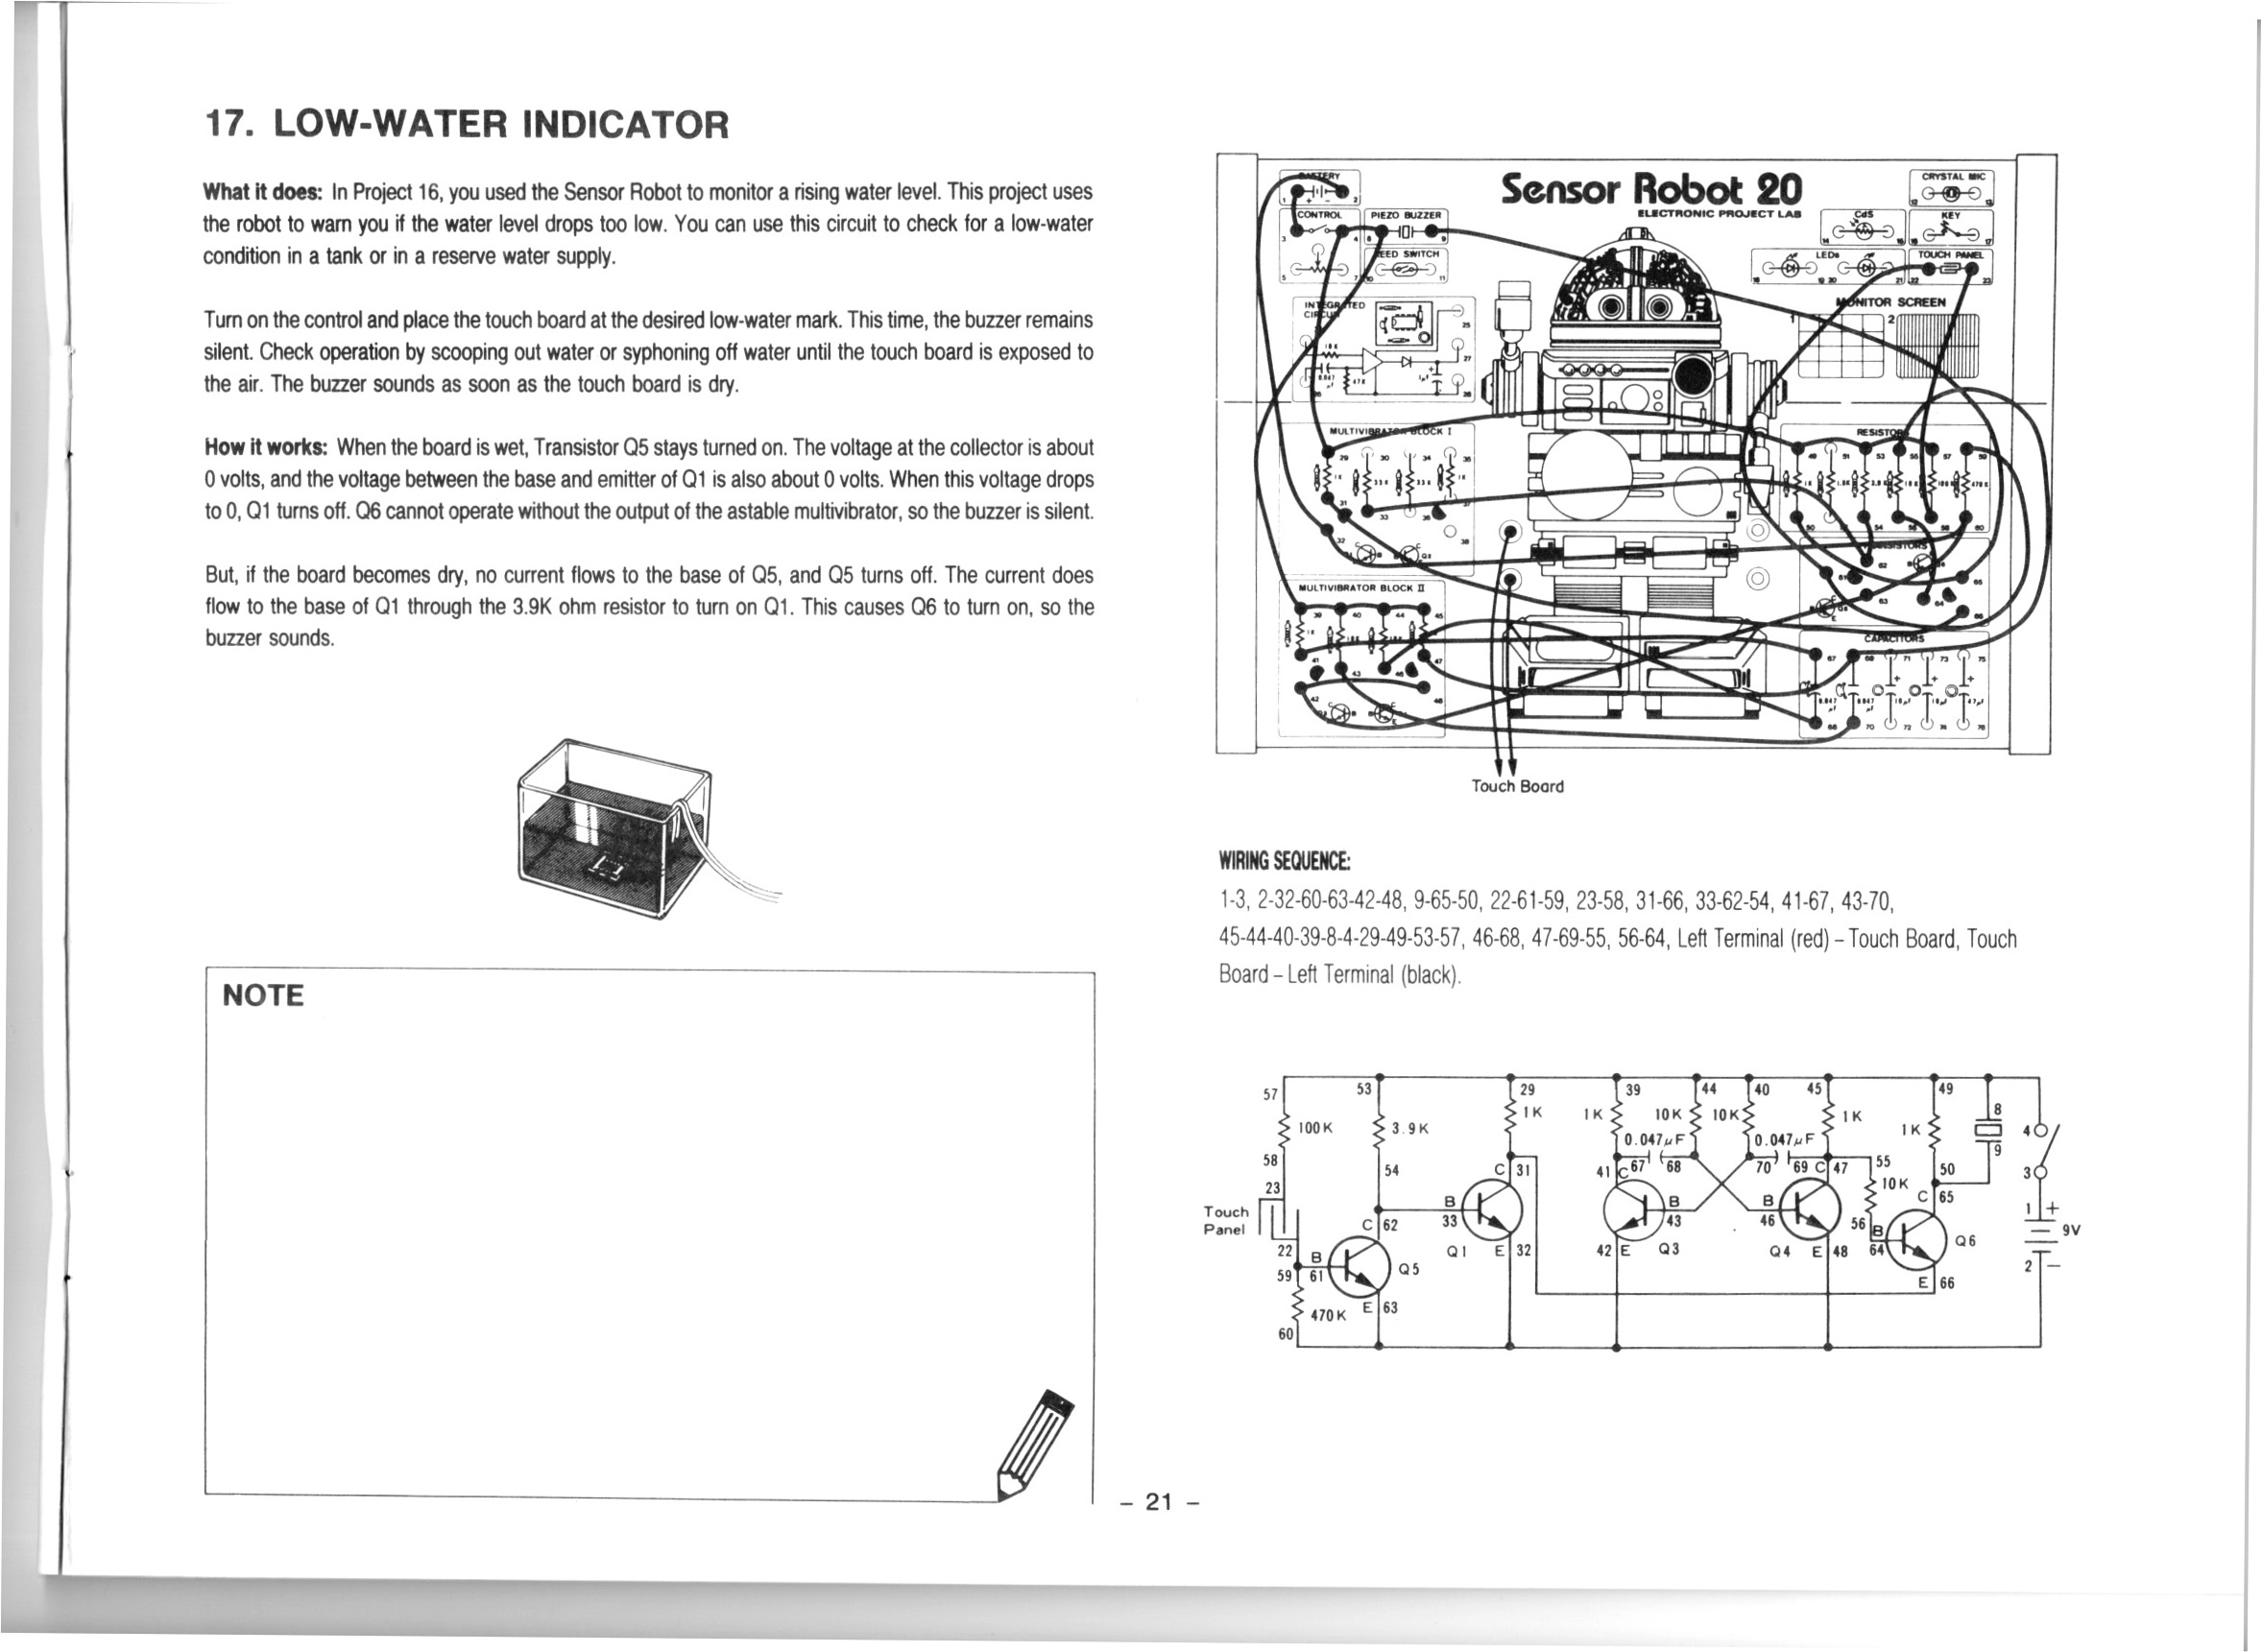
- High-Water Indicator | Project 16/20
- Low-Water Indicator | Project 17/20
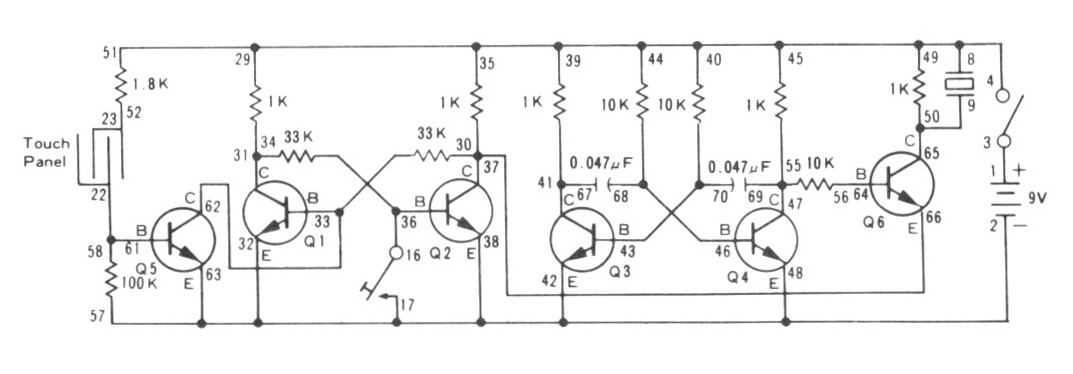
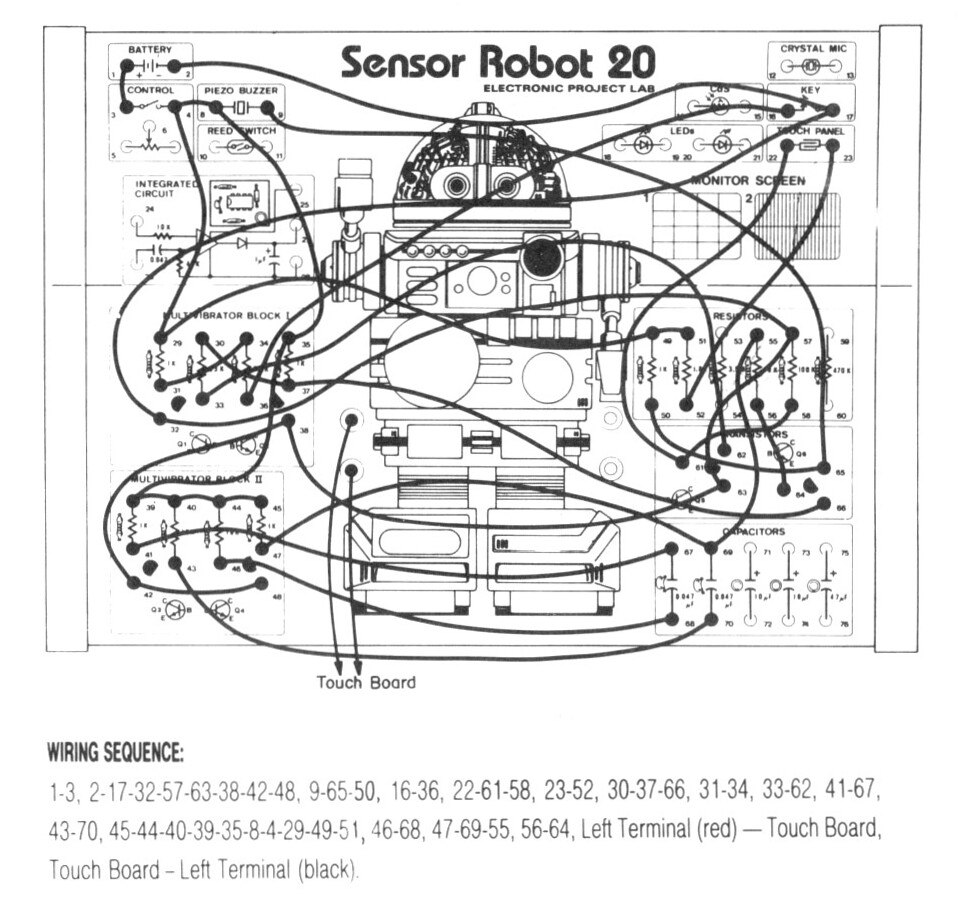
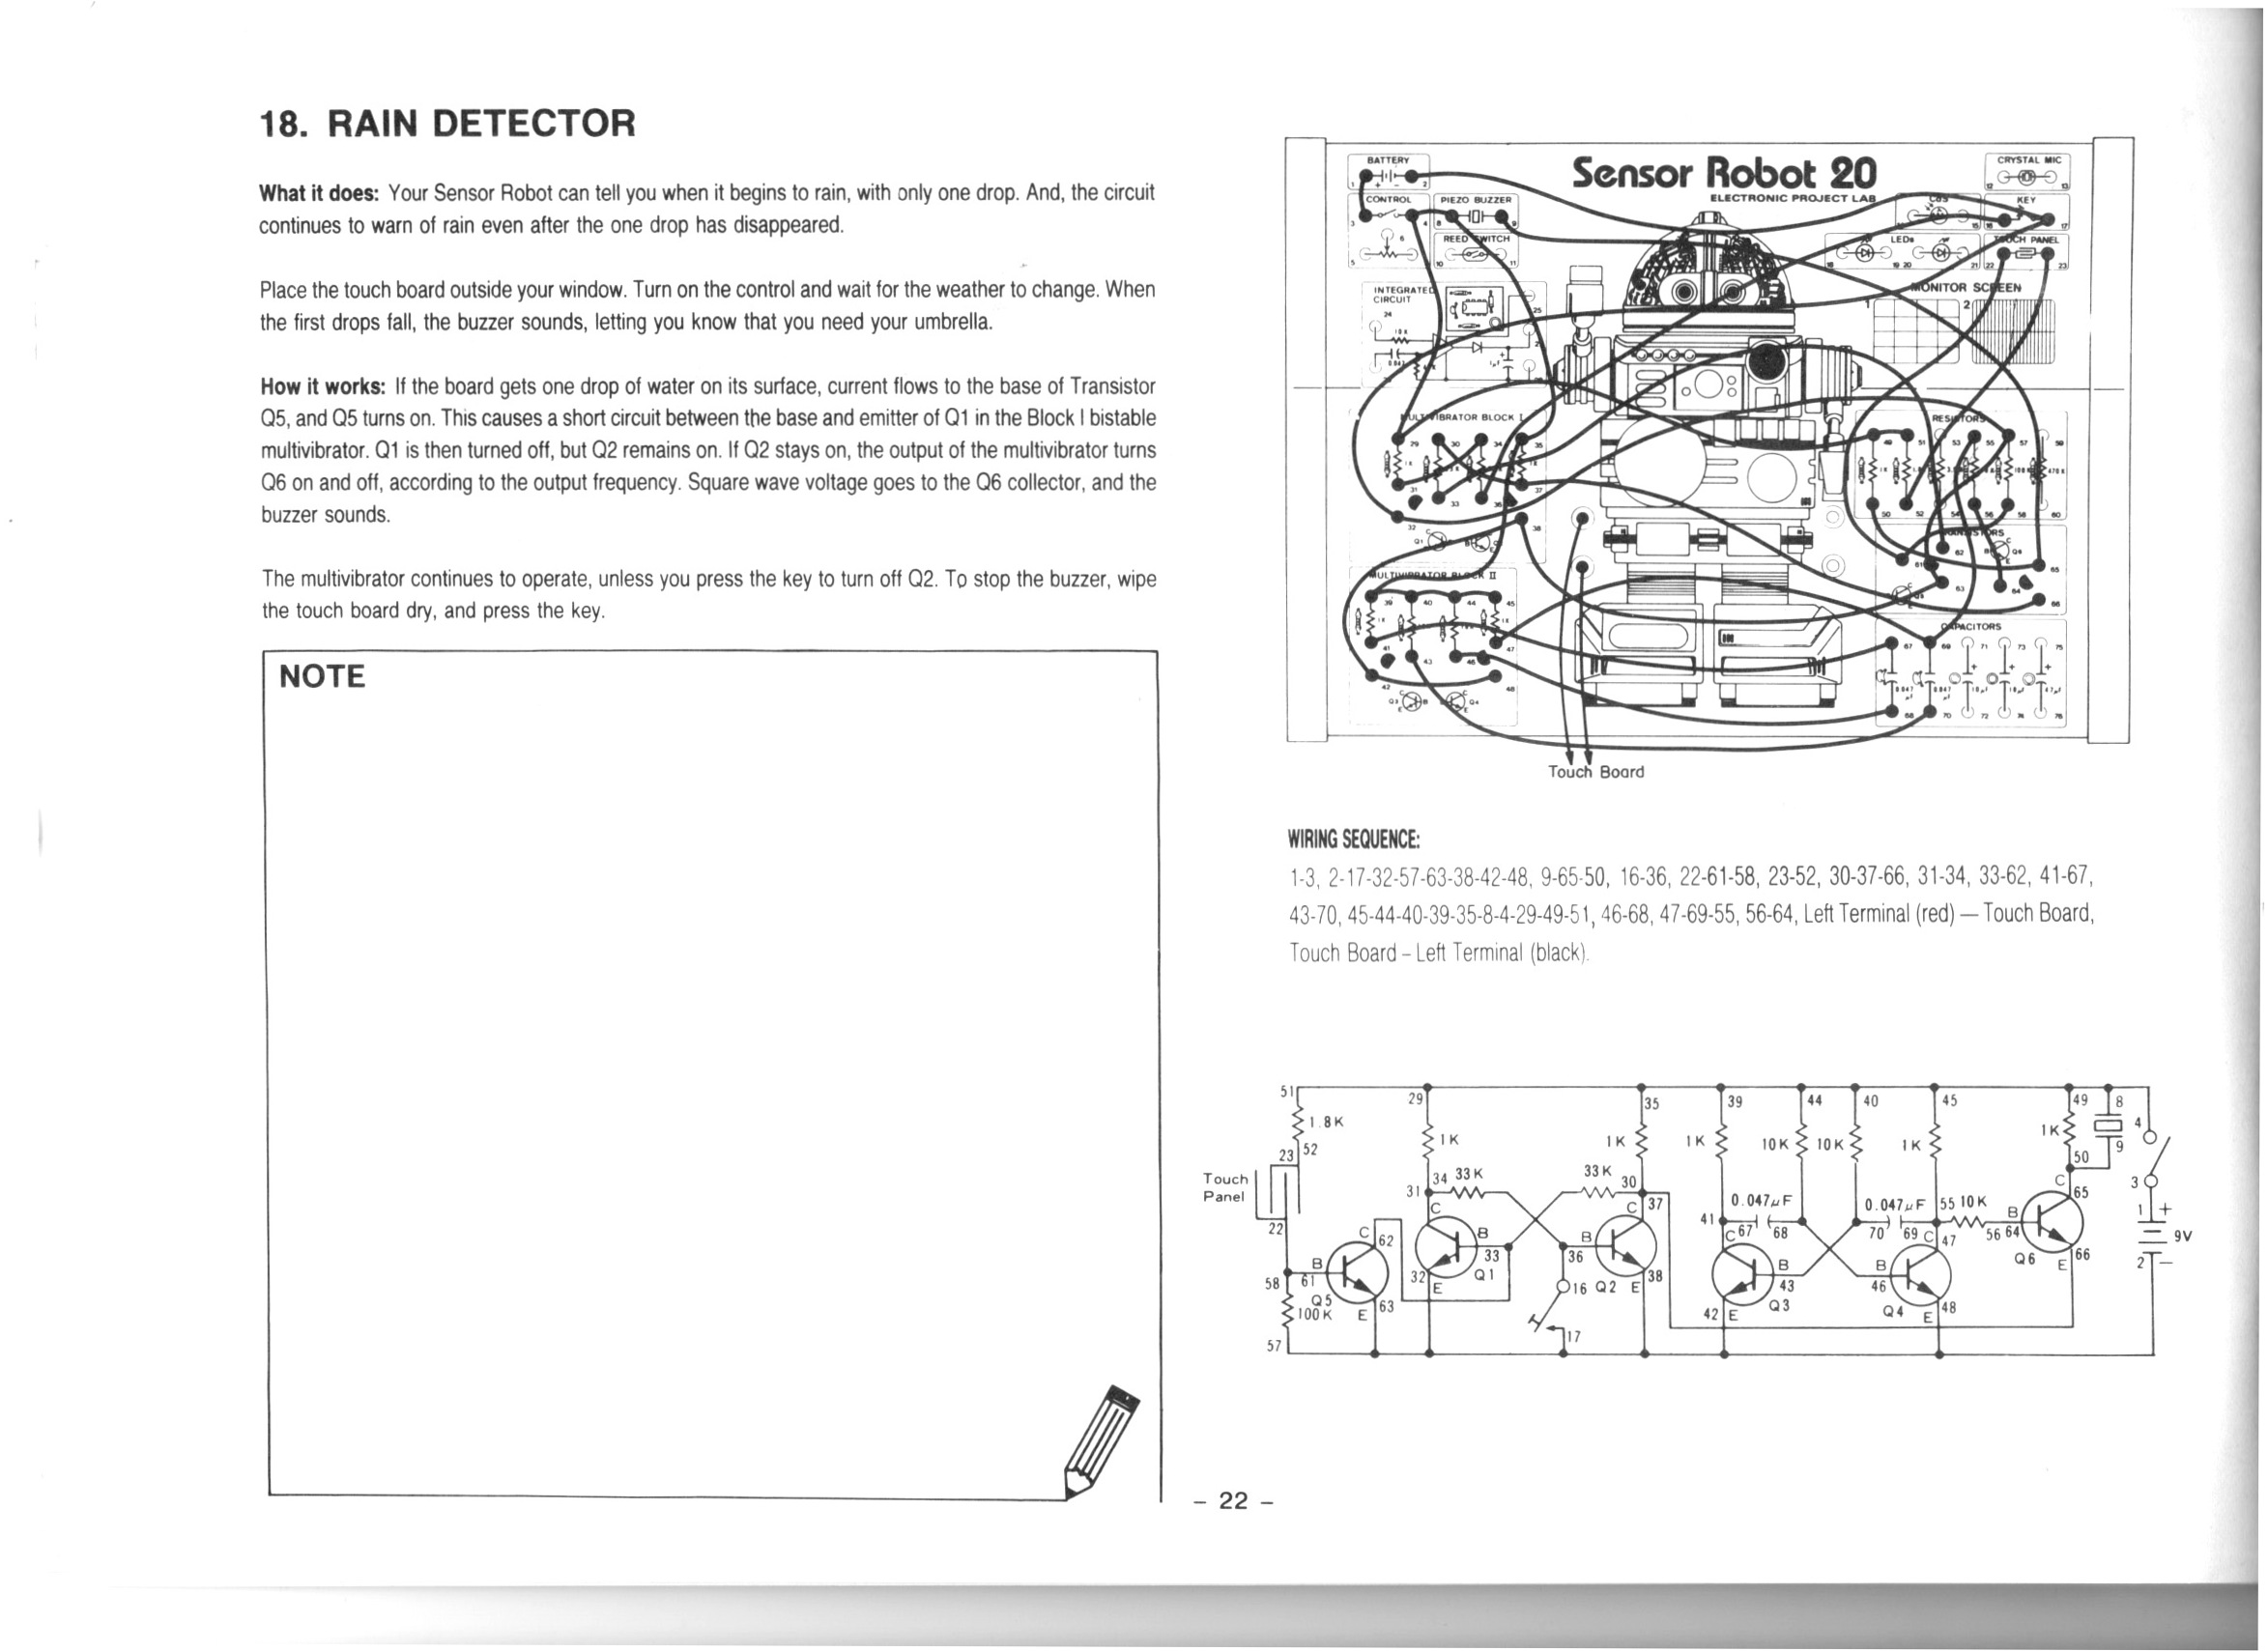
- Rain Detector | Project 18/20
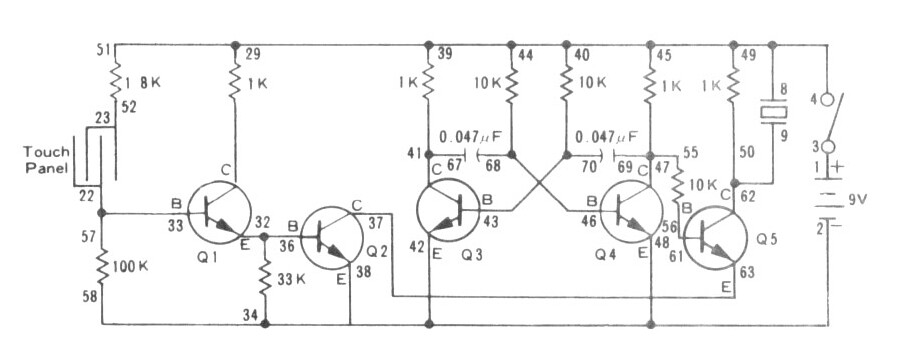
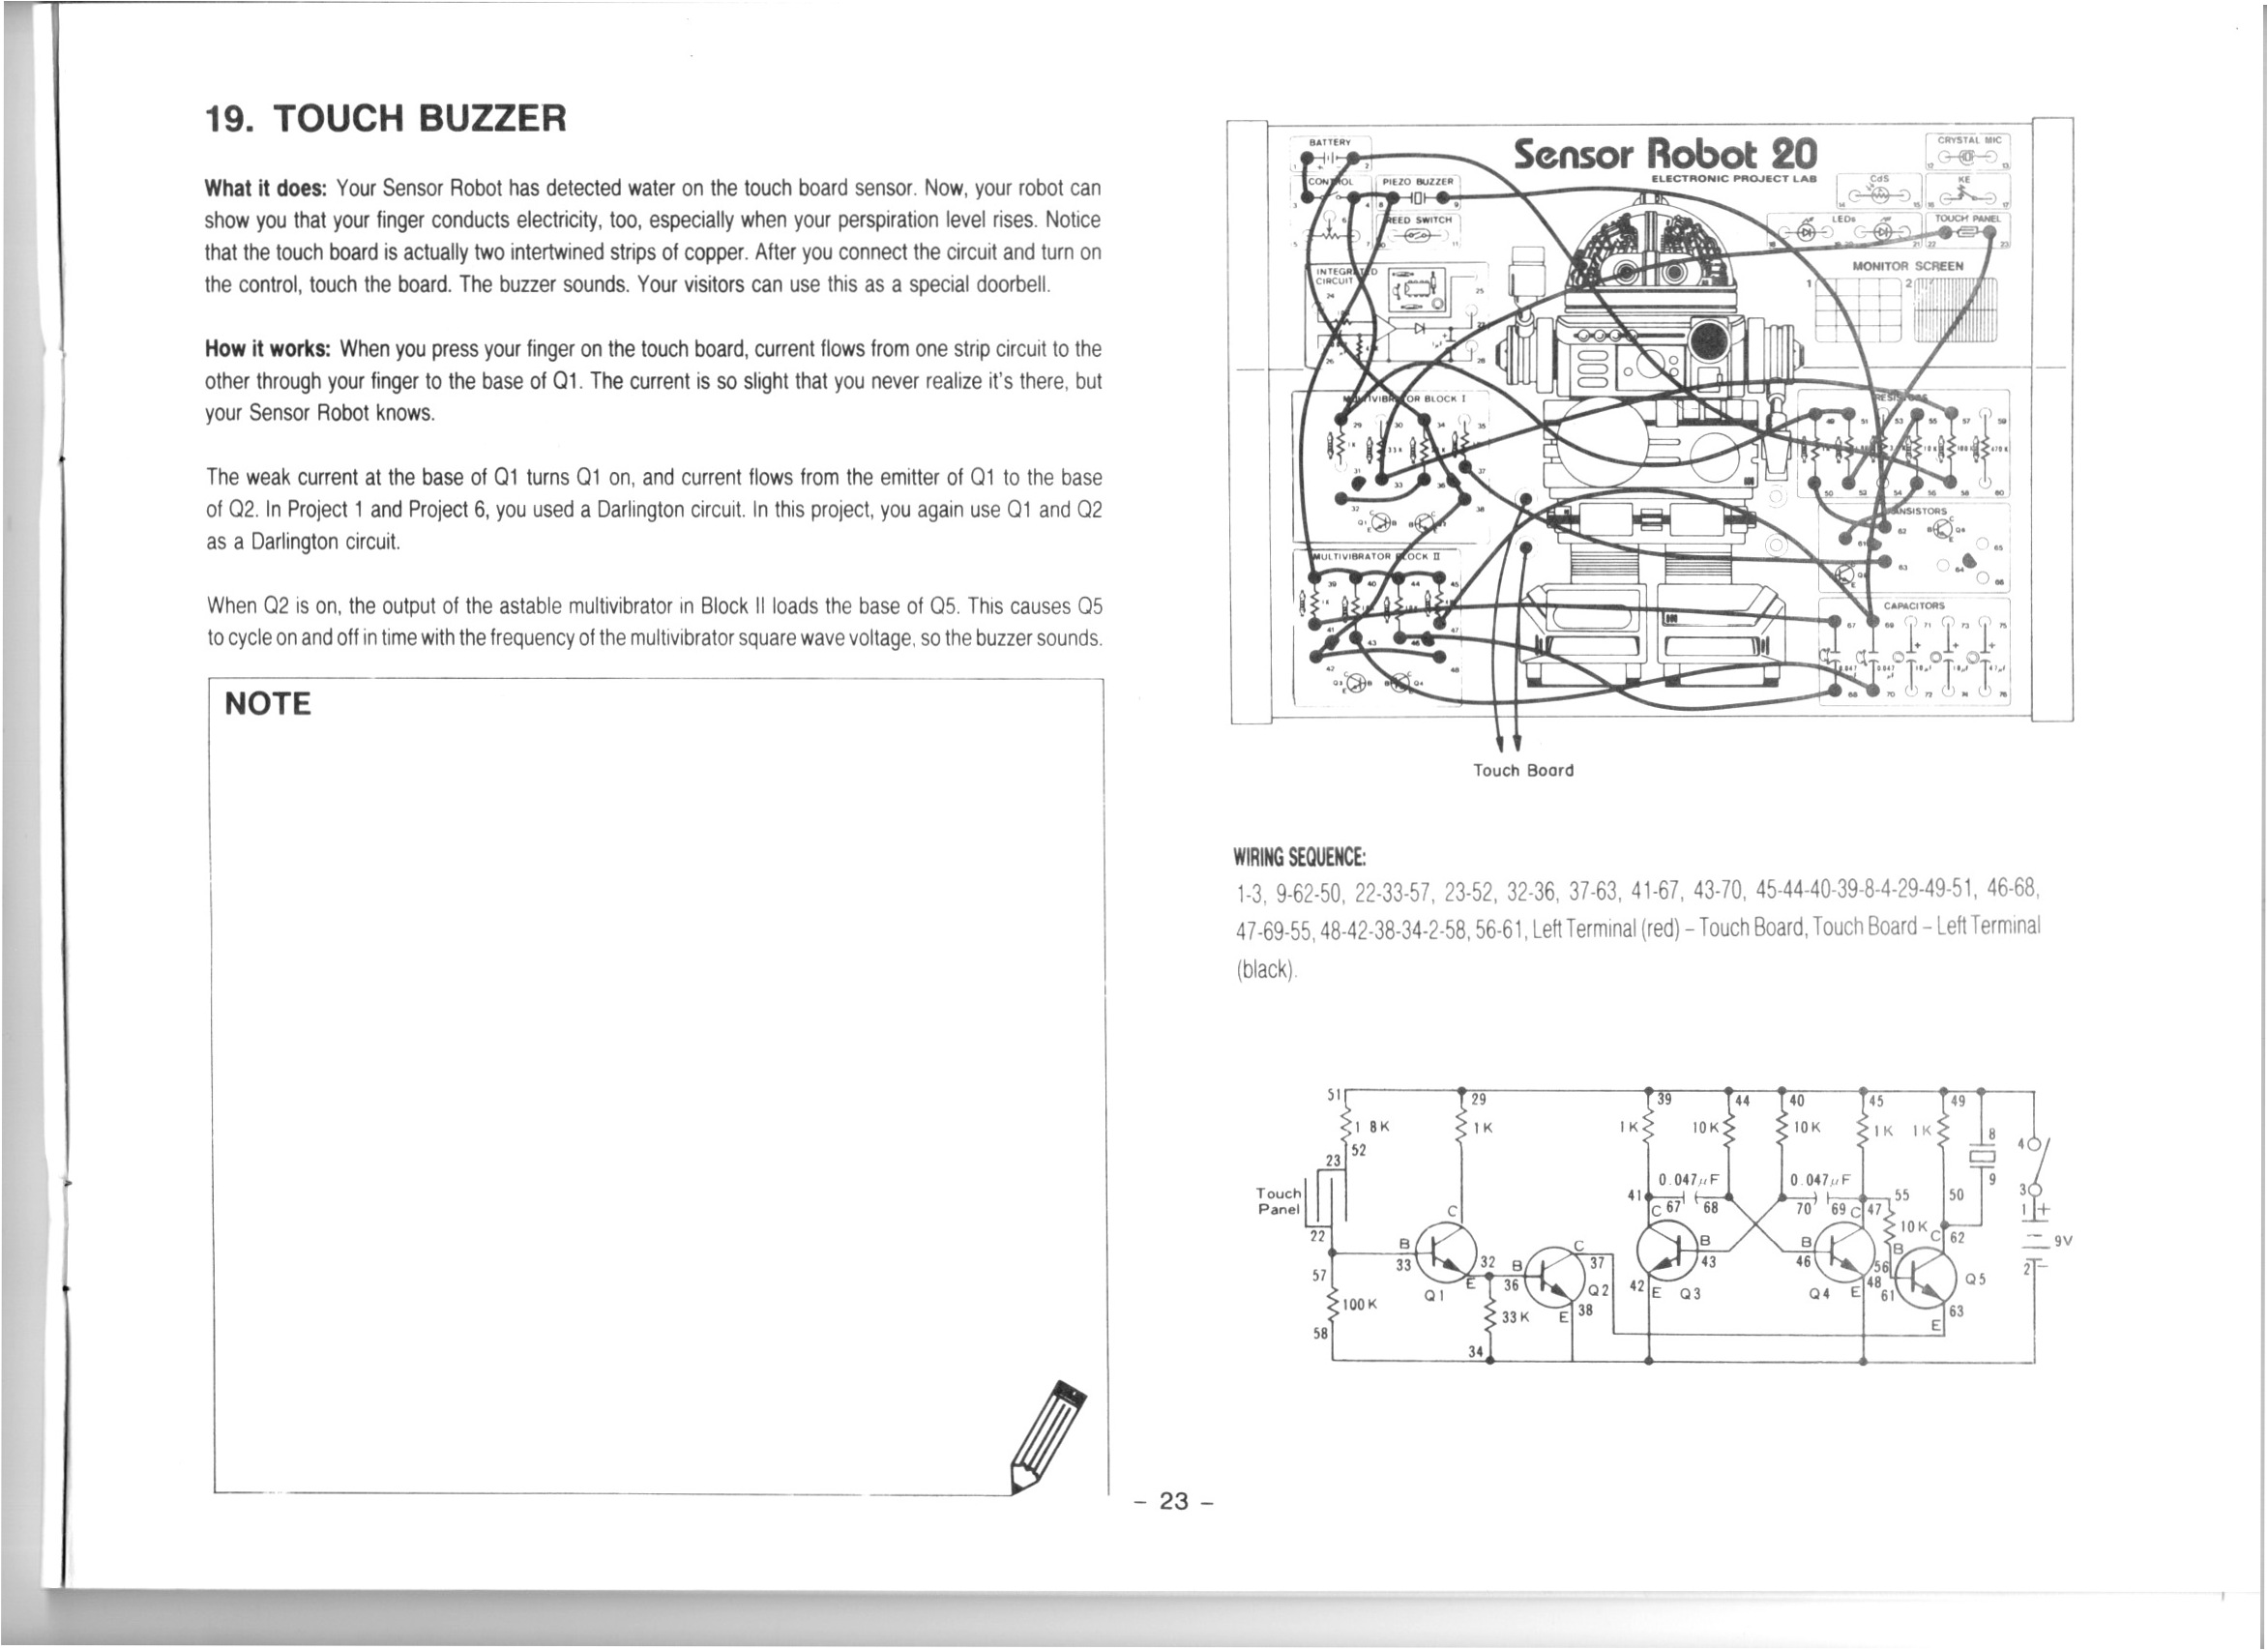
- Touch Buzzer | Project 19/20
- Weather Indicator | Project 20/20
- Concluding Maxitronix 20in1
Thanks very much for watching! And please remember to hit like and subscribe! :)
Following is a product I use picked at random from my collection which may appear in my videos. Clicking through on this to find and click on the green affiliate links before purchasing from eBay or AliExpress is a great way to support the channel at no cost to you. Thanks!
Yum Cha Double-ended Cotton Swabs |
Let’s go shopping!